Note: The Workspaces feature is enabled on an organizational level. To have the workspaces feature enabled for your organization, please click the blue "?" in the lower left and type "contact support" so we can have a representative reach out.
Featured:
What is a Workspace?
Creating a new Workspace
Viewing a Workspace
Adding sheets to a Workspace
Markups and Workspaces
Workspaces and Documents
Workspaces and Team members
Versioning and Workspaces
What is a Workspace?
What is a Workspace?
With Workspaces you can create sub projects to break up specific parts of the project to focus on project areas or crews. This offers significant flexibility in how your team collaborates, while still connected to the main project.
When Workspaces is activated for an organization, every individual in that organization will have the ability to create a workspace on any project that they participate in.
Field reports, RFIs can be used in a workspace in the same way they are used on a project. The field reports in a workspace are only visible inside a workspace, and any forms can be used - just like in a project.
Creating a new Workspace
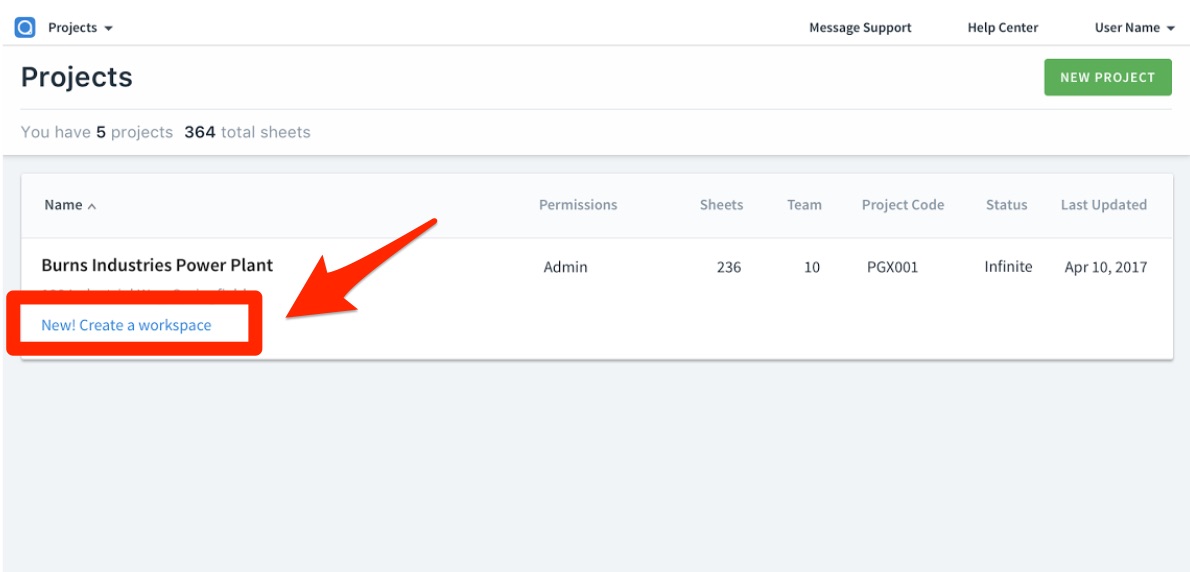
When you enter the projects list page in plangrid.com, click on: "New! Create a workspace" below the projects you would like to create it for
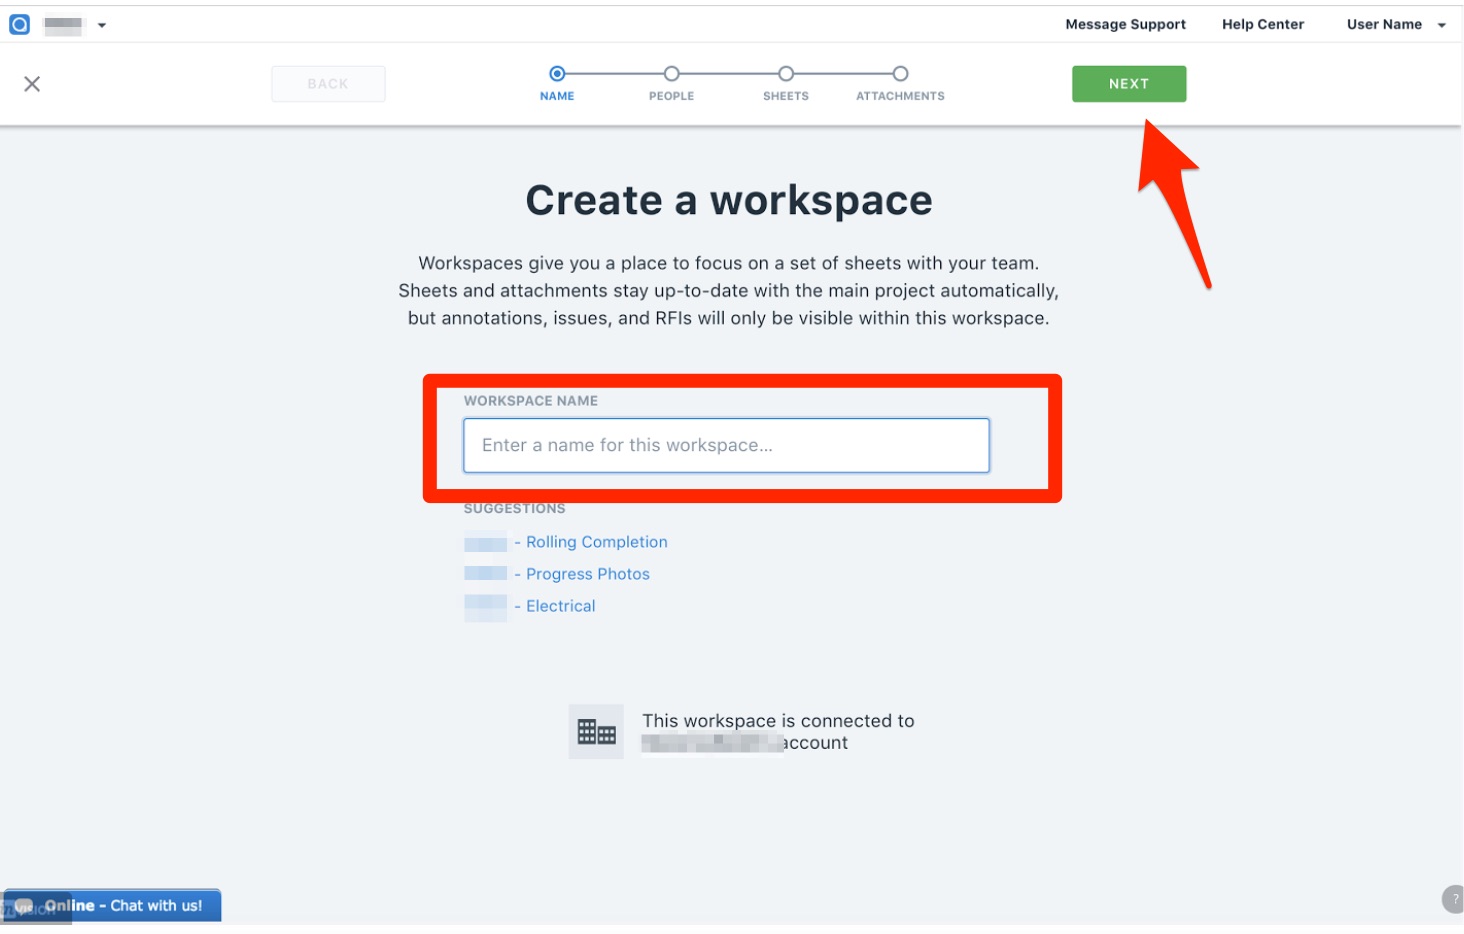
Type a name for your workspace, and click on "Next"
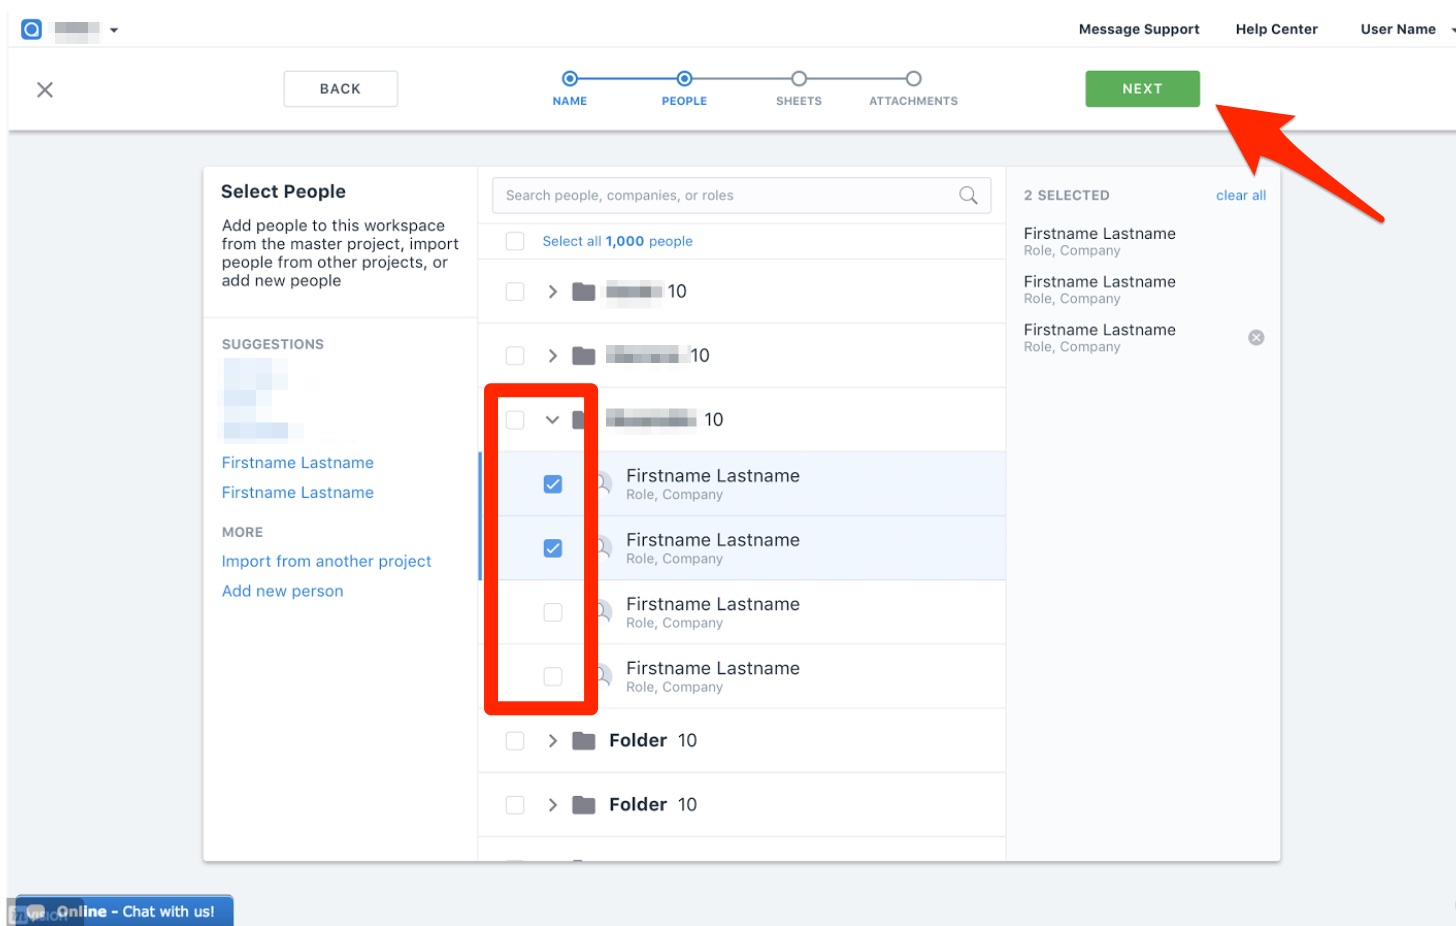
You will then be able to select the team members that you would like to have access to the Workspace. Only people currently in the project can be invited to a workspace. If there is someone that isn't on the project that you would like to invite to a workspace, a Project Administrator will need to add them to the project team.
The list of people in a project are shown grouped by Company Name folder, if they have filled out their company information. If there is no company information available, then the folders will group people by domain.
Select one or several people at one time. Every selected team member will be added automatically to the workspace as a collaborator. The creator of the workspace is added to the workspace as an administrator by default. Click on "Next" once you are done selecting the team members.
You can then select the sheets you want to share or work on with the selected group. The sheets are grouped by tags if tags have been set up on the project. Otherwise sheets are grouped by first letter initials. Click on "Next" after you are done selecting your sheets
Note: Sheets can be added or removed from a workspace after the workspace has been created, so there is no need to worry about missing one or two in the Workspace creation process.

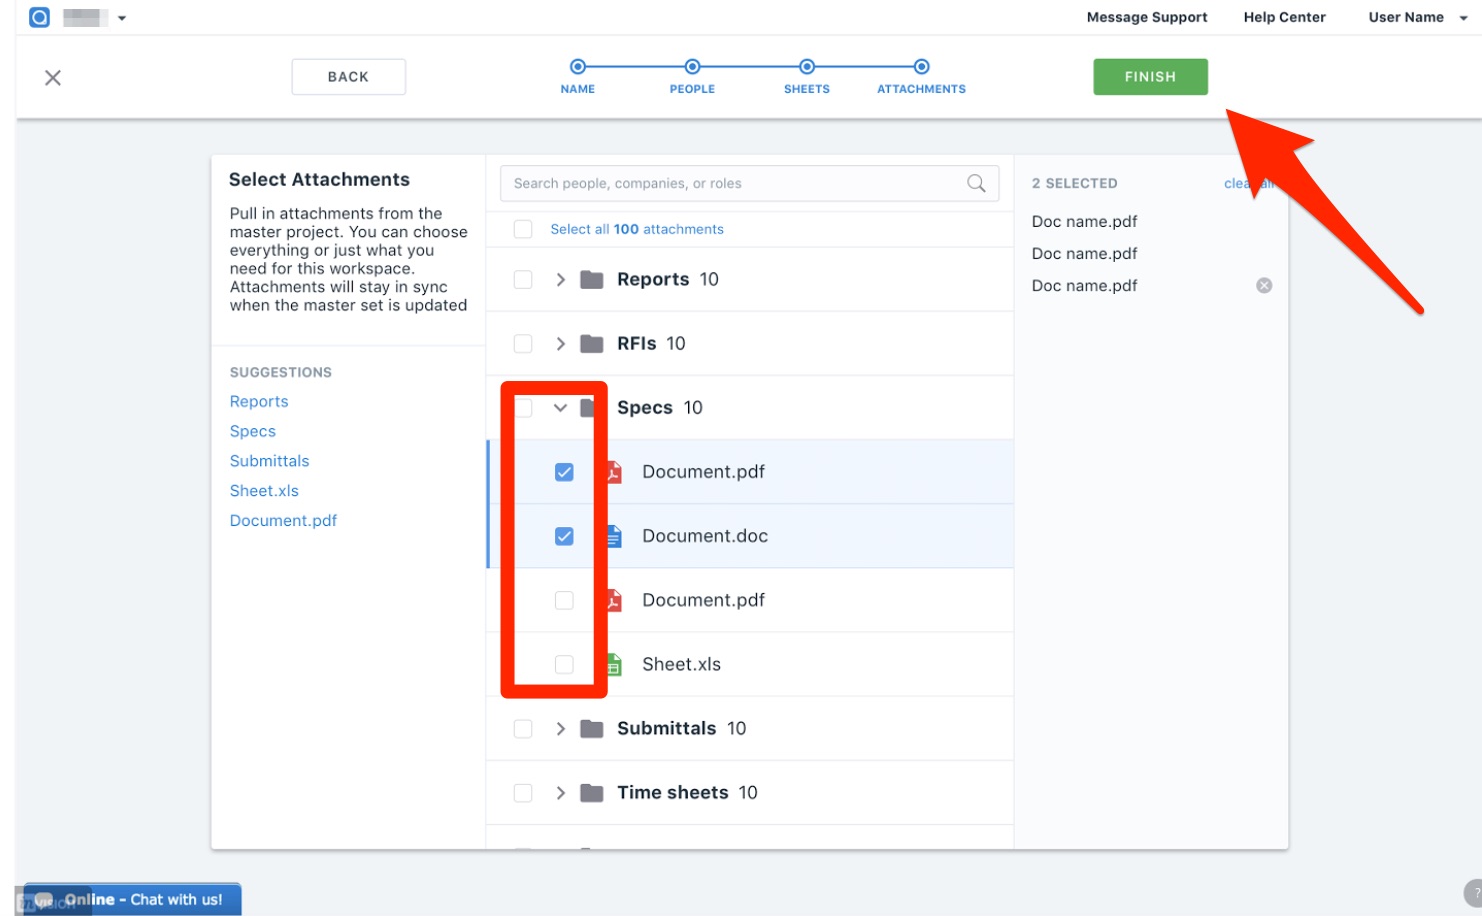
The last step of the process is to select the documents you want to share or work on with the selected group.
The documents are grouped by folders set up on the project. If there are documents that aren’t saved to a folder, they will appear in the “Other” folder. Click on "Finish" once you are done selecting your documents.
Note: Documents can be added or removed from a workspace after the workspace has been created, so there is no need to worry about missing one or two in the Workspace creation process.
From here, a progress bar will appear in the Project List area of your account if it is taking longer than a few moments to create.

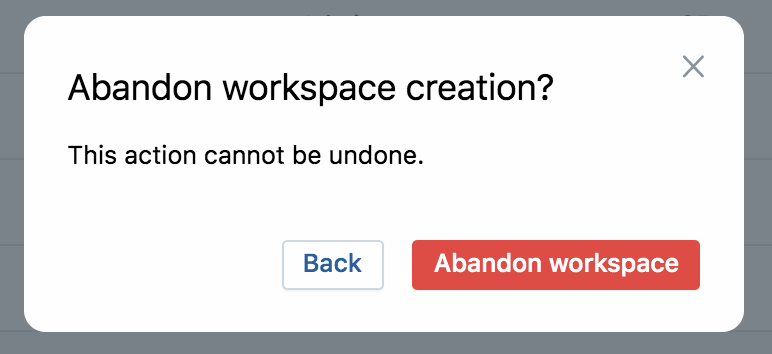
If you need to cancel the workspace during it's creation progress, click on the red garbage can. This will confirm with you once more if you would like to abandon this creation.
Viewing a Workspace
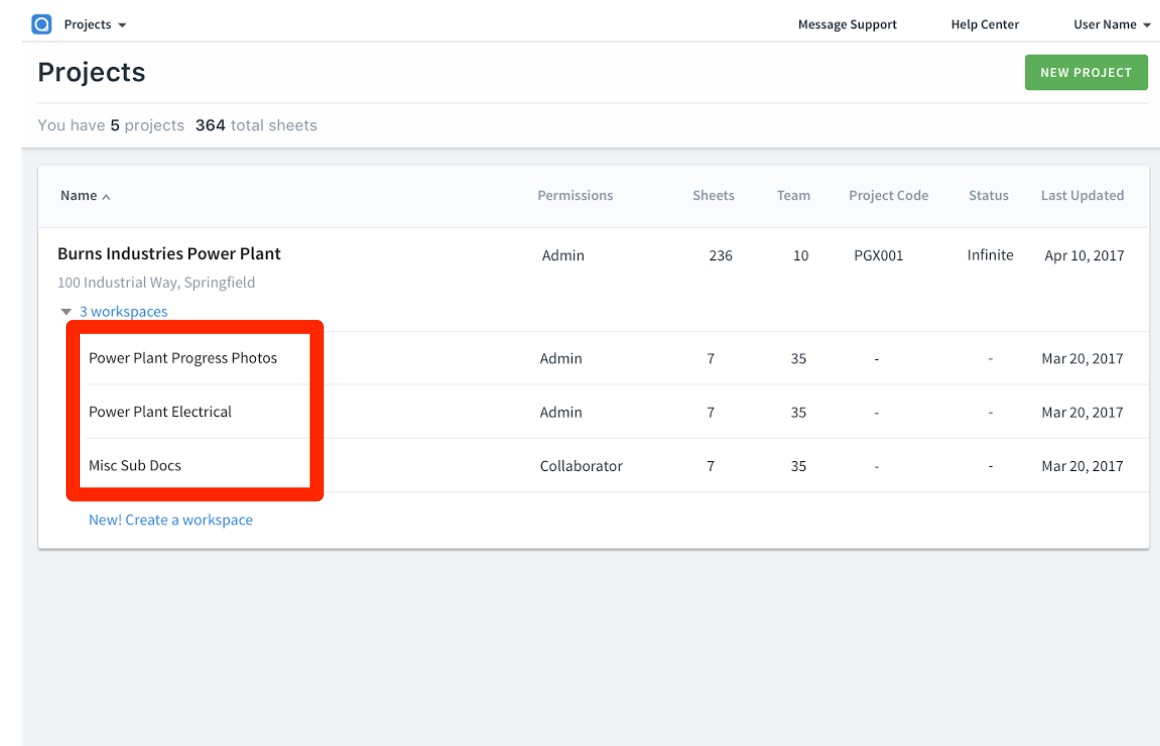
On the projects list, the Workspace is easily identified as an indented row under the project it was created from. Only team members invited to that Workspace are able to see the it. Each user only sees, in the project list, the name of the project the workspace was created from, and the workspaces they are part of.
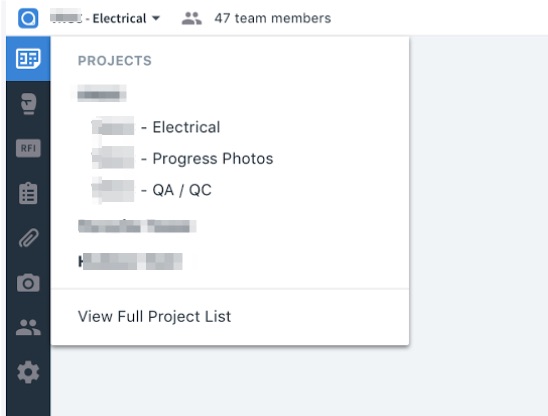
Inside a workspace, the project dropdown list also clearly identifies workspaces from projects.
Adding sheets to a Workspace
After a Workspace is created, the Administrator of it can add more sheets from the project to the workspace. If an architectural sheet, for example, becomes relevant in an Electrical workspace, it’s easy to add it to the workspace directly from the "Add sheets" button in the sheets view. Click on "Select from project".
Note: Only Workspace Admins can add sheets to a Workspace
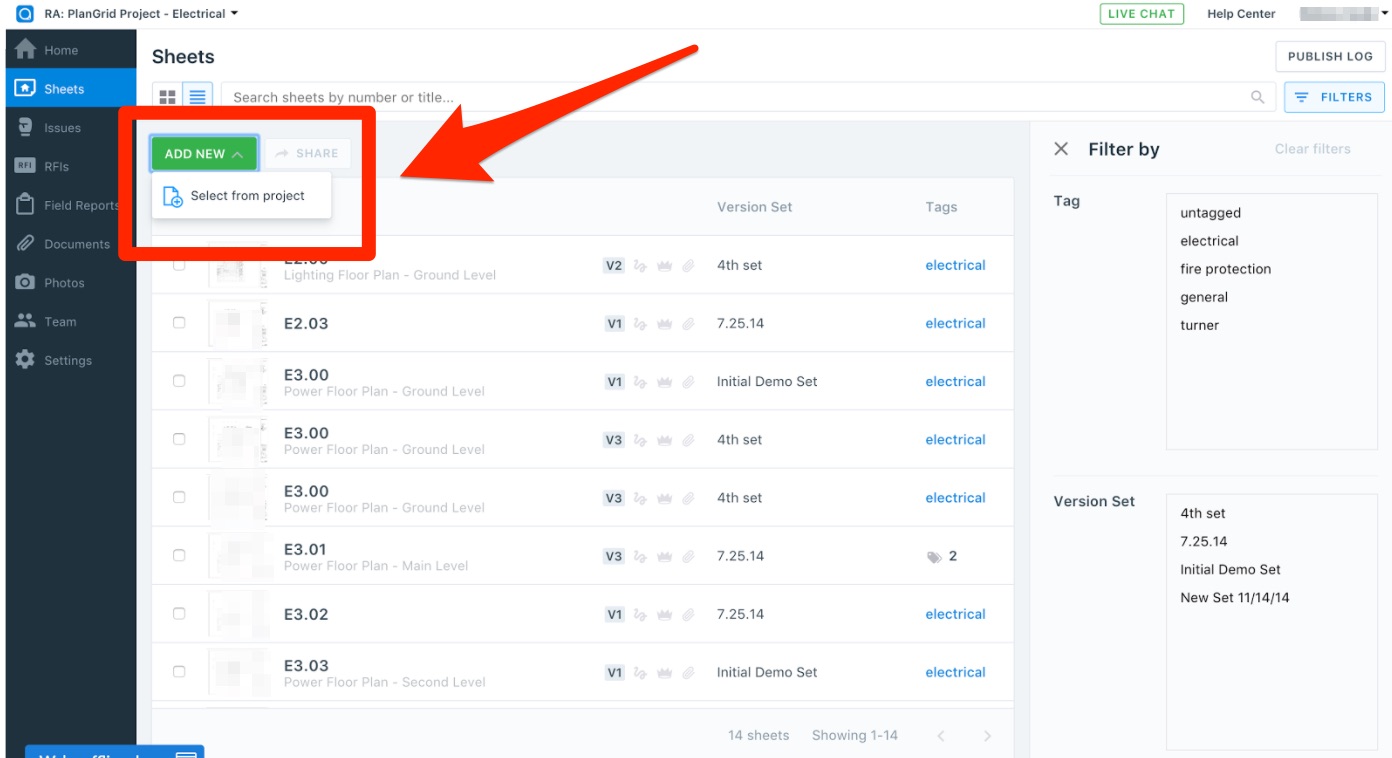
You will be presented with all the sheets from the project to choose from. Select the sheets you'd like to add to the workspace and click "done".

Markups and Workspaces
All markup types, tasks, photos, etc, all work the same as in a Parent Project. Please note that from a Parent Project, no markups whatsoever will be able to push down to a Workspace (and vice versa). Markups in both Parent Projects and Workspaces will only exist in their own projects.
When a workspace administrator or power collaborator publishes a markup, it is only published to the workspace. It is immediately visible to the team in the Workspace Team Tab only. This allows a team working in a workspace to communicate among themselves privately, without the concern of sharing it with the overall project, or cluttering the master project documents.
Task stamps inside a workspace work the same way, and holds true to the info above about staying in it's respective project type (Workspace vs Parent Project). The can be assigned, modified, added to lists, published, etc., just the same.. For more details on how the tasks tool works click here. The team inside a workspace can implement any workflow they want by making use of the tasks tool. All reporting is available inside a workspace.
Workspaces and Documents
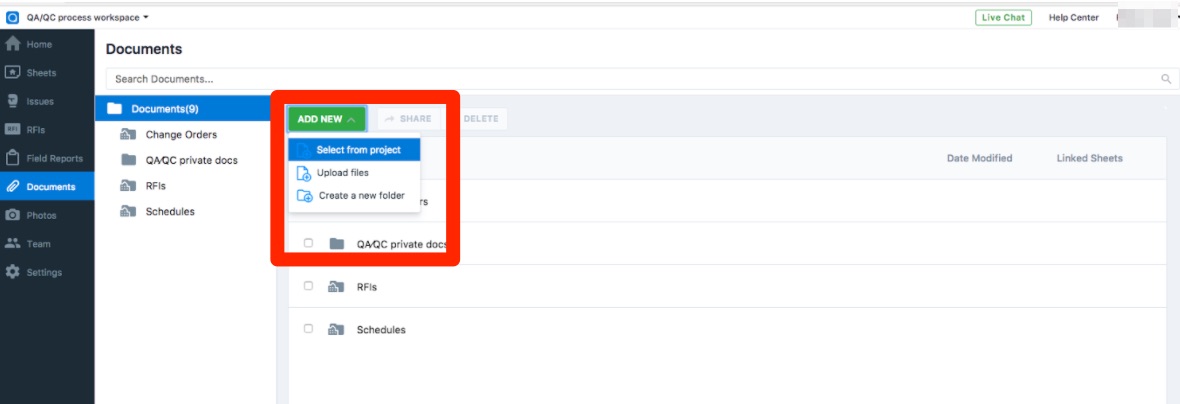
Documents work exactly the same as sheets, if there is a need to add another document to the workspace, any workspace administrator can "Add new" and select it from the project.
If an administrator clicks on the "Add new" button inside the documents tab, they will get three options: Select from project, Upload files, and Create a new folder.
To select documents previously published to the project, click on “Select from project”.
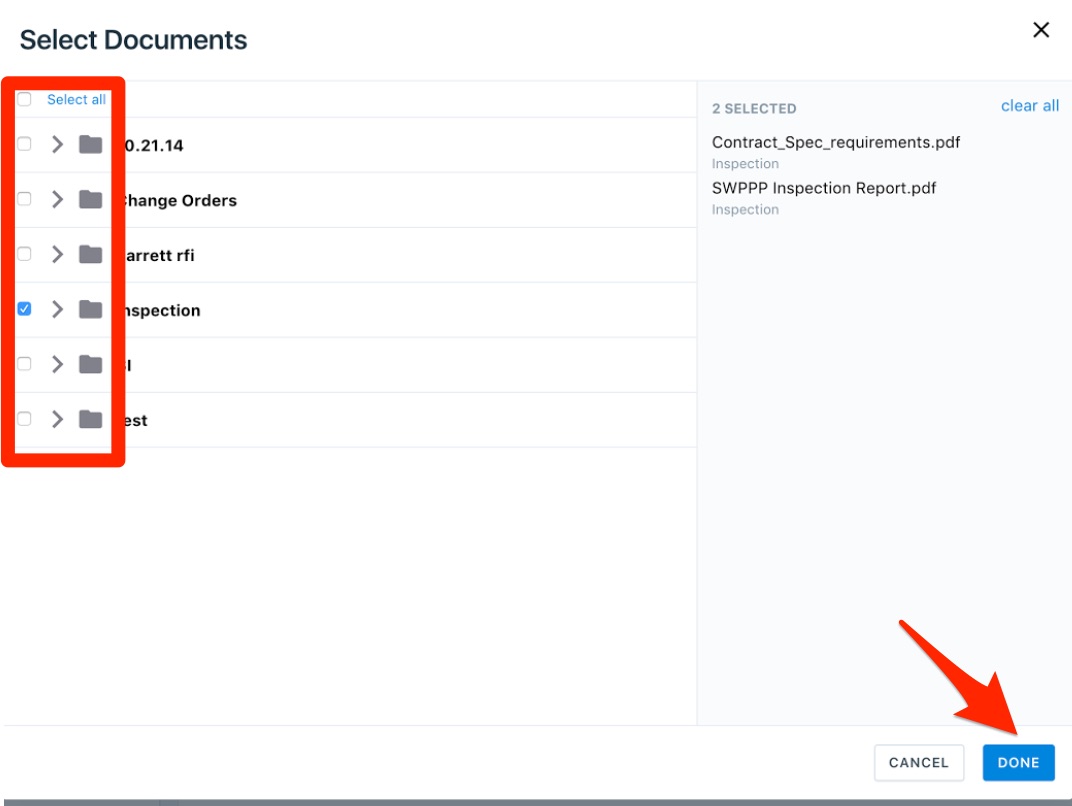
The documents list from the project will appear and you will be able to select any additional documents you want added to the workspace. Click on "done" once you finish your selection.
If you want to create a private document inside a workspace, click on "upload files". When a document is uploaded directly to a workspace that document becomes private in that workspace and is only available to the team in the workspace.
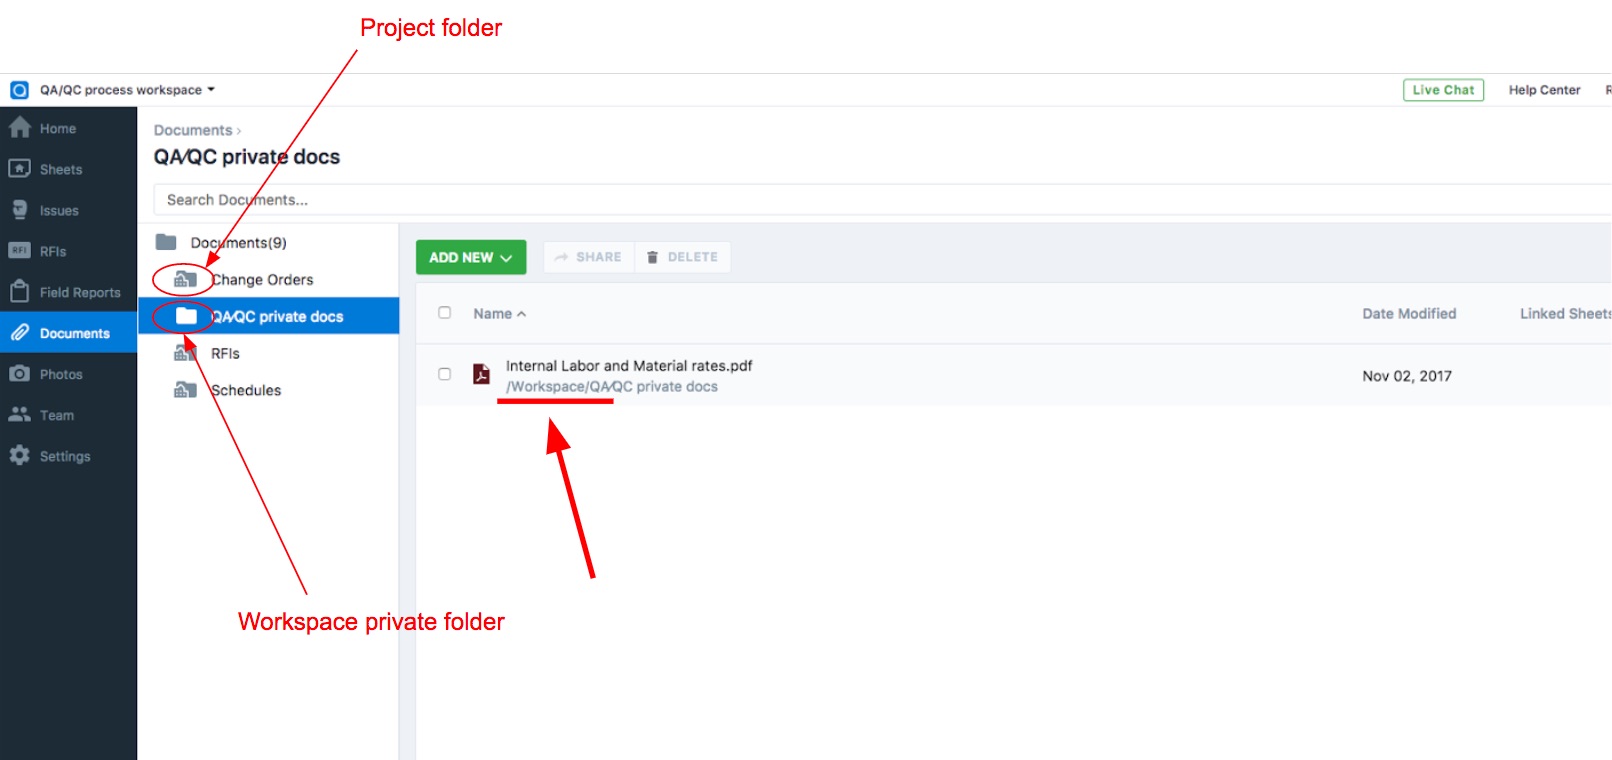
Project documents and Workspace private documents are differentiated by the icons used. The Project documents are identified by a folder with a small building. Workspace documents are plain folders.
In addition, any document that is private to a workspace will have the “Workspace” label underneath it.
Documents can be seen, shared, downloaded from a workspace in the same way they can be from a project.
If a document that was originally added to the workspace needs to be removed, the administrator can easily select it and delete it from the documents list. Deleting the document from the workspace does not remove it from the Master Project.
If the document is a workspaces document - it will need to be re-uploaded to the project if needed.
If the document is a project document - it can easily be re-added to the workspace following the steps listed above.
Workspaces and Team Members
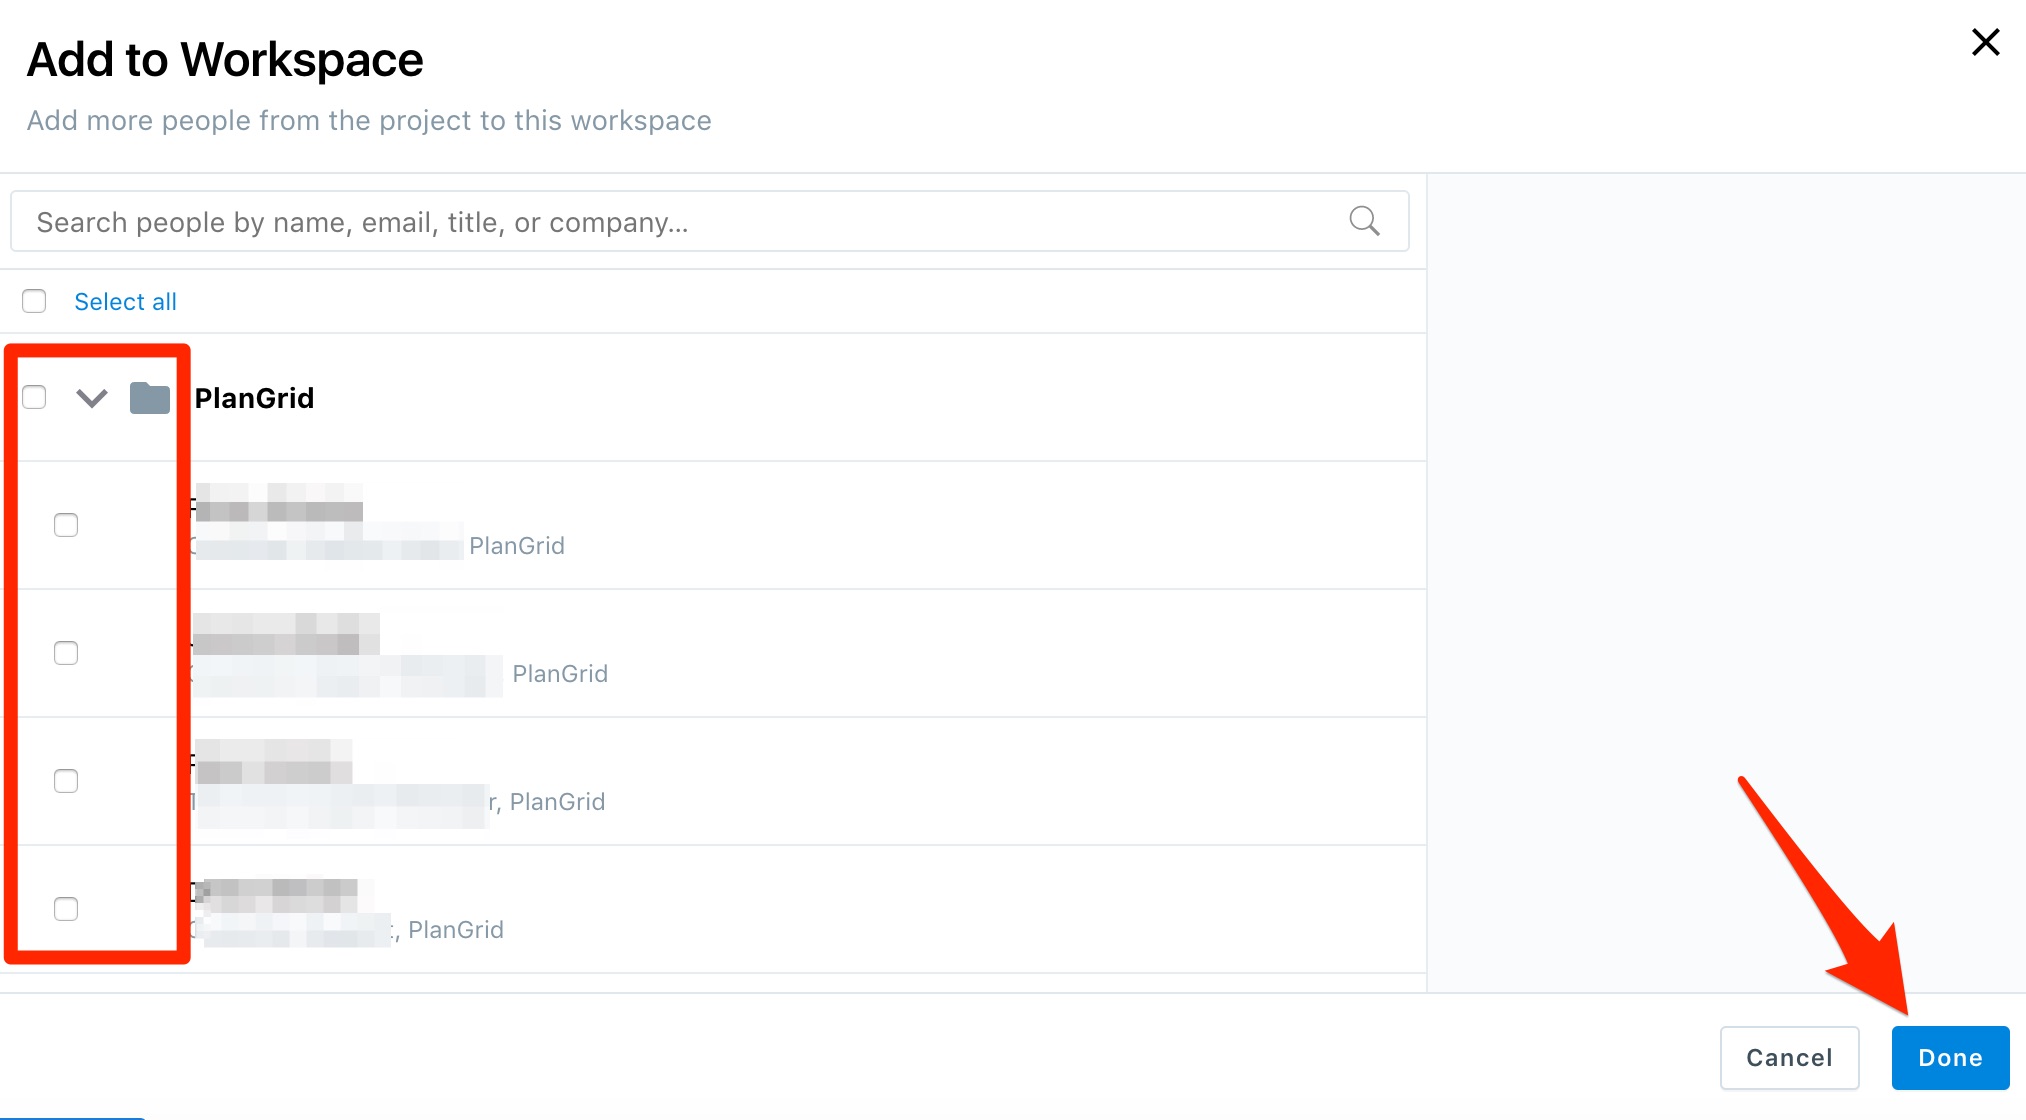
Once a workspace is created, any additional team members not added during the creation of the workspace can be added using the "Add team member" button in the team page. Permission levels can be managed from the team page.
Note: Only users currently on the main project can be invited to a workspace
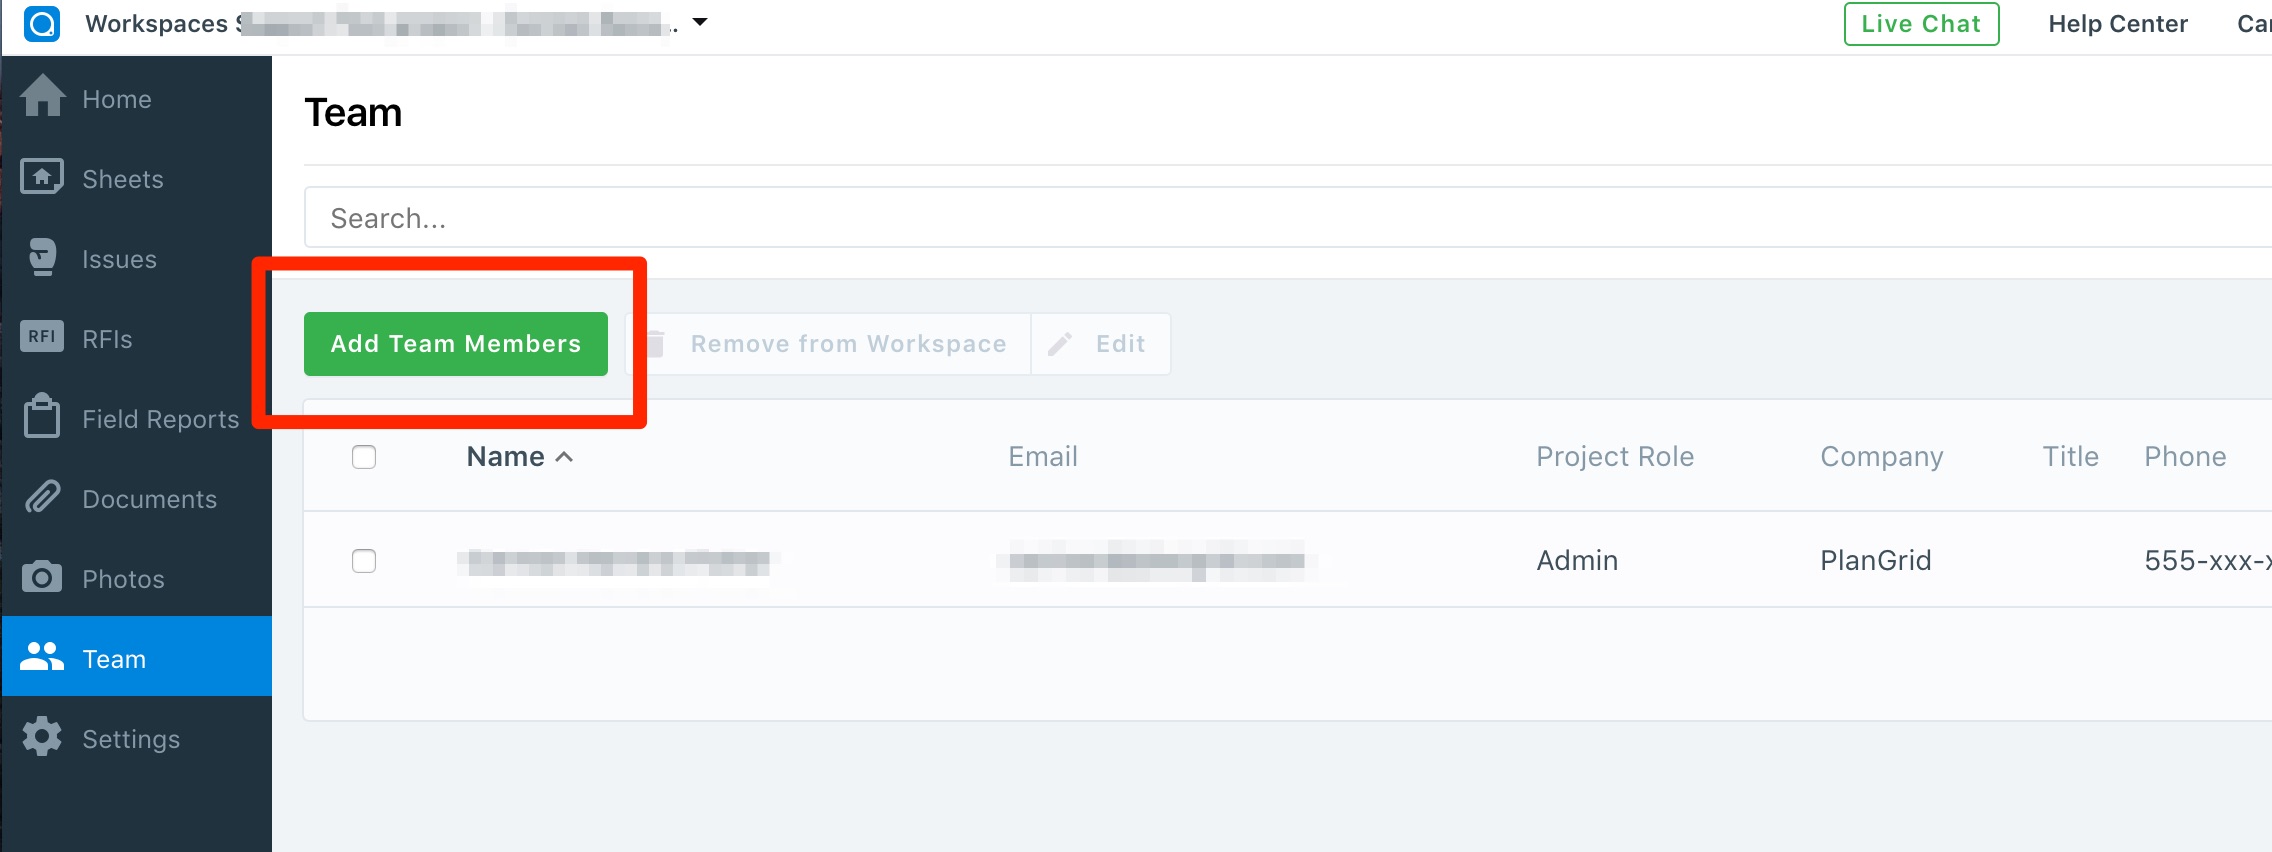
Select the team members you would like to add, and click on "done".
Versioned sheets in workspaces will still pull from the parent project, which requires an upload that can only be done in that parent project. With sheets and versions in the workspace, any uploaded revision of that sheet in the parent project should automatically reflect in the workspace. Please assure that it has completed the publishing stage in the parent project.
Aside from existing versions, new sheet numbers that do not yet exist in the workspace will need to be pulled in manually, via 'Adding Sheets to a Workspace'