All tools are available across Android, iOS, and Web.
Featured:
- Getting to Know the Markup Toolbar
- Adding Mark-Ups to Your Sheets
- Editing or Deleting Markups / Multi-Select
- Locking Markup Tools on the iOS App
- Selecting Overlapping Markups
- Sharing Markups with the Project Team
Getting to Know the Markup Tool Bar
Note: On Android, the toolbar will be located at the bottom of the screen, with the same icons described below. They will display the most commonly used tools. To access the rest of the tools, please click on the 'more' button on at the end of the toolbar on the right.
![]()
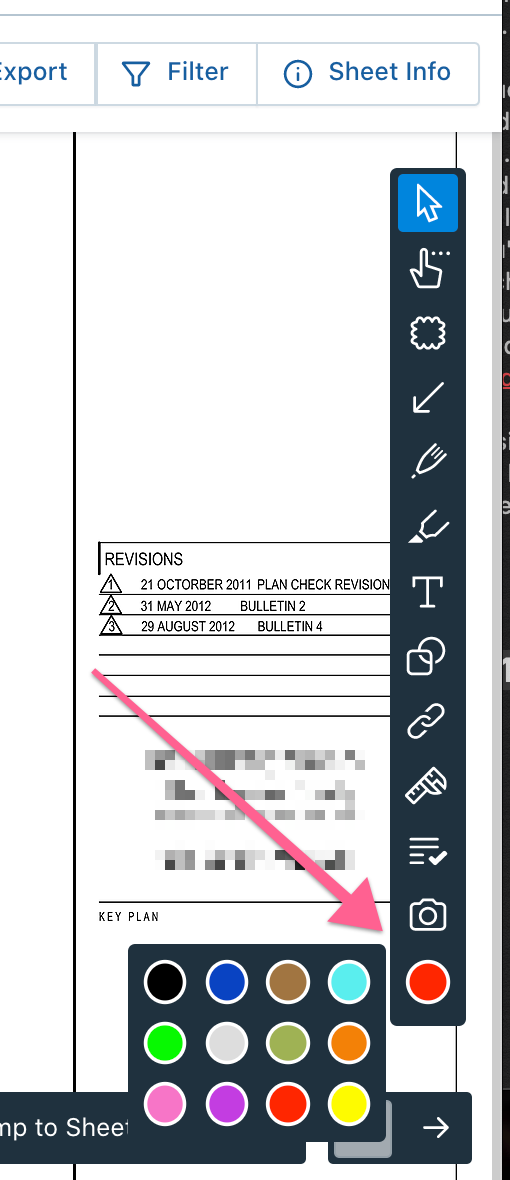
1. Multi-Select - Select multiple markups at once, by dragging your finger to all of the markups, you want to select. It will let you copy, remove, or publish markups to the project.
2. Cloud tool - To cloud RFI's or any area of interest on a sheet.
3. Arrow - Tap and drag your finger along the sheet to draw arrows on the sheet.
4. Pen tool - Create freehand markups.
5. Highlighter - Highlight any area in a sheet of interest.
6. Text tool - Add text to any sheet.
7. Shapes - Make a box or circle around any area in a sheet. Options in this tool also allow for easy creation of an "X" shape or a straight line.
8. Task Stamps - Add task stamps that will track item details such as title, assign items to a collaborator, take photos, add descriptions, and track item statuses.
9. Hyperlink - Use this tool to create square, circular, or cloud shaped hyperlinks.
10.Ruler - You can use this as a scaling tool. First find an area on the sheet which has a scale, place the ruler there, and enter the scale. You can then use the ruler to find the measurement of any other area on the sheet
11. Camera - Take photos or choose a photo from the library, and pin them directly to the area of these sheet you are in, these photos are also saved on the website.
12. Color selection - All markups can be made in twelve different colors. Choose a color from this menu before placing a markup, or select an existing markup and change its color from this selection.
Adding Mark Ups to Your Sheets
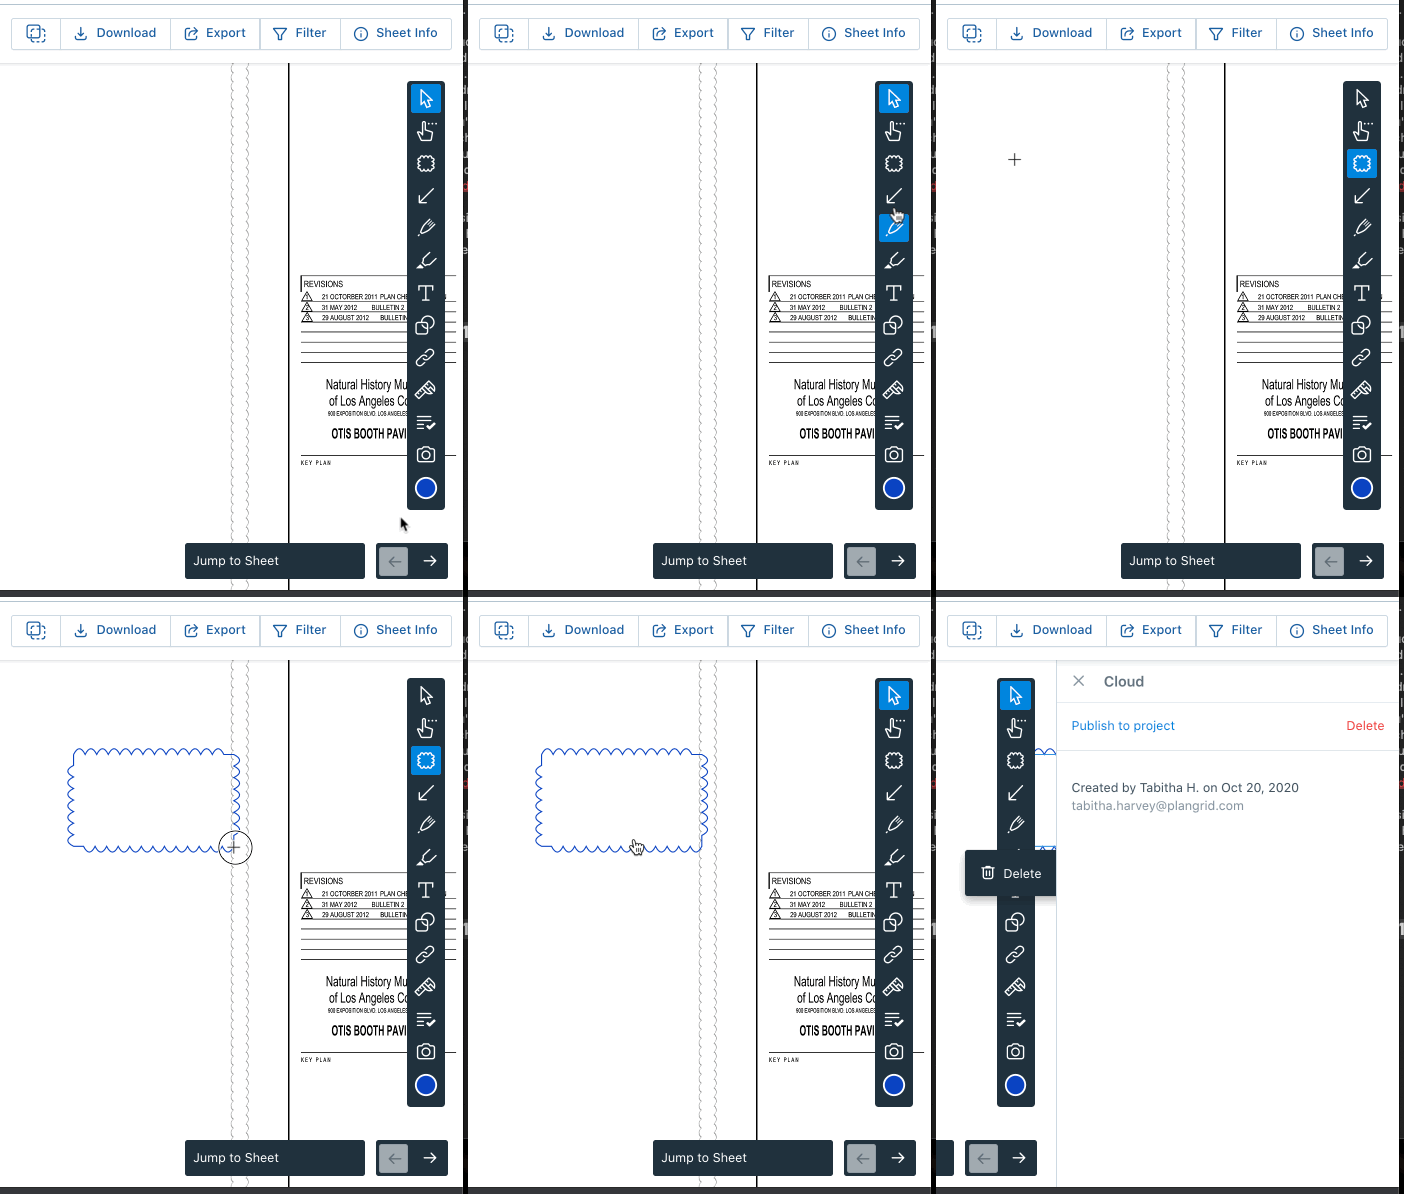
1. Click the sheet you want to markup from your sheets tab (web) or Grid View (mobile).

2. From this view, you can use any of the markup tools. Select the preferred color, and then select the markup you want to place.
3. Next, simply click or tap and drag to create it.
Editing or Deleting Markups / Using the Multi-Select Tool
To remove or edit a markup on your tablet:
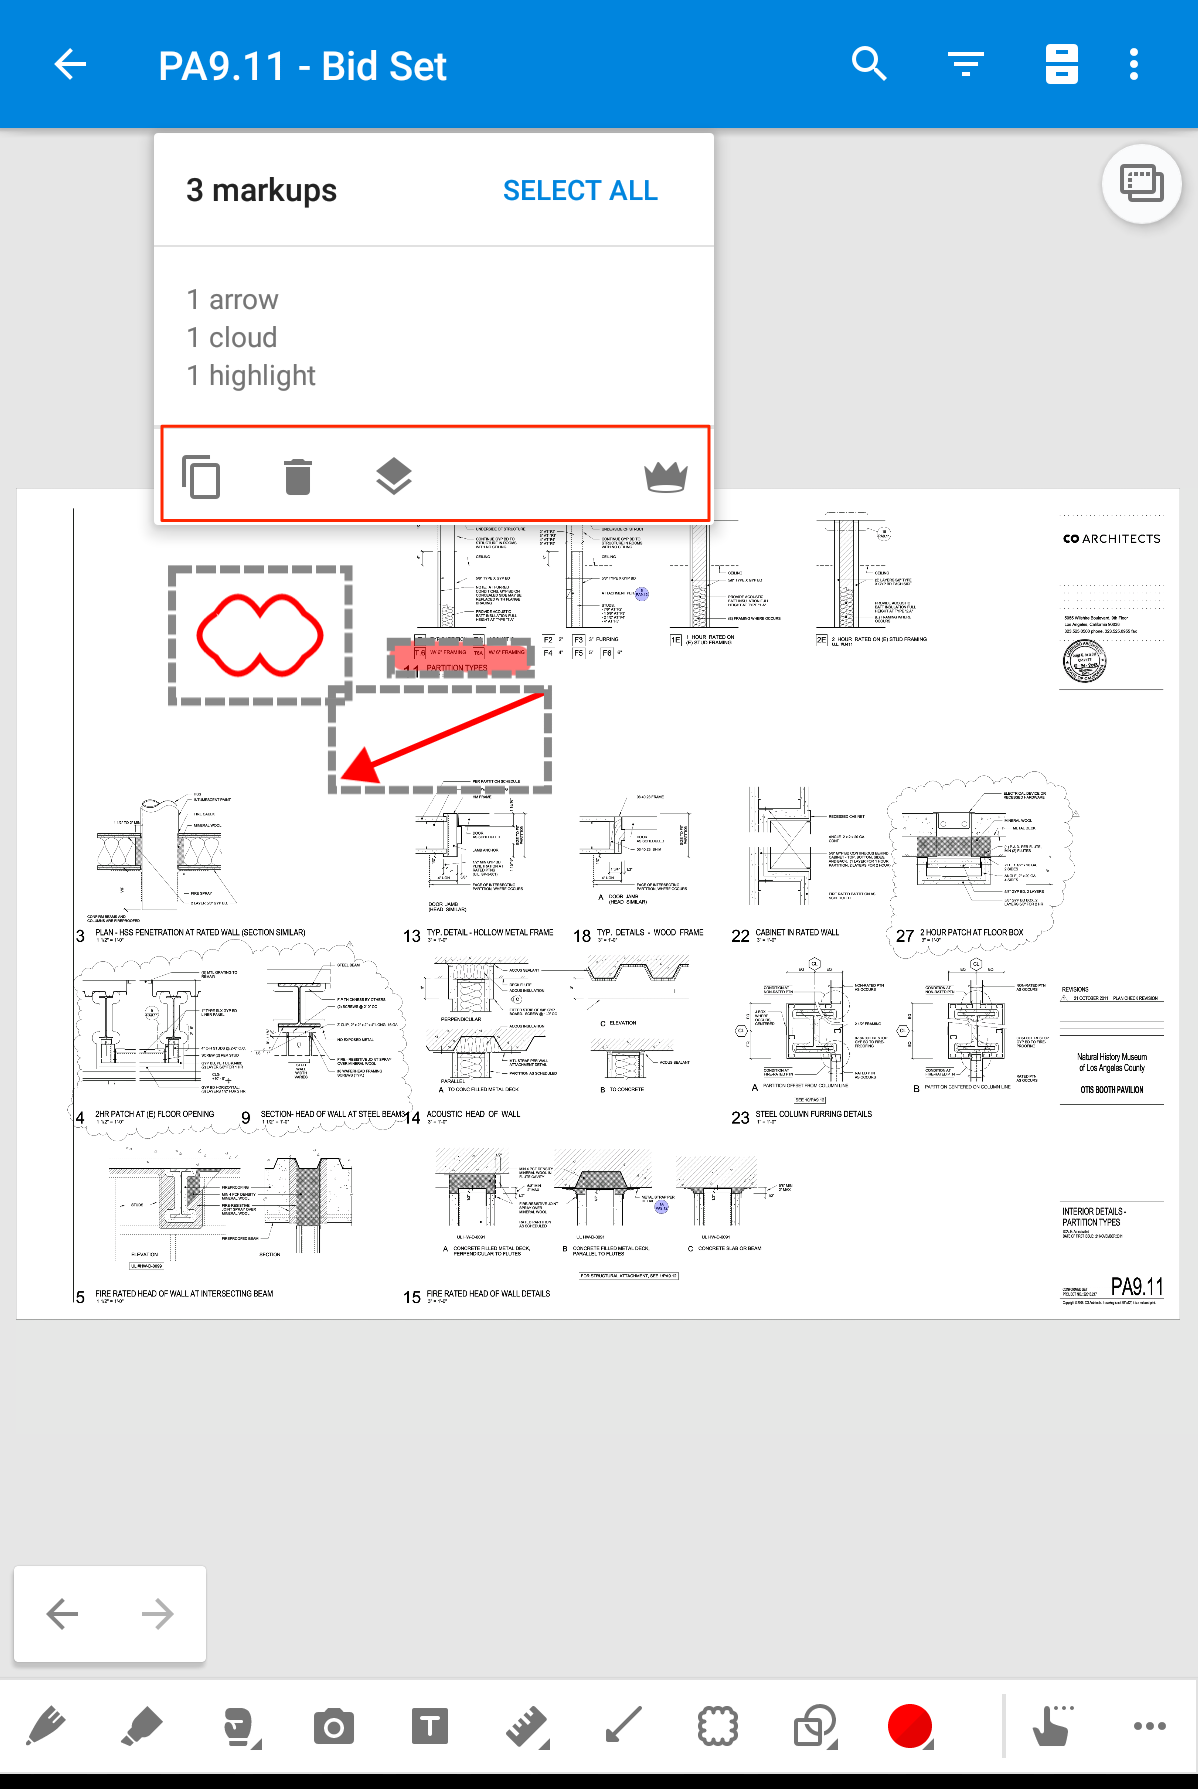
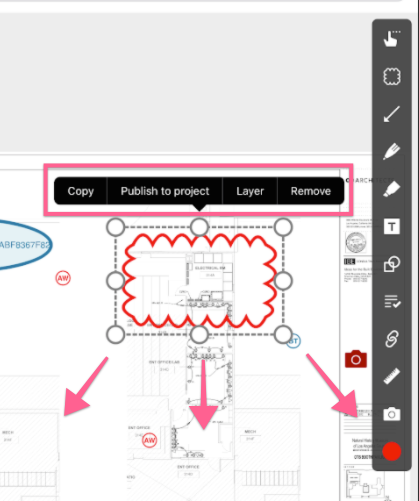
Tap the markup and then select from the options that appear in the pop-up menu. You can remove (trash can for Android or "Remove" for iOS), edit, or copy and paste a markup elsewhere on the sheet.
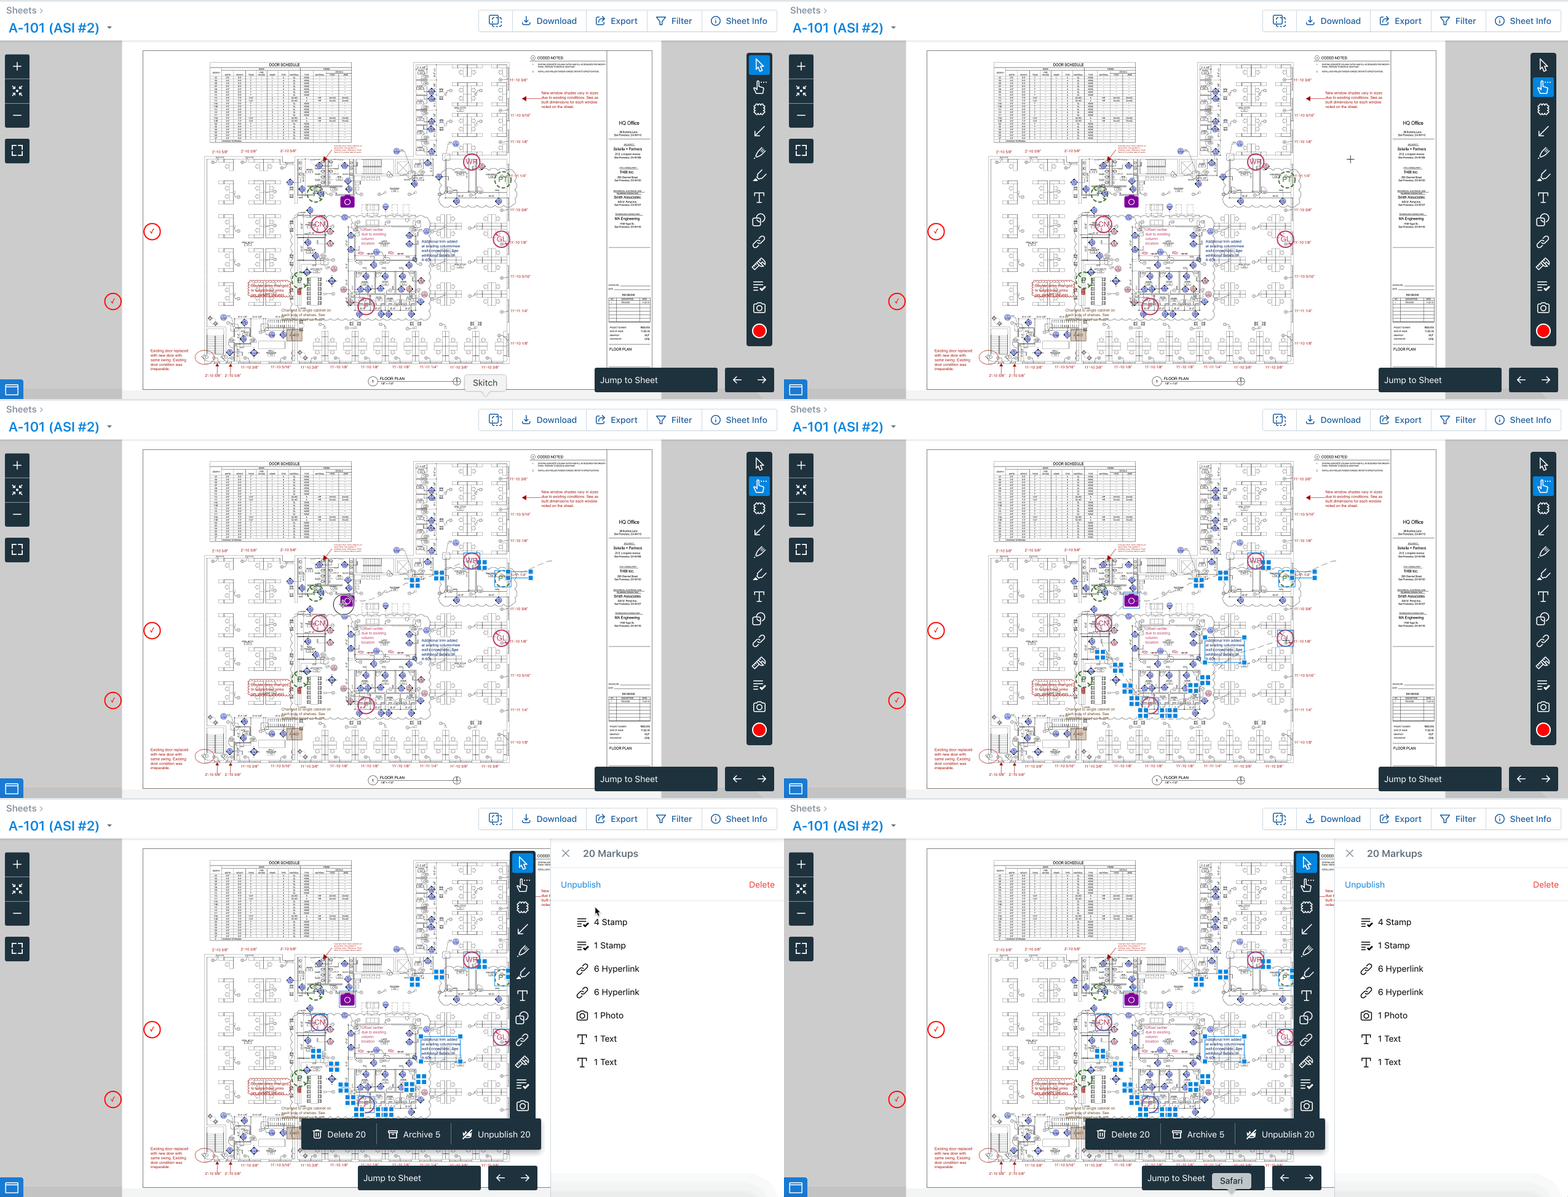
Use the multi-select tool to draw a path across all the markups you want to select. The multi-select tool is the first tool at the top of the toolbar. For Android, you will have to access the toolbar positioned on the bottom.

Android
iOS
Note: Published markups can only be removed and edited by admins.
To edit and delete markups on the web:
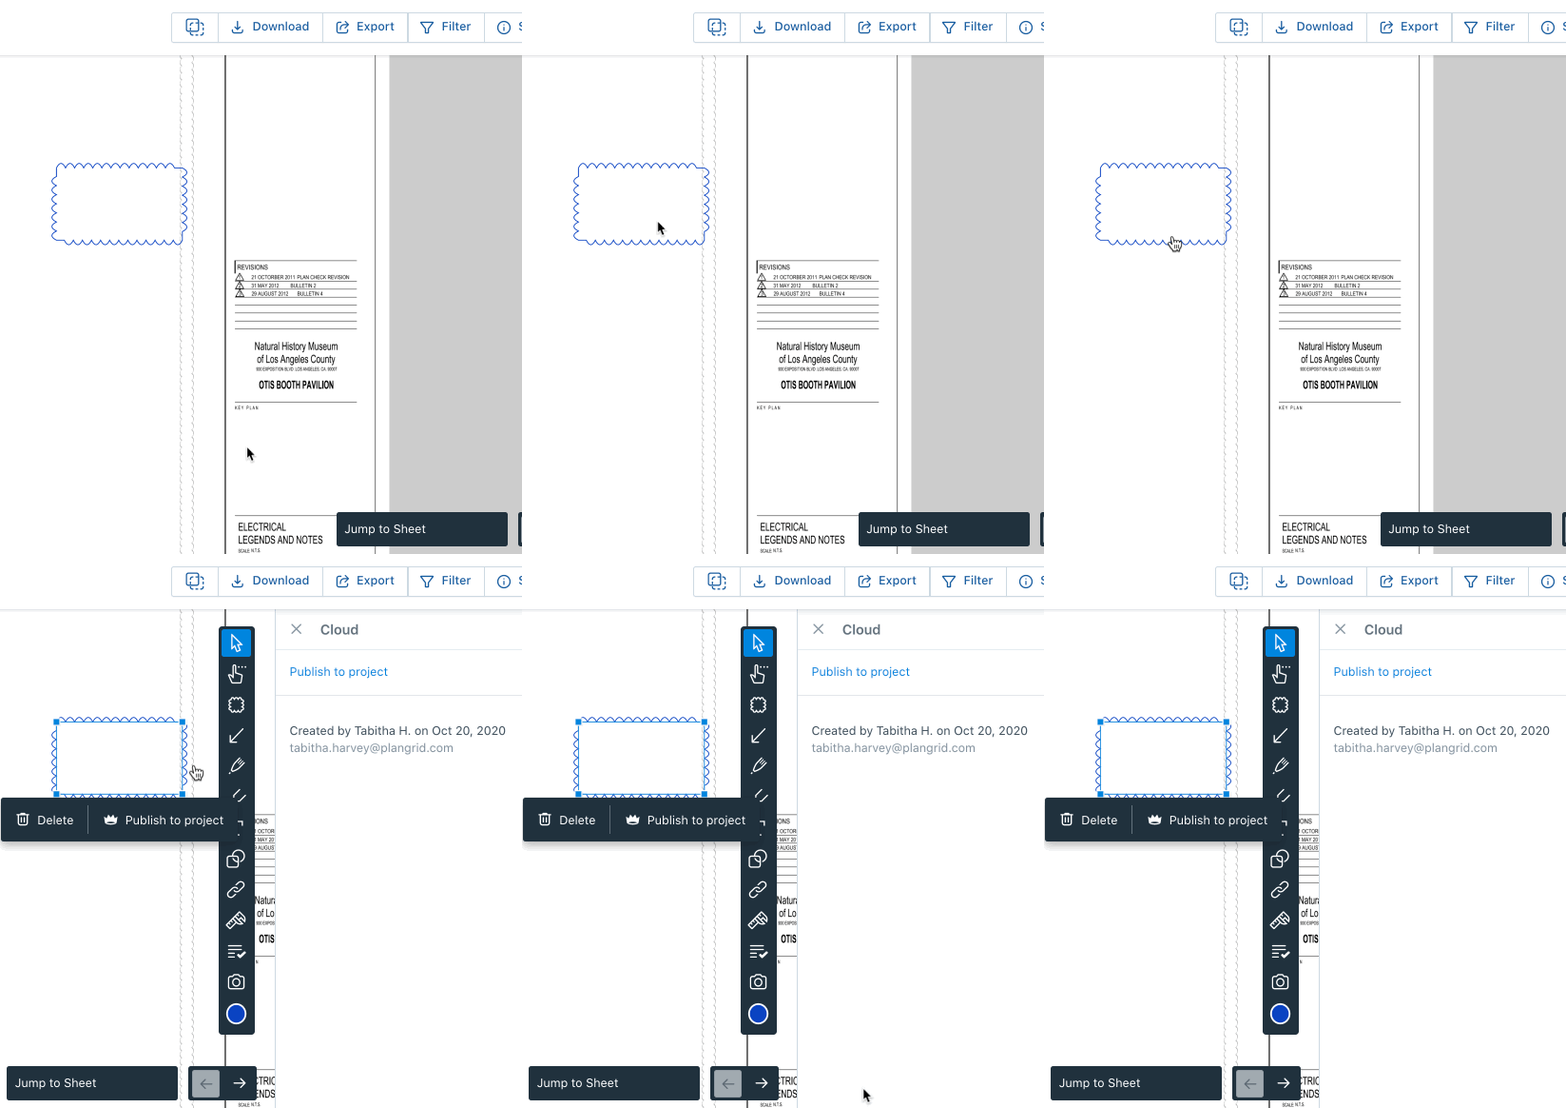
Click on the markups with your mouse, the options to delete and modify the markup will appear. You will also see a pop-out on the right with those options.
Locking Markup Tools on the iOS App
Note: This feature is only available on the iOS and Windows apps at this time.
To use any of the markup tools continuously on the iOS app:
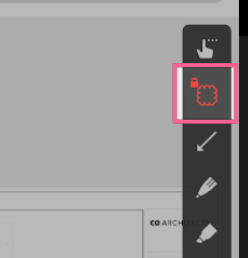
1. Double tap on the tool and a lock icon will appear. You can now draw continuously, even if you lift your finger or stylus off the screen.
2. To unlock, tap once and you can go back to navigating the drawing as usual. The pen and highlighter tools are locked by default.
Selecting Overlapping Markups
To select one overlapping markup:
1. Tap on or near the markup you want to select.
2. If two or more markups intersect, a bounding box will appear to confirm your selection. On iOS, published markups will be darker than personal ones. On Android, published markups will have the word "Published" next to them. In the examples below, the hyperlink markup has already been published to the project, while the cloud markups have not.
Android

iOS

Sharing Markups with the Project Team
You can use published markups to share your markups from mobile device to mobile device between team members, or to flag an RFI to the whole team. You can share your markups both from the website as well as the mobile app.
Please Note: Only project admins and power collaborators can publish markups to the rest of the team. Collaborators can view all published markups, but they cannot publish their markups to the project. For more information on the difference between permission levels, go here.
For information on exporting and sharing your marked-up sheets from the mobile app, go here. For information on exporting and sharing marked-up sheets from the website, go here.
To Publish a Single Markup to the Project:
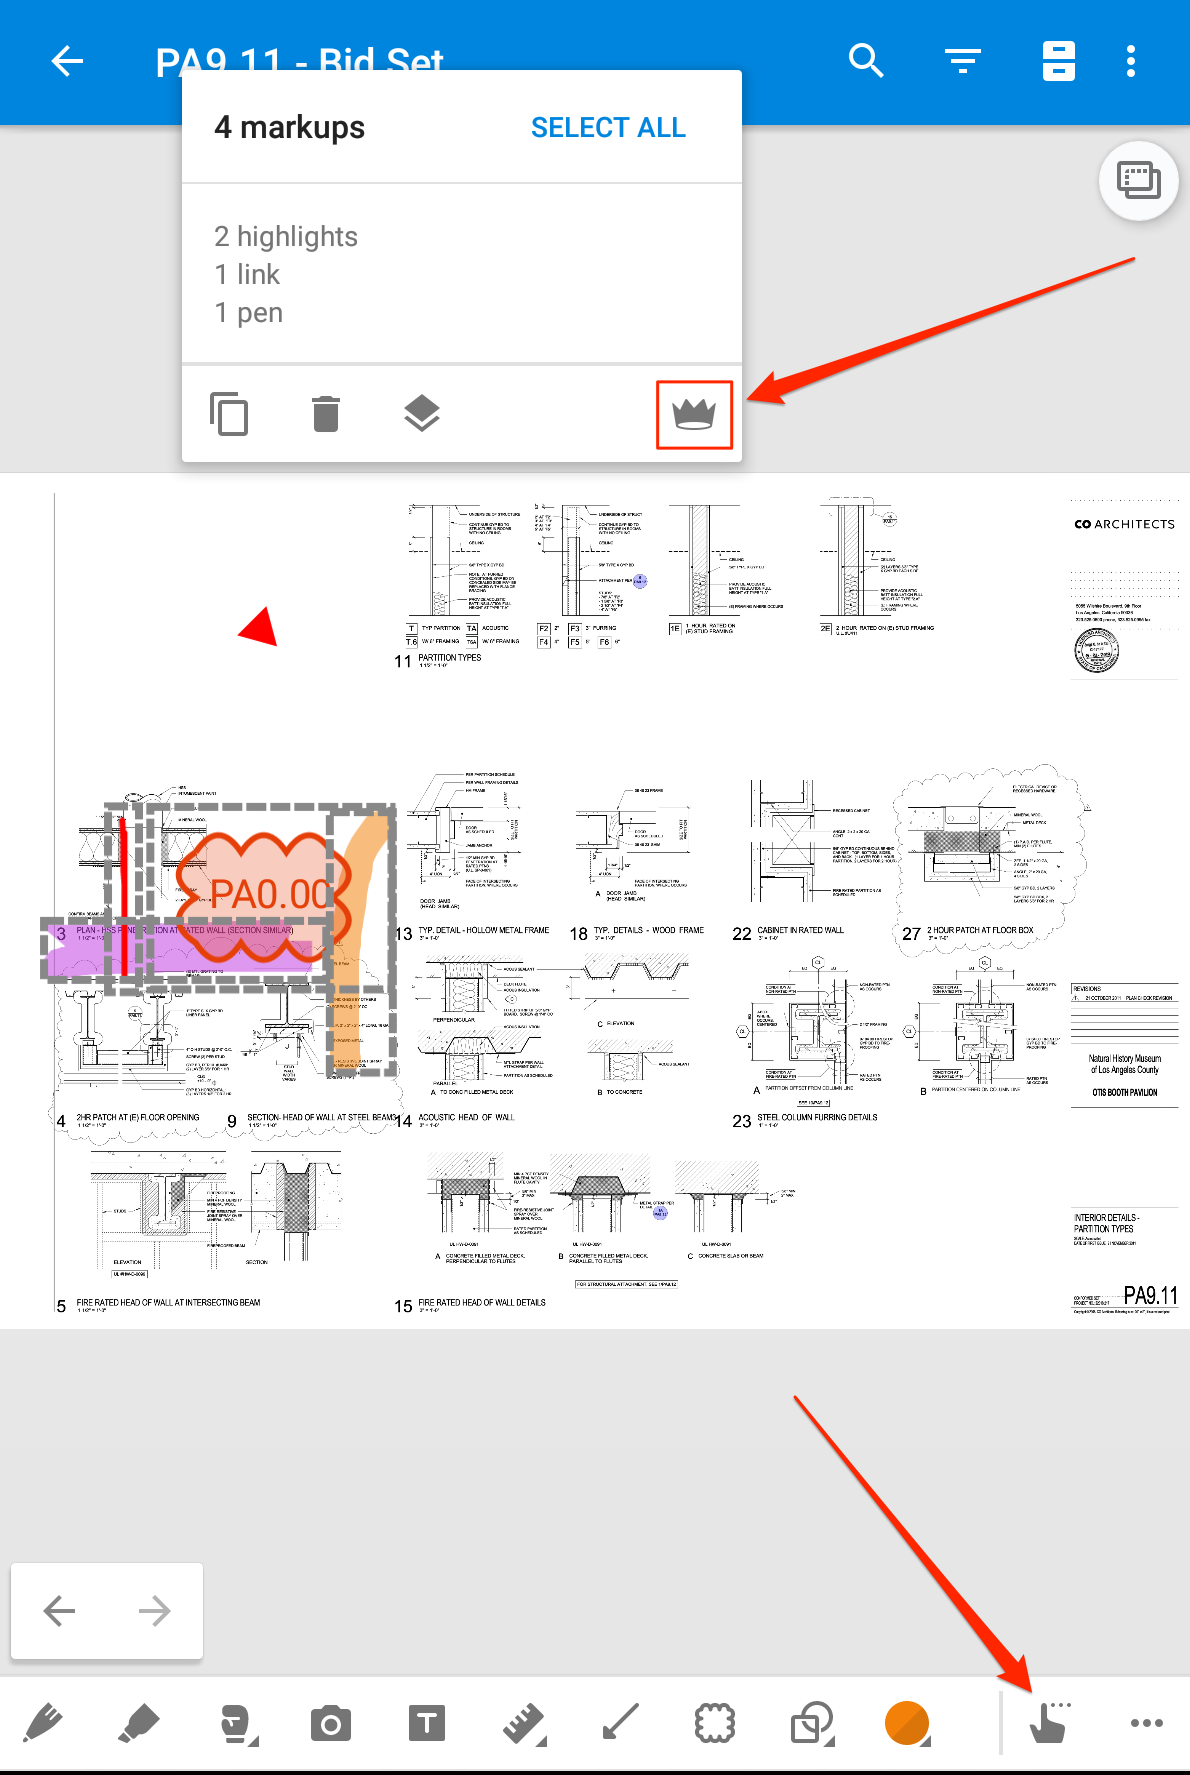
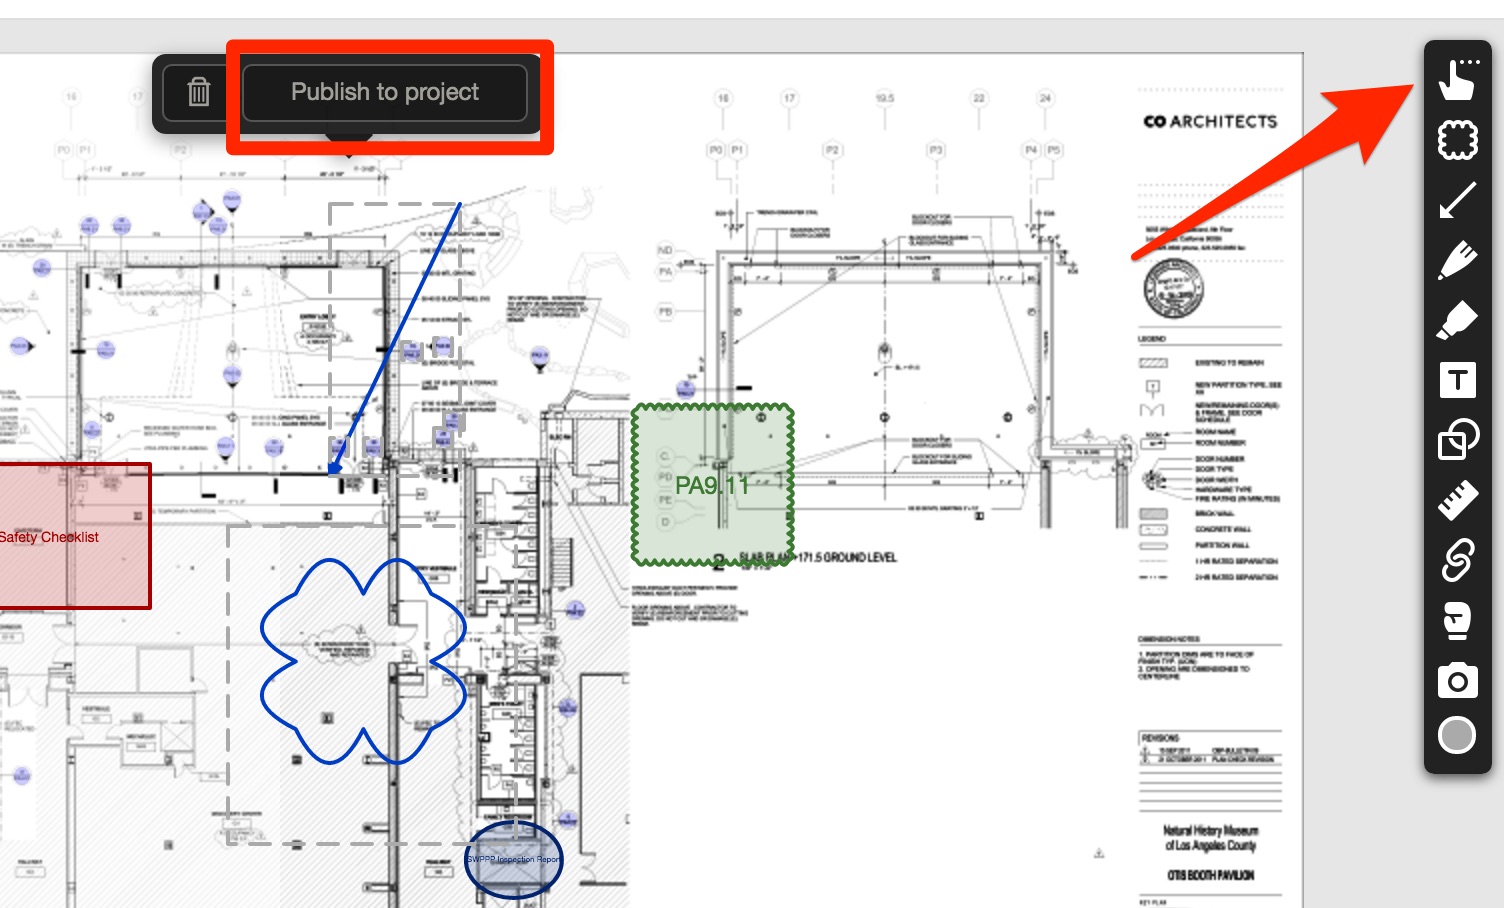
To share a markup with the entire project team, you can simply click or tap on the markup and choose "Publish to Project" (Crown icon on Android). Published markups will darken in color to indicate that they have been shared with the project team. This method can be used on the website as well as the mobile app.

To Publish Several Markups to the Project:
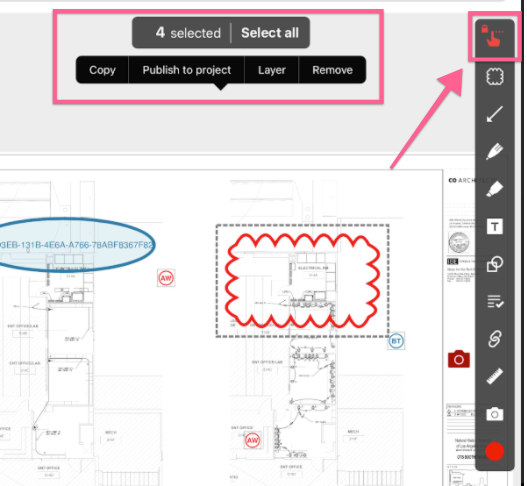
Select the multi-select tool at the top of the markup tool bar. Drag across the markups you would like to publish and then tap "Publish to Project" or the crown icon to share your selections with the entire team. On Android, please remember to click on the 'more' button if you don't see the multi-select tool on the toolbar.
iOS
Android
Web
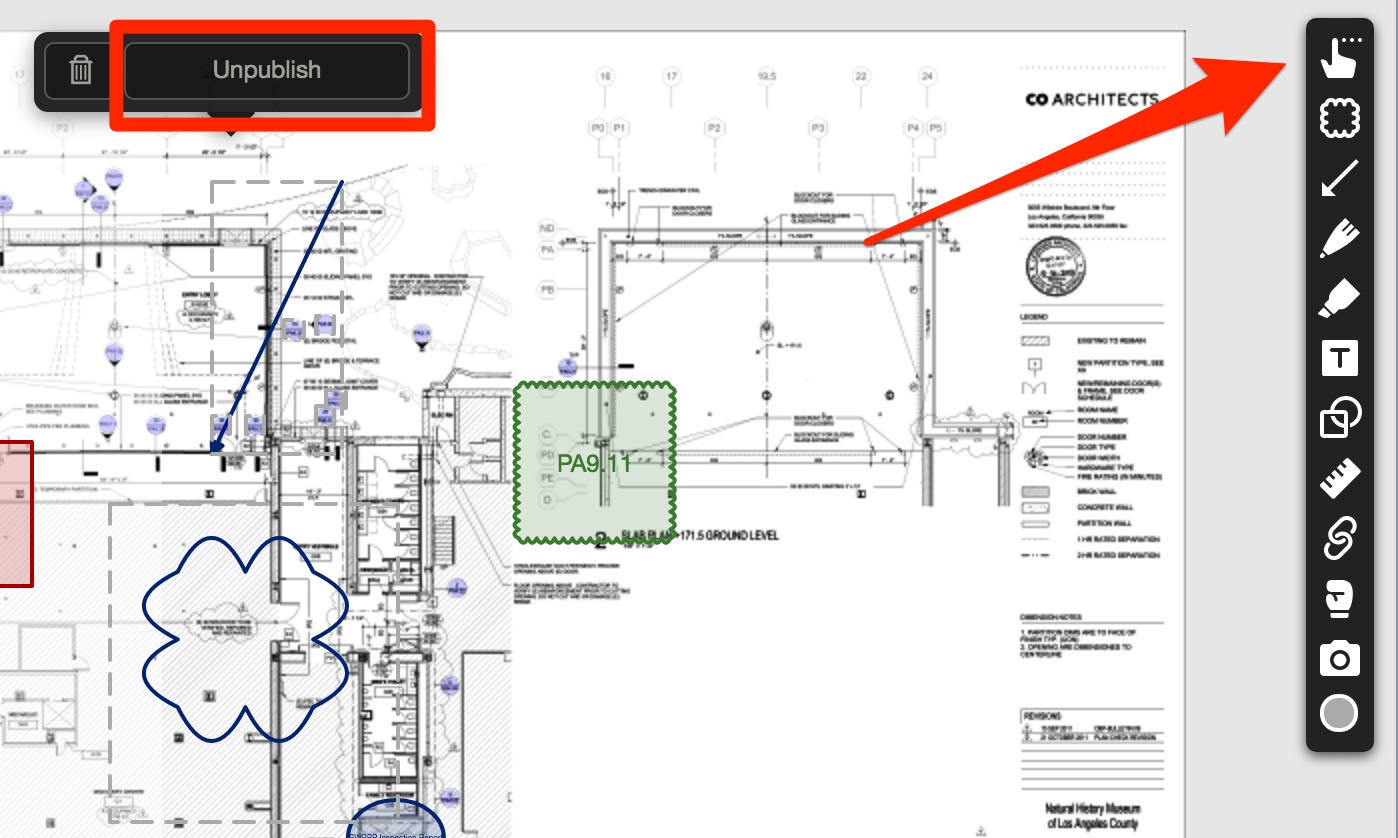
Unpublishing Markups from the Project:
If you no longer wish to share your markups with the team, you can unpublish them from the project and make them personal markups again. Once they are unpublished, they will be visible only to the user who created them.
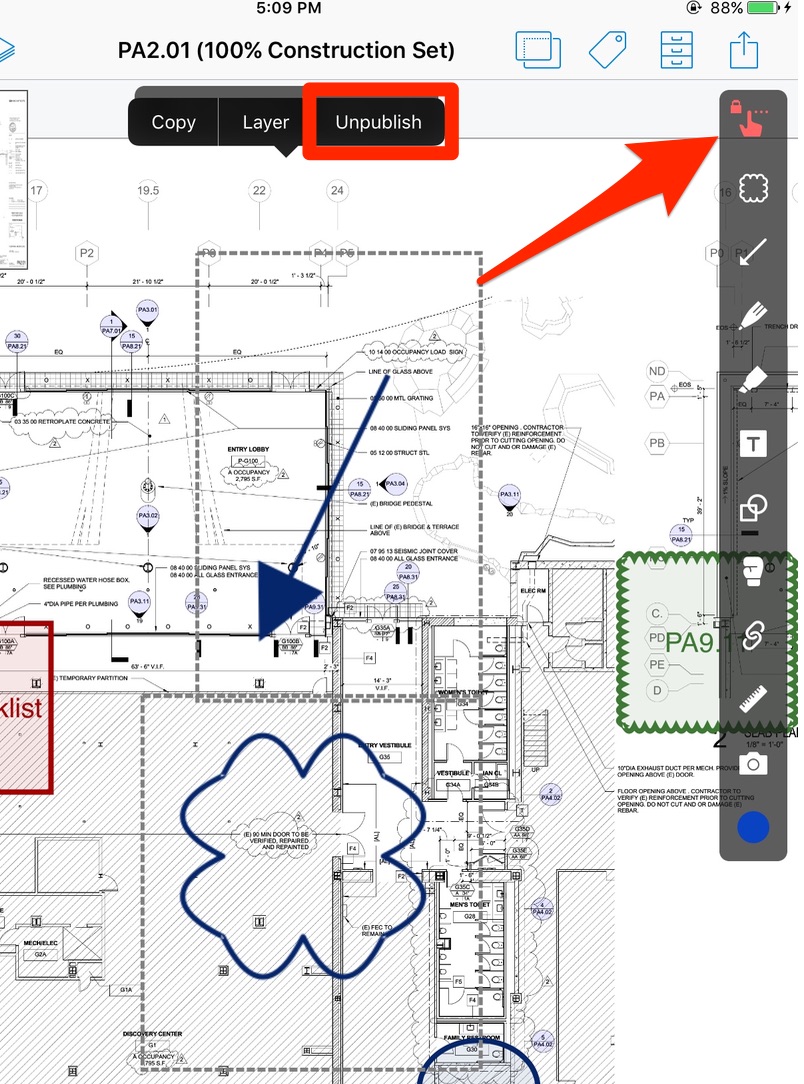
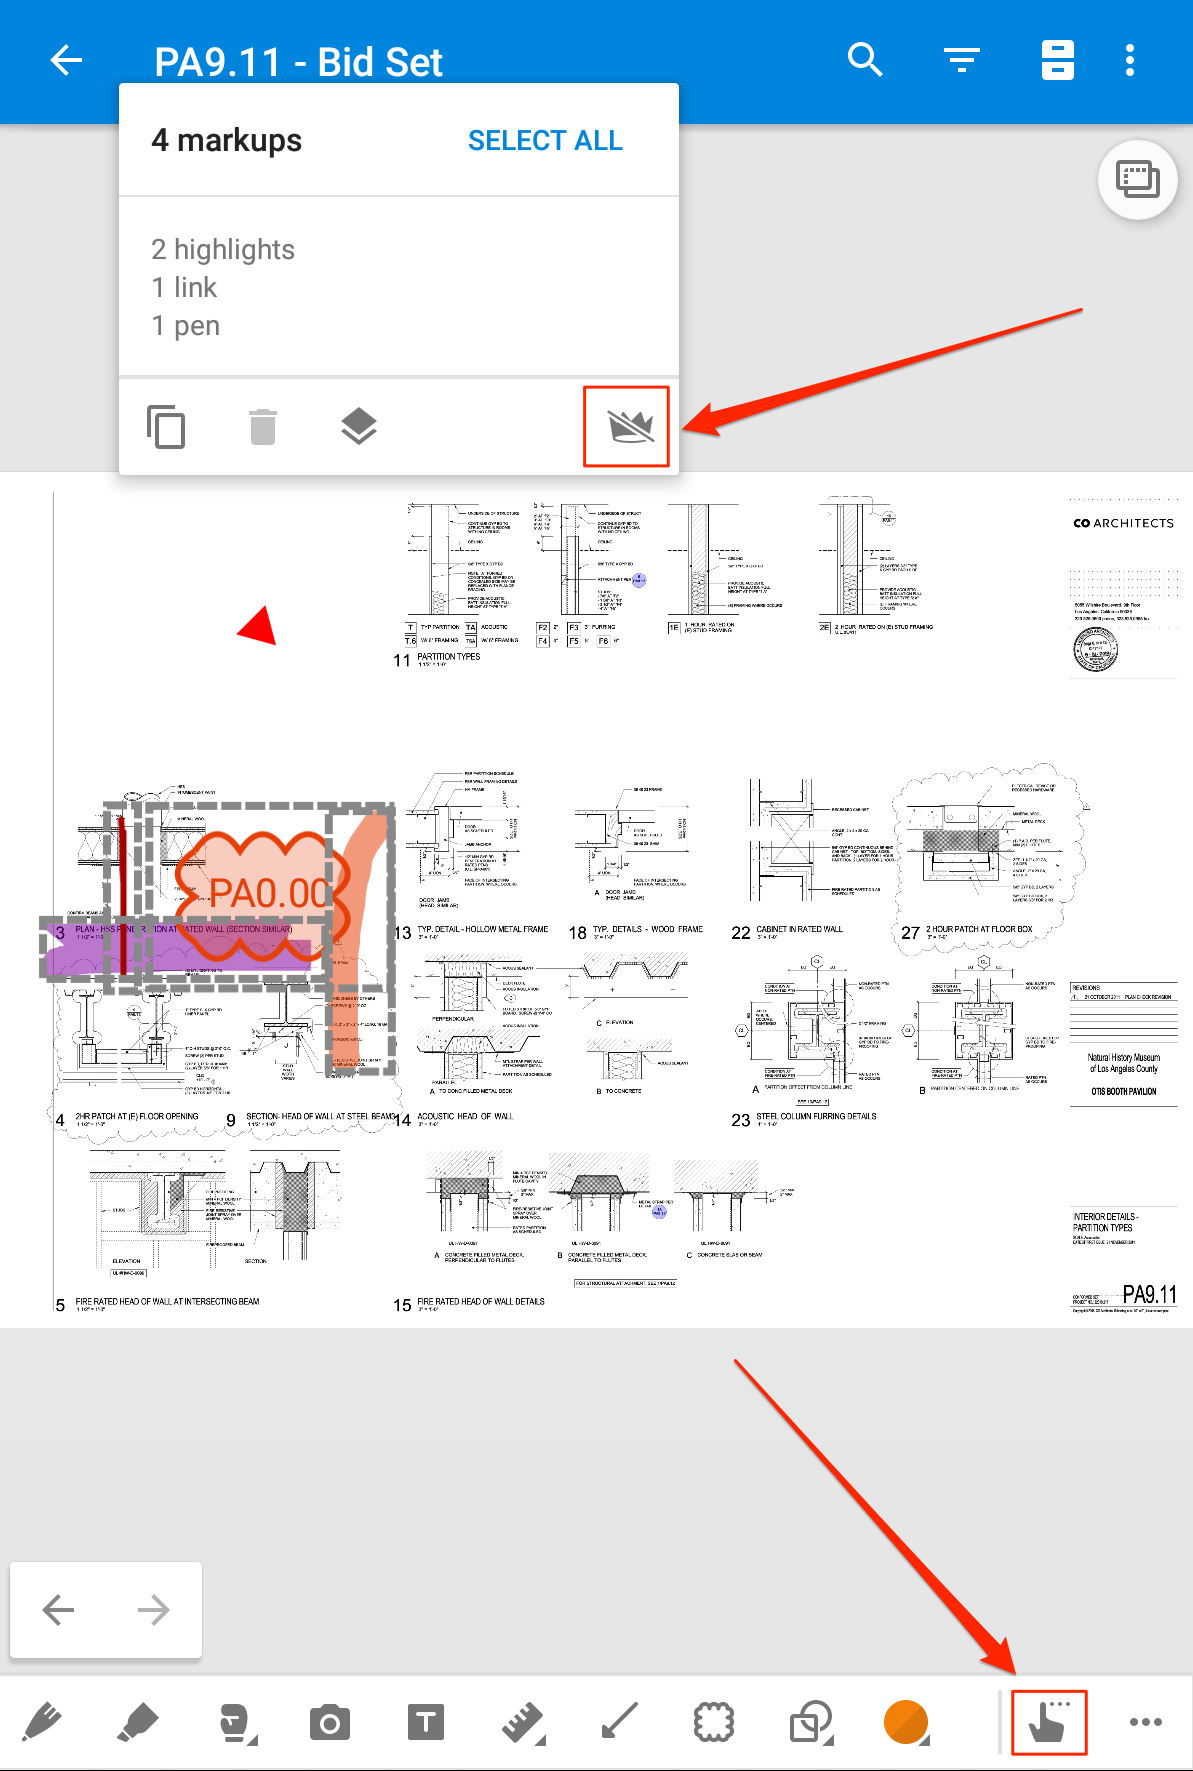
Tap the "Unpublish" option (or the strikeout crown icon on Android) that appears for any selected published markup to unpublish it.
iOS
Android
Web
Please Note: Team members will need to refresh their mobile apps before the published markups will appear on their mobile devices for the first time. For more information on updating and refreshing your PlanGrid app, check out these instructions.
Task stamp markups and photos are automatically synced to their rolling lists on the website, and are available to all team members, regardless the permission level of the user that created them. You do not need to publish task markups and photos to the project for them to be visible to all users from the Issues or Photo icons on web. However, to share these markups in the sheet, the stamps and camera icons will need to be published to the project.
Related Articles: