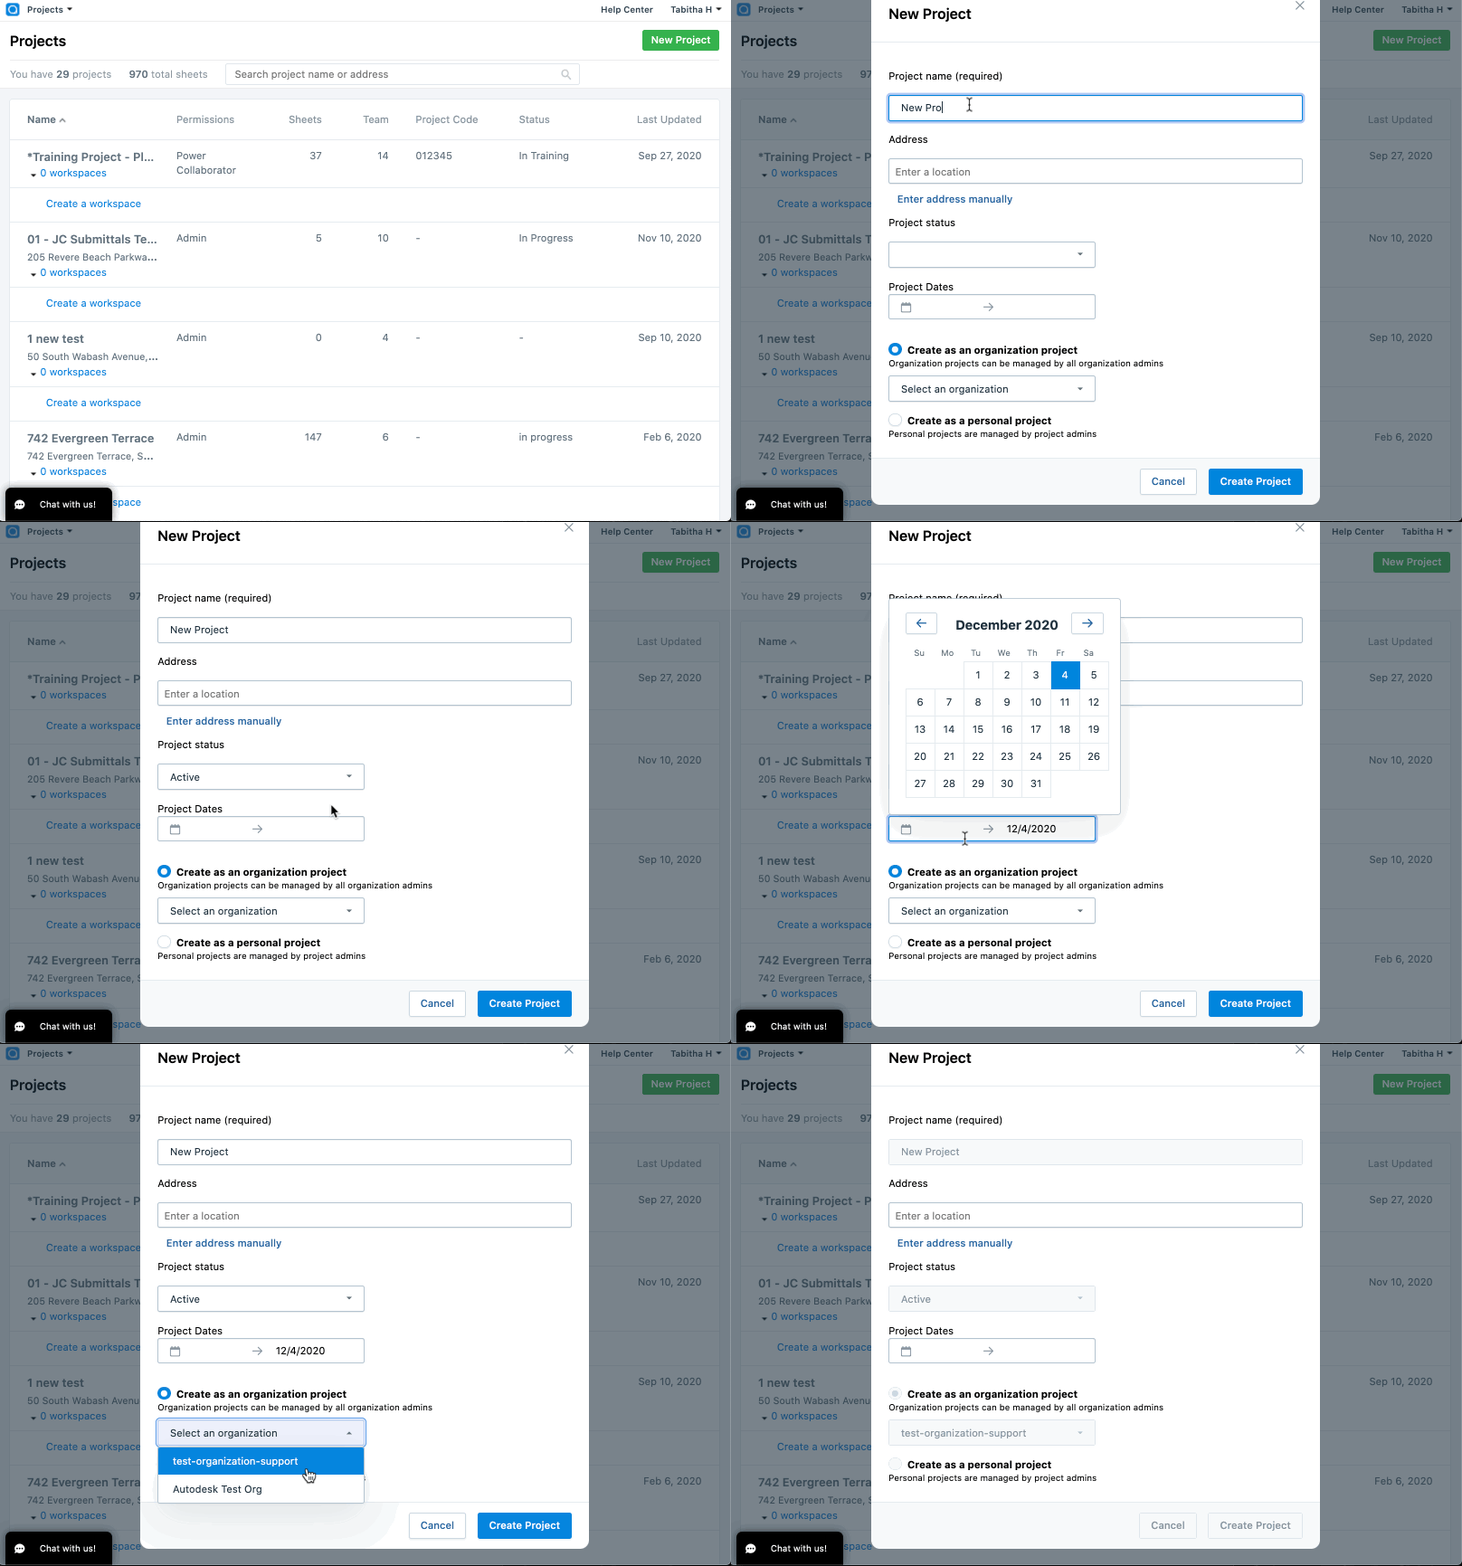
It's easy to start a new project with PlanGrid. To create your new project and to upload sheets, you will need to be logged into the PlanGrid website at www.plangrid.com
Featured:
Uploading Sheet Revisions to an Existing Project
Making Changes to Sheet Numbers
Reordering Sheets after Publishing
Creating a new project
To create a new project, be sure you’re logged in to PlanGrid. From your project list, click on “New Project.”
A pop-up will appear, asking you for a project name, status, and address. Fill in these fields and then click “Create Project”
You’ll also be asked to select “Create as an organization project” or “Create as a personal project.”
- Select “Create as an organization project” if your company has an Admin Console established and you would like your organization’s admins to have full rights to the project.
- Select “Create as a personal project” if your company doesn’t have an Admin Consoleenabled or you want to maintain full administrative rights over the project.
Once your project has been created, you’ll be taken to the home page, where you can get started.
Add sheets to your project
Sheets are drawings that you upload to your project in PlanGrid. Uploading sheets is easy, and PlanGrid will automatically detect Sheet numbers to help you keep everything in order.
Upload Sheets
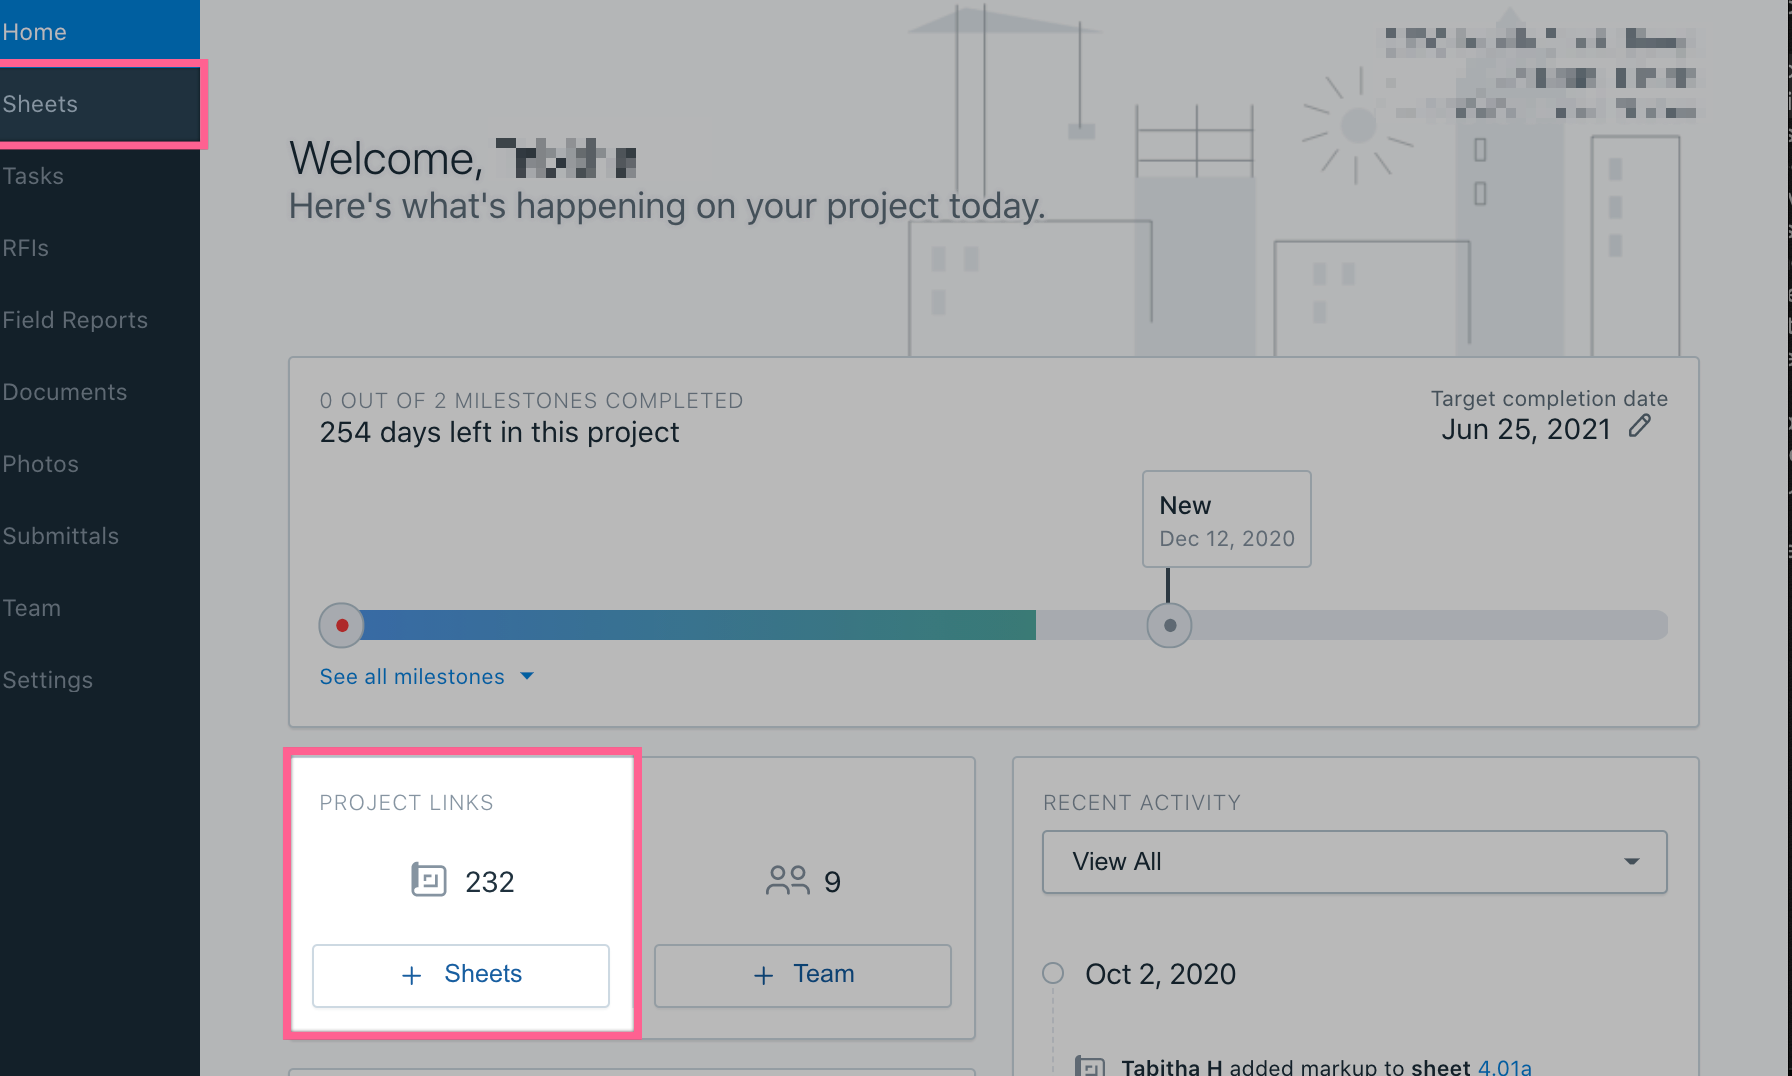
To get started, make sure you’re logged in to plangrid.com and open up your project.
- Navigate to the homepage of your project and click “Add sheets" by either navigating into the Sheets tab and clicking "Upload Sheets" or by using the quick + Sheets box on the project home page.
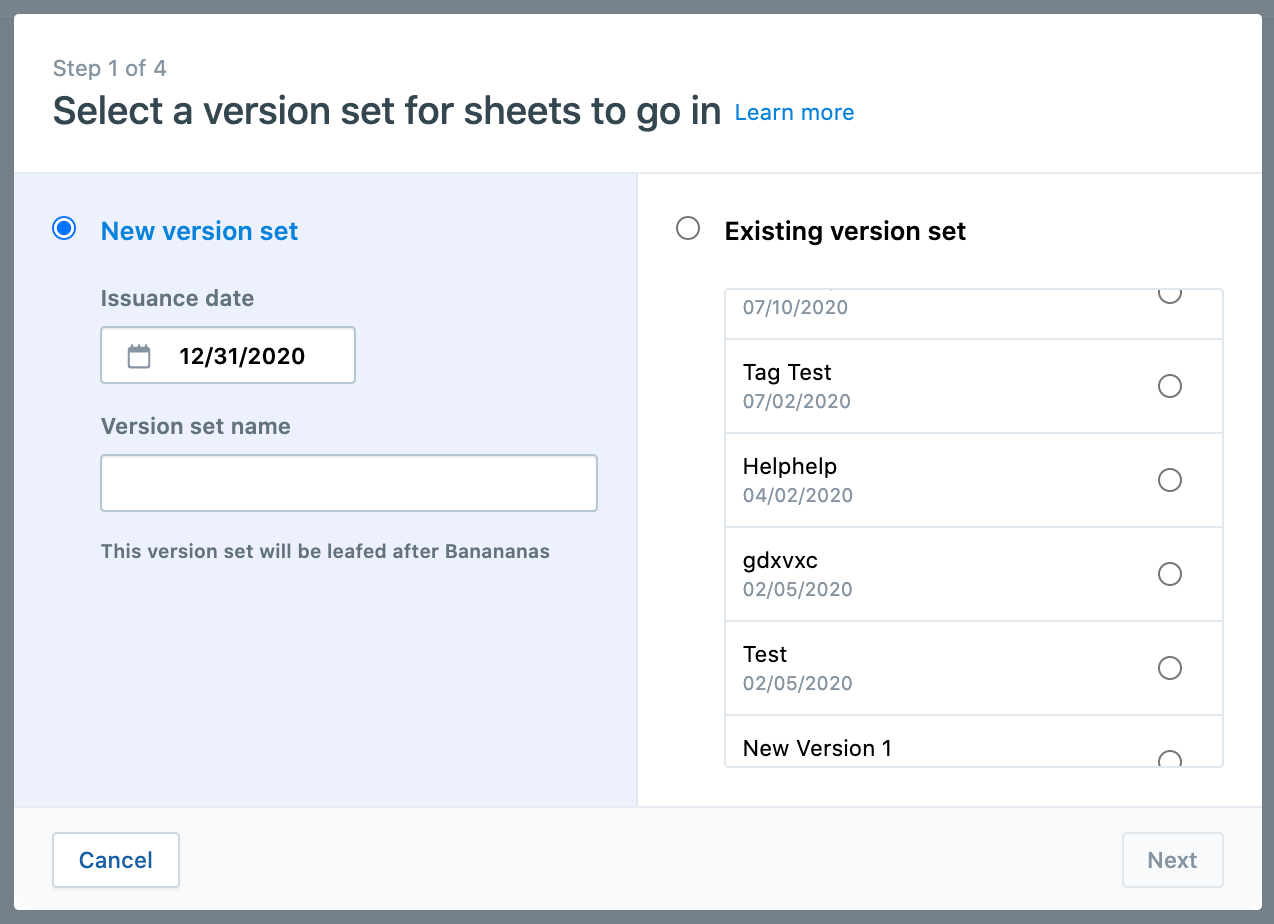
- Select the issuance date and add a version set name or choose an existing version set, then click “Next"
3. Upload PDF files from your computer and click “next”
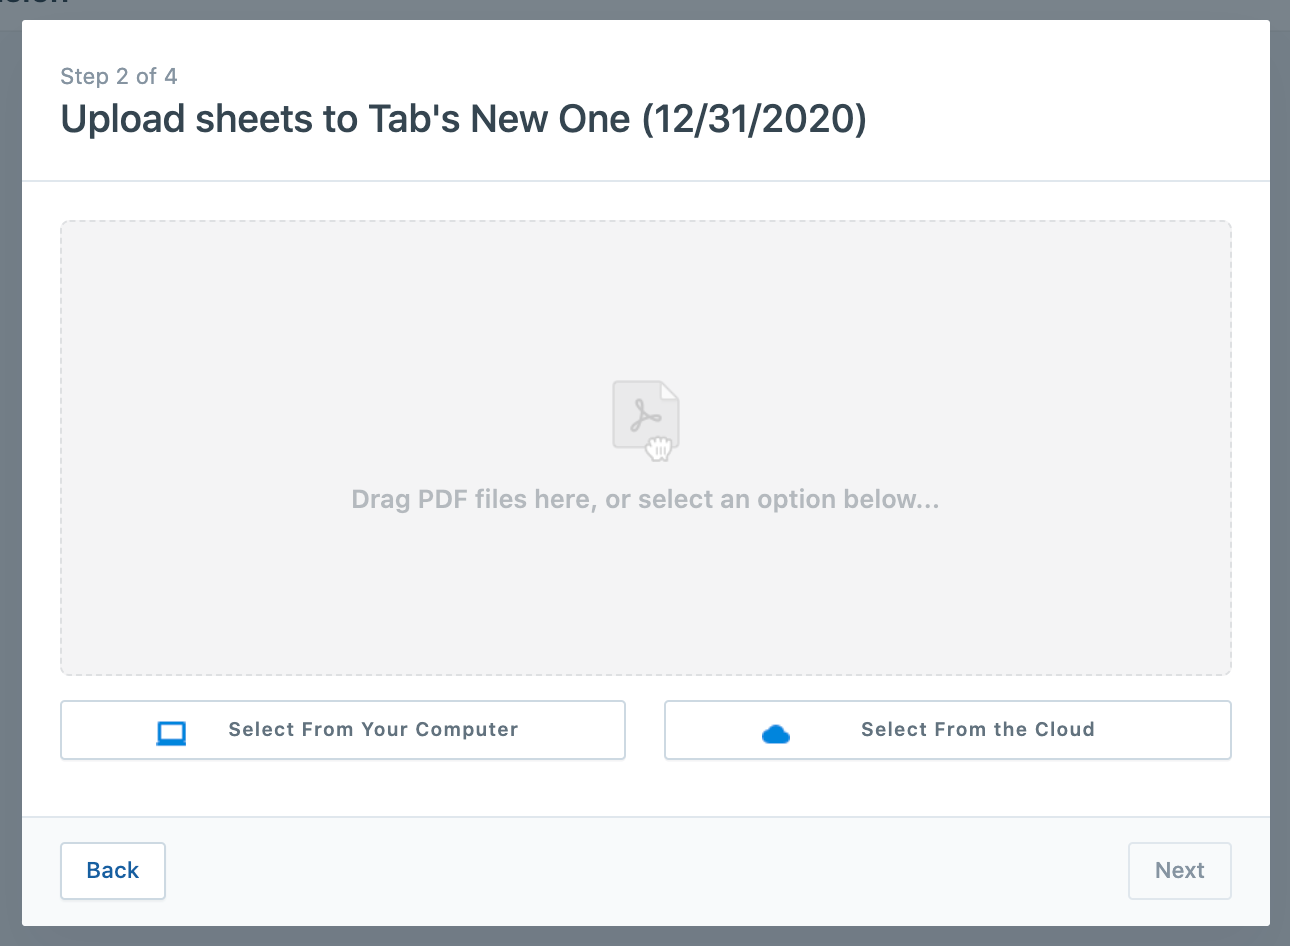
It can take a couple of minutes to process your sheets, but you’ll receive an email once they’re done.
Review sheet numbers
PlanGrid automatically labels your sheets based on the numbering in your original documents. However, it’s best to review the numbering to ensure that everything is accurate.
PlanGrid will show a thumbnail image of the sheet, along with the sheet number scanned from your original PDF. Check that the numbering in the Sheet Number column matches the numbering on your original files.
If everything is correct, click “Sheet Numbers Are Correct” at the bottom of the page. If you need to fix any of the sheet numbers or rotate sheets, see Making Changes to Sheet Numbers.
Add sheet titles and tags
The next step is to add sheet titles.
- Select the sheets with titles you’d like to edit using the checkboxes on the left-hand side of the table
- Choose “Edit Titles,” which appears once you’ve selected at least one sheet
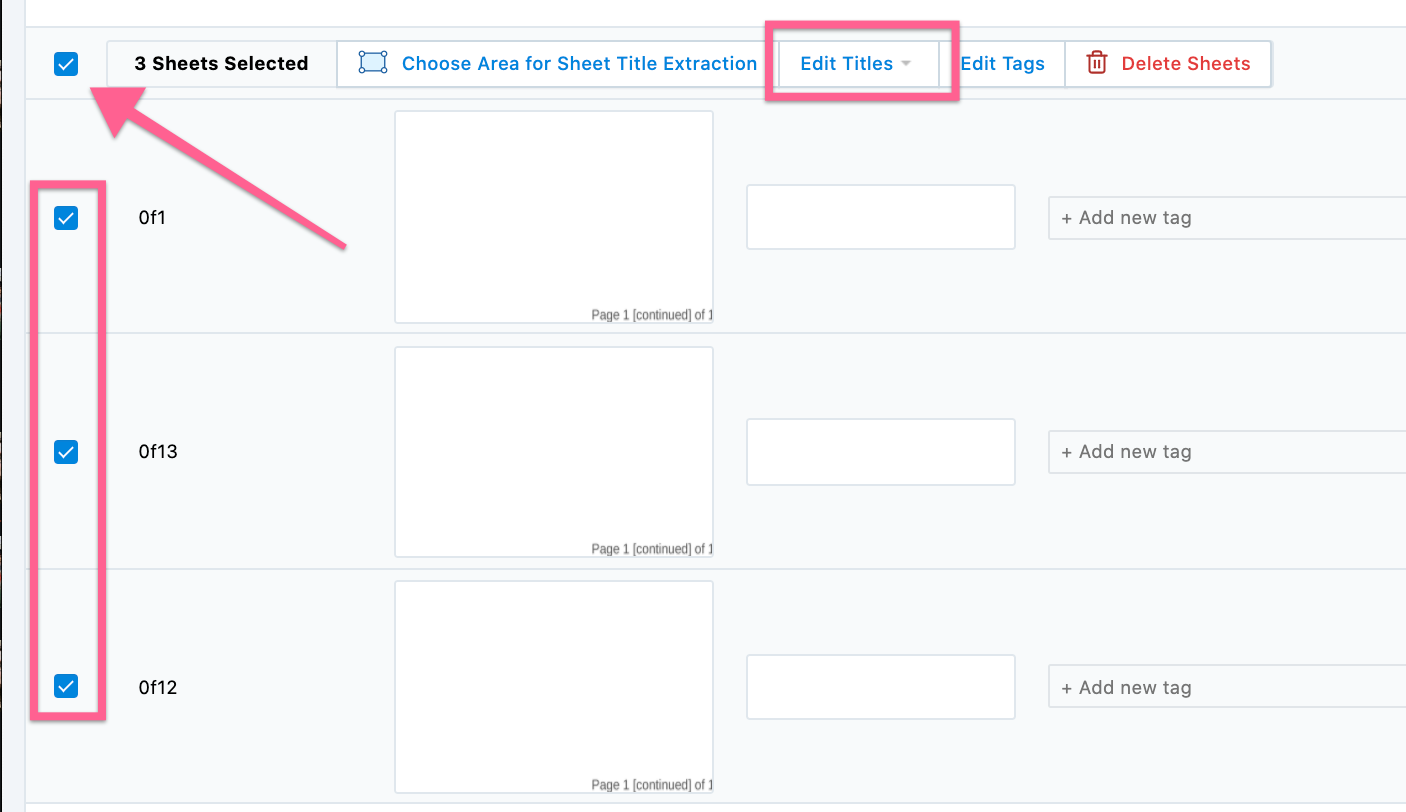
- Select "Remove characters," "Add characters," or "Find and replace"
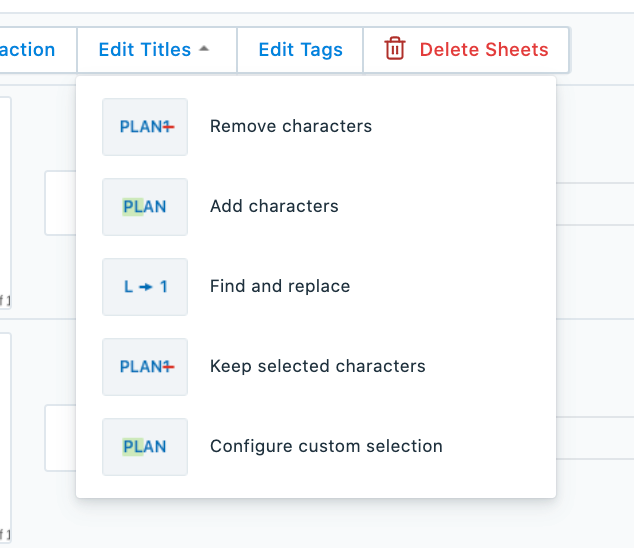
- Follow the prompts and verify your changes in the “Preview changes” table
Then you can add or edit tags.
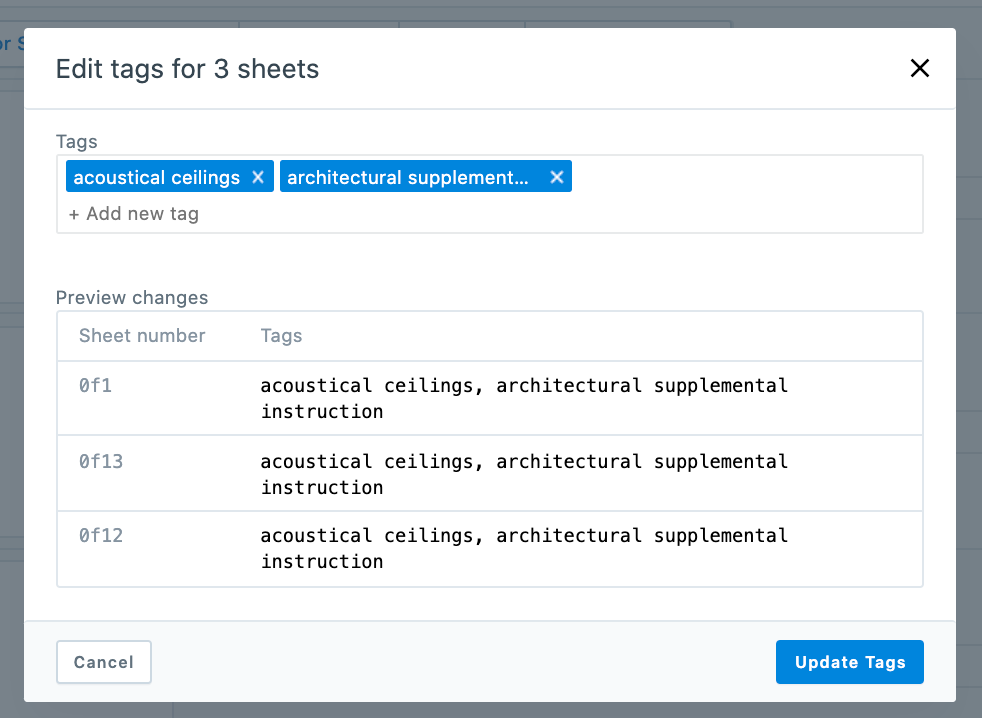
- Select the sheets whose tags you’d like to edit using the checkboxes on the left-hand side of the table
- Click “Edit tags,” which appears once you’ve selected at least one sheet

- Add the tags that apply and click “Update Tags.”
Publish to projects
After making sure your sheets have been uploaded with the correct numbers, titles, and tags, you can click “Publish to Project.” Or click on the “More” button for the option to delete sheets or save and exit the project.
If you leave the Publish stage at any time, you can navigate back to the sheets to publish them by going to the sheets page and selecting “Publish Log” on the top right.
Removing Unpublished Uploads
If you've uploaded a set of sheets, and did not publish them, you may see a number indicated on your Publish Log at the top right of the Sheets tab. If you no longer need them, please follow the steps below on how to delete it.
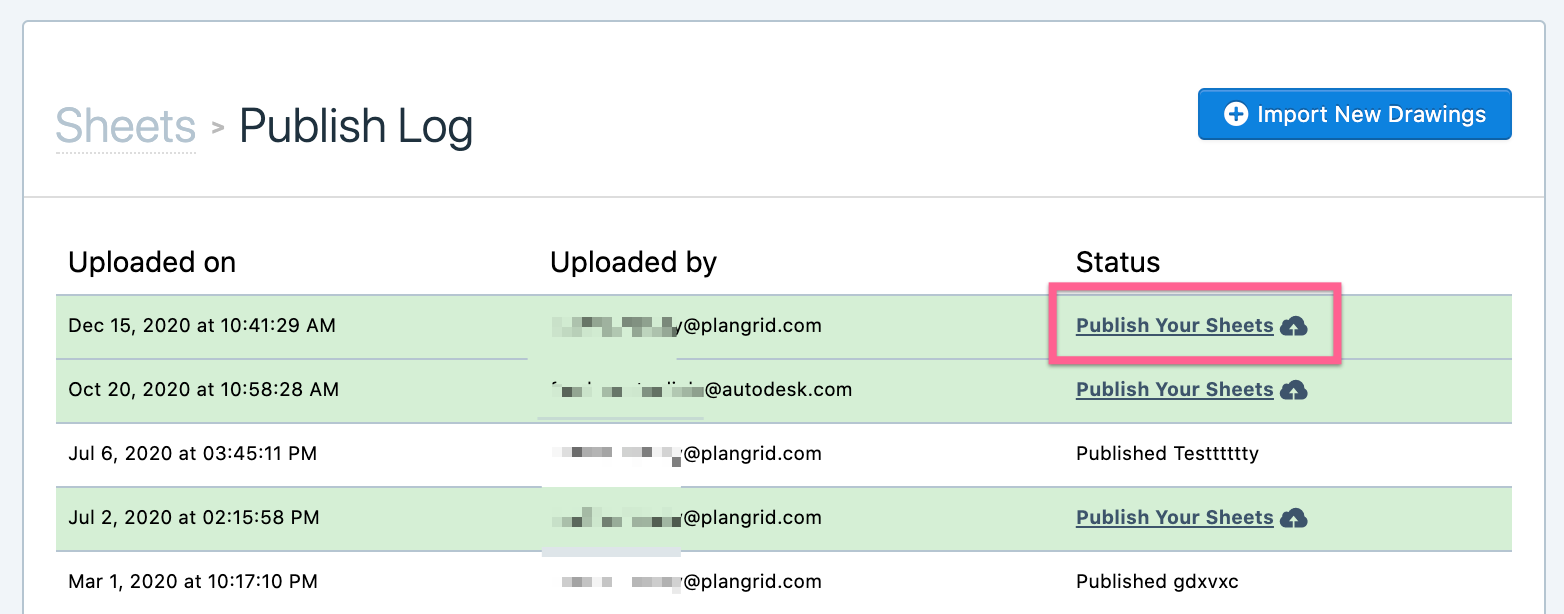
1. In the Sheets tab, click on the publish log on the upper right.

2. The row of the unpublished upload should be in green. Please click on the link that says "Publish Your Sheets" (this will just take you back to the publishing stages of that batch)
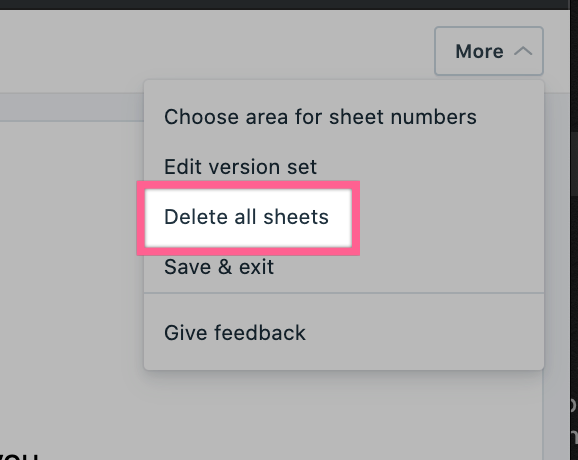
3. Click on "More" on the upper right.

4. Click on "Delete All Sheets." This will only delete that specific upload batch; furthermore, the row of that upload will disappear from the publish log.
Upload Sheet Revisions to an Existing Project
To upload sheet revisions, select the project that you’d like to add revisions to and then enter the “Sheets” tab.
- Click “Upload Sheets”
- Select “New Version Set”, select an issuance date, then type in a new version set name, as shown here.
- Upload your sheets from your computer
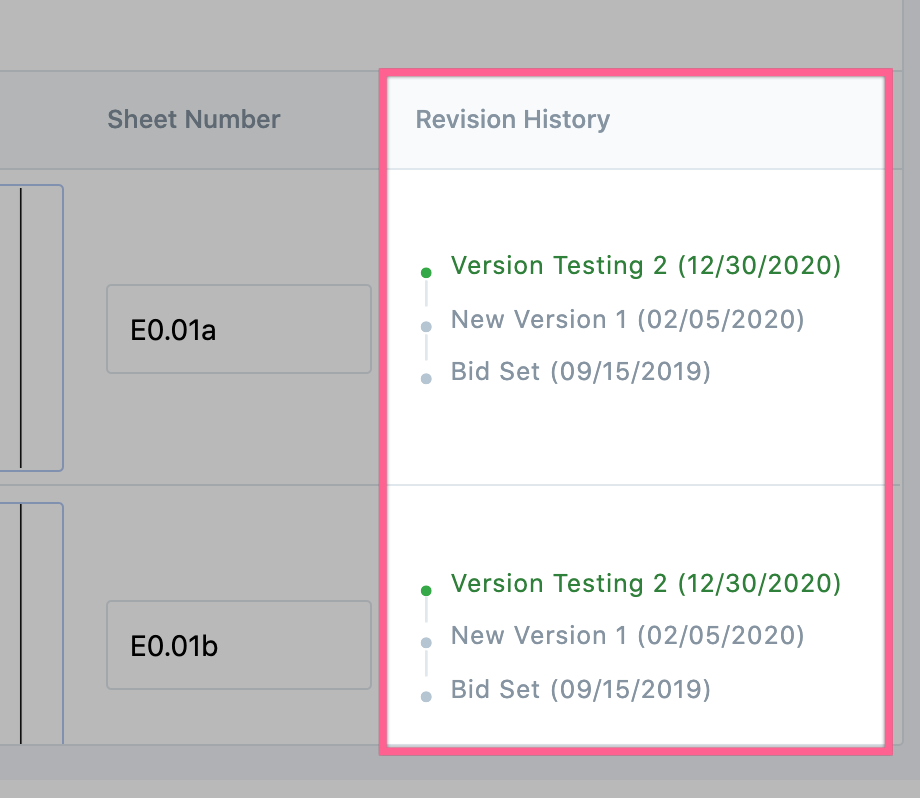
- Review your sheet numbers. Notice on the right hand side that if the sheet is detected as an already existing sheet (prior versions), it will acknowledge and confirm on the right hand side. The green text is what you have named the new version, and the gray text below are the prior versions.
5. Review the rest of the sheet numbers and proceed to click "Sheet Numbers Are Correct"
6. Review the titles and tags, and complete the upload process by clicking "Publish to Project"
Making Changes to Sheet Numbers
If any of your sheets aren’t numbered correctly or if they aren’t oriented correctly, it’s possible to make changes to correct these problems during the upload process.
Featured
Fix sheet numbers and titles that were read incorrectly
Fix sheet numbers and titles that were read incorrectly
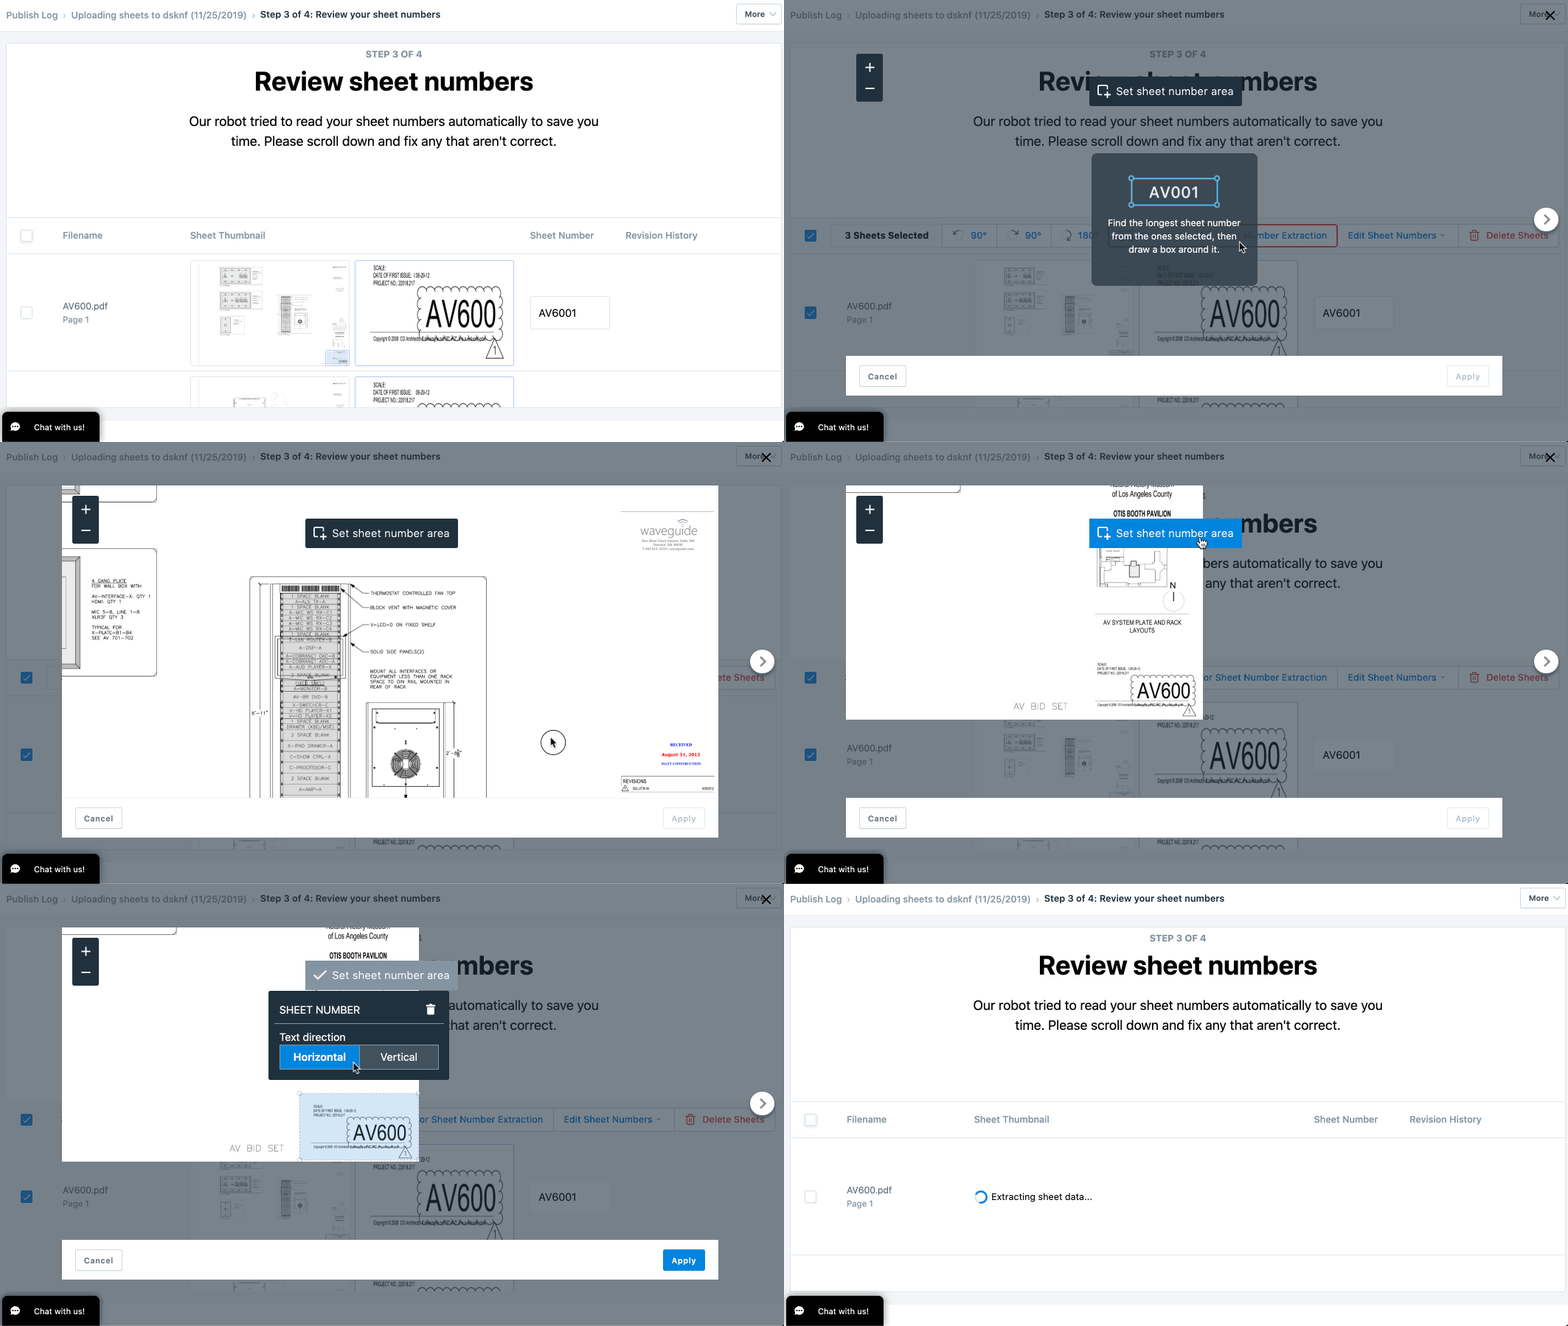
If your sheet numbers were read incorrectly, you can fix them in a few ways. You can define the region to scan for the correct numbers, remove and add characters, use the find-and-replace tool, keep certain characters, edit based on special characters, or correct them manually.
Define scan region
- Select the sheets you want to edit using the checkboxes on the left side of the sheets table
- Click “Choose Area for Sheet Number Extraction”
- Find the sheet number on the sheet the appears
- Click “Set sheet number area” and draw a box over the sheet number
- Make sure that the correct text direction, horizontal or vertical, is selected and click “Apply”
- Review your results and repeat the process for sheets with a different number or title location
If the sheets you’re using for a project have sheet numbers printed at different parts of the sheet, it’s possible to define different custom regions for them. Simply select the first set of sheets and follow the steps above. Then repeat the steps for your other set of sheets.
Remove or add characters
To add or remove characters from your sheet numbers, first select the sheets you want to edit using the checkboxes on the left side of the sheets table. Next, click “Edit Sheet Numbers” and then select “Remove characters” or “Add characters”
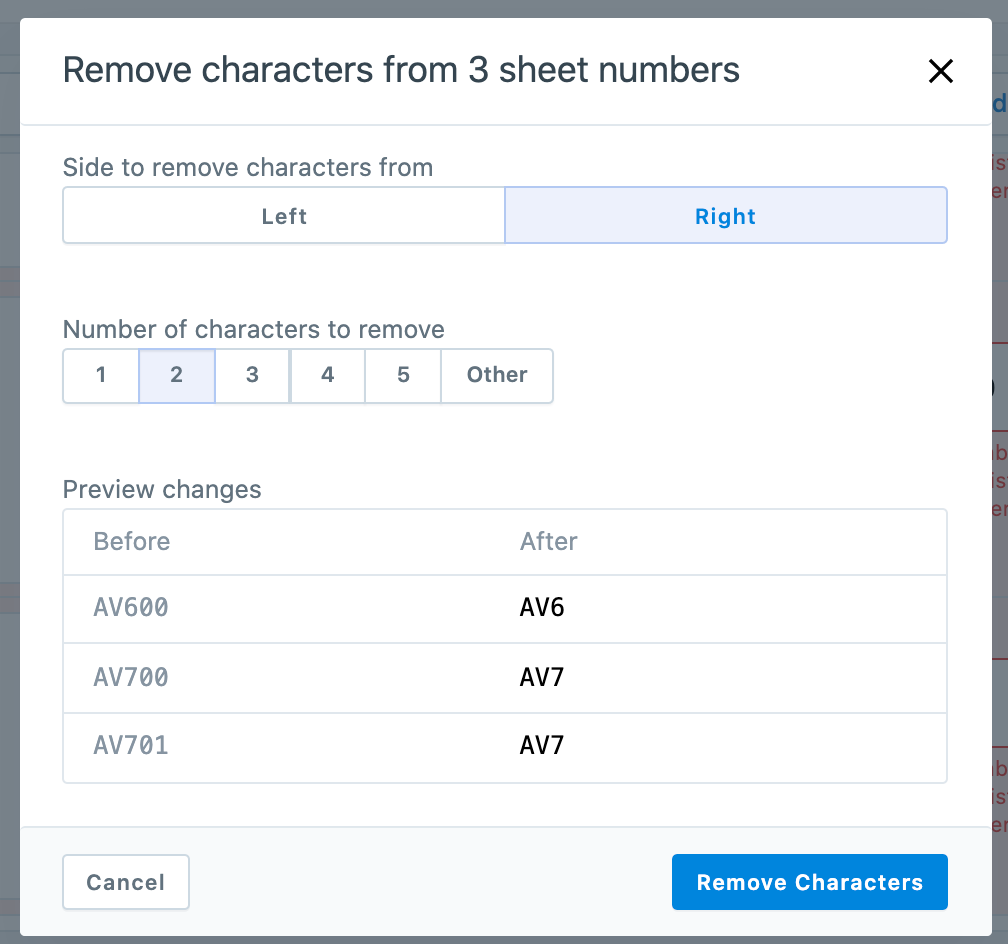
To remove characters
- Choose whether to remove characters from the left or right side of the sheet number
- Select the number of characters to remove
- Verify the changes in the “Preview changes” table
- Click “Remove Characters”
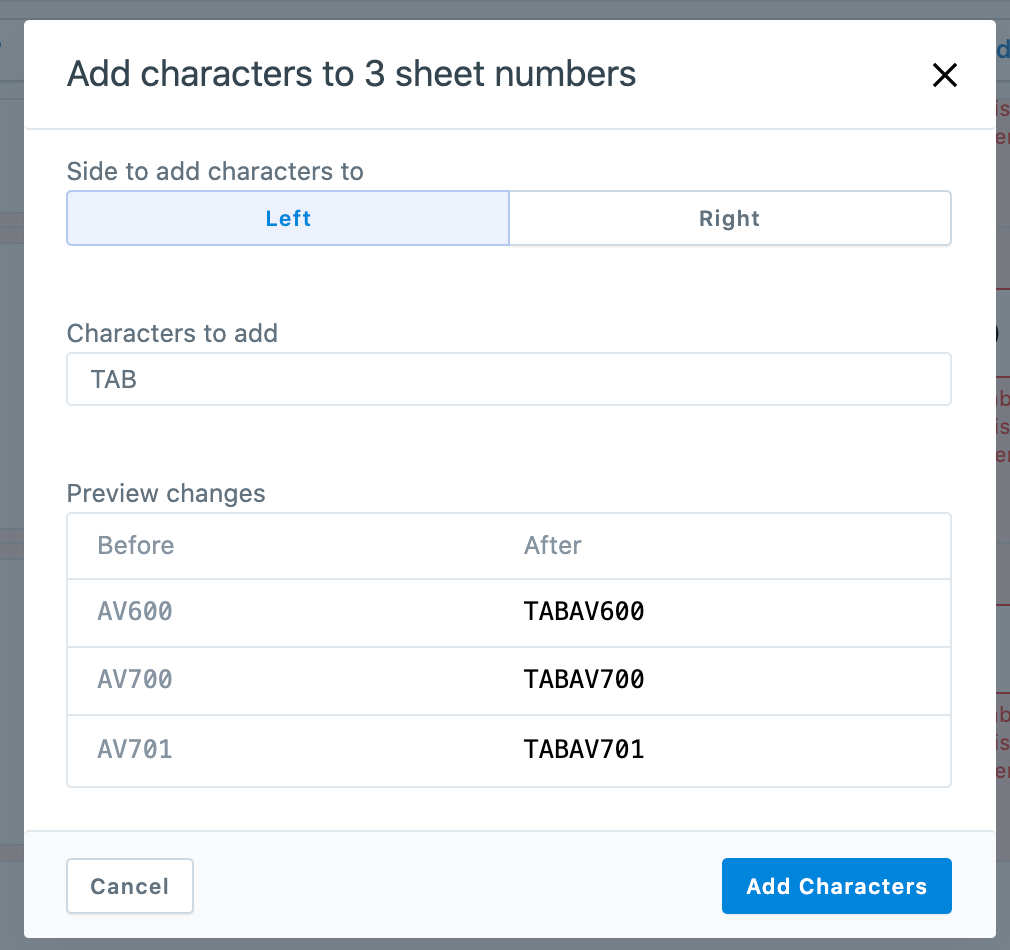
To add characters
- Choose whether to add characters to the left or right side of the sheet number
- Enter the characters to add
- Verify the changes in the “Preview changes” table
- Click “Add characters"
Find and replace characters
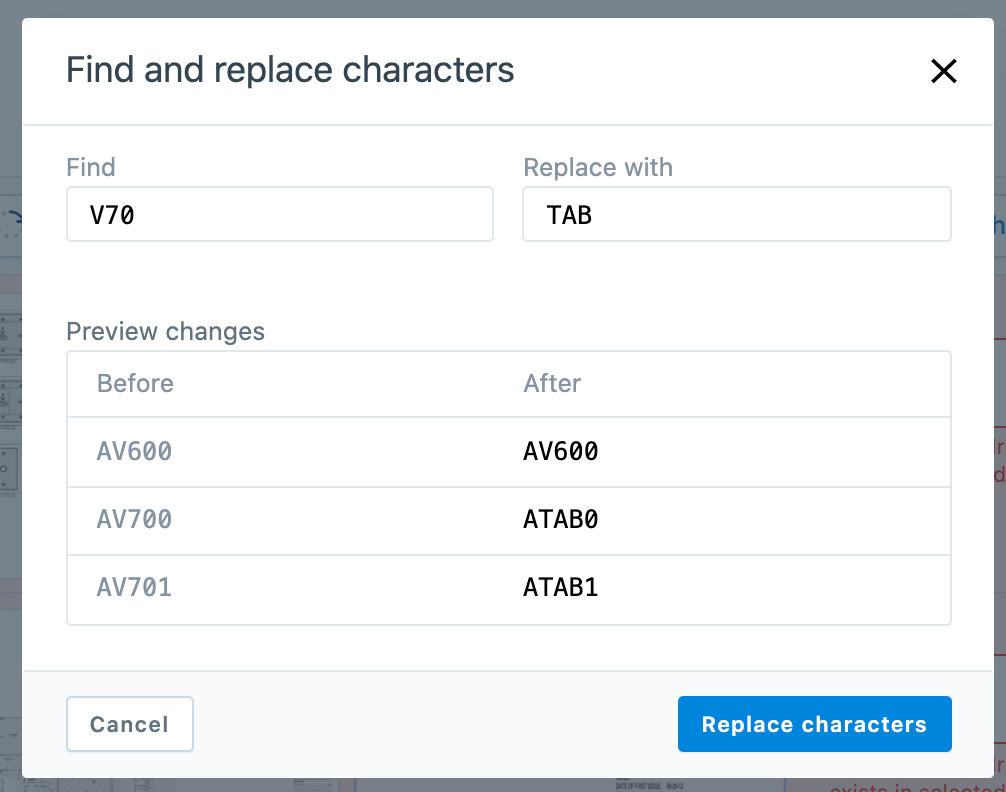
To use the find-and-replace tool on your sheet numbers, first select the sheets you want to edit using the checkboxes on the left side of the sheets table. Next, click “Edit Sheet Numbers” and then select “Find and replace.”
- Enter the characters to find
- Enter the characters to replace
- Verify the changes in the “Preview changes” table
- Click “Replace characters”
Keep selected characters
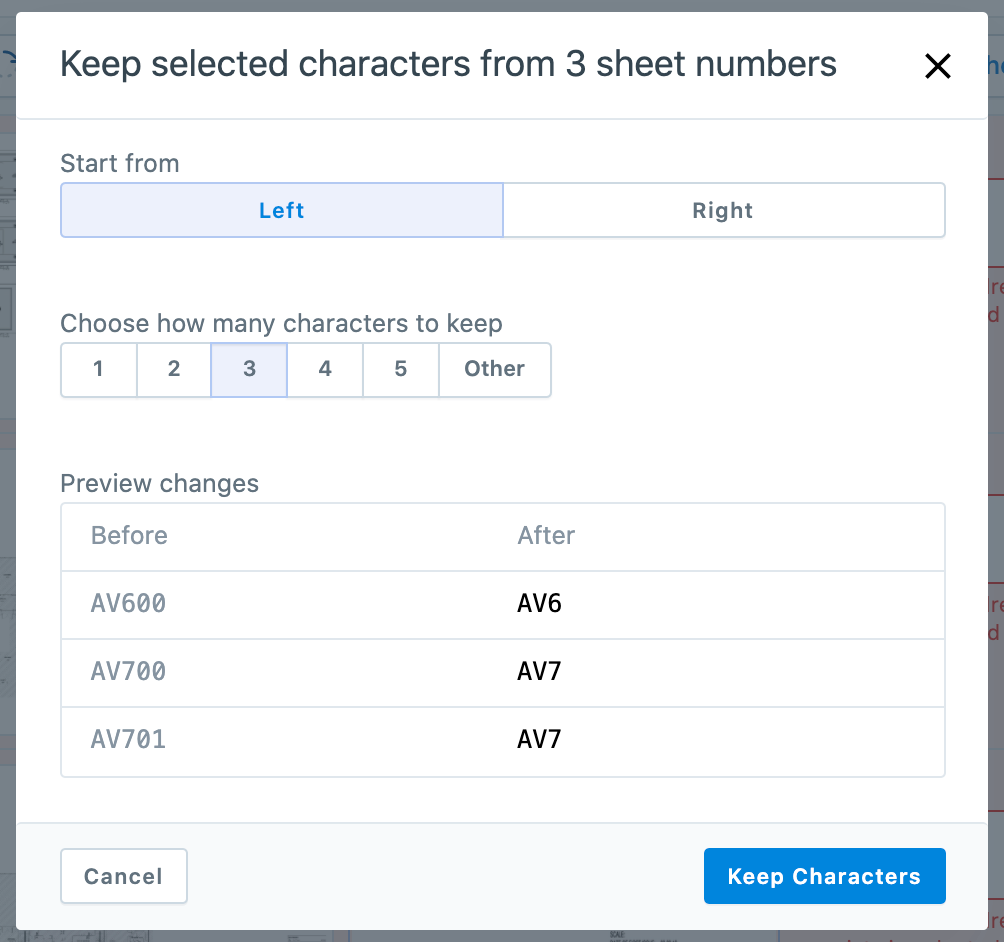
To keep only a selection of characters from you sheet numbers, first select the sheets you want to edit using the checkboxes on the left side of the sheets table. Next, click “Edit Sheet Numbers” and then select “Keep selected characters.”
- Select whether to keep characters from the left or right side of the sheet number
- Choose how many characters to keep
- Verify your changes in the "Preview changes" table
- Click "Keep Characters"
Configure custom selection
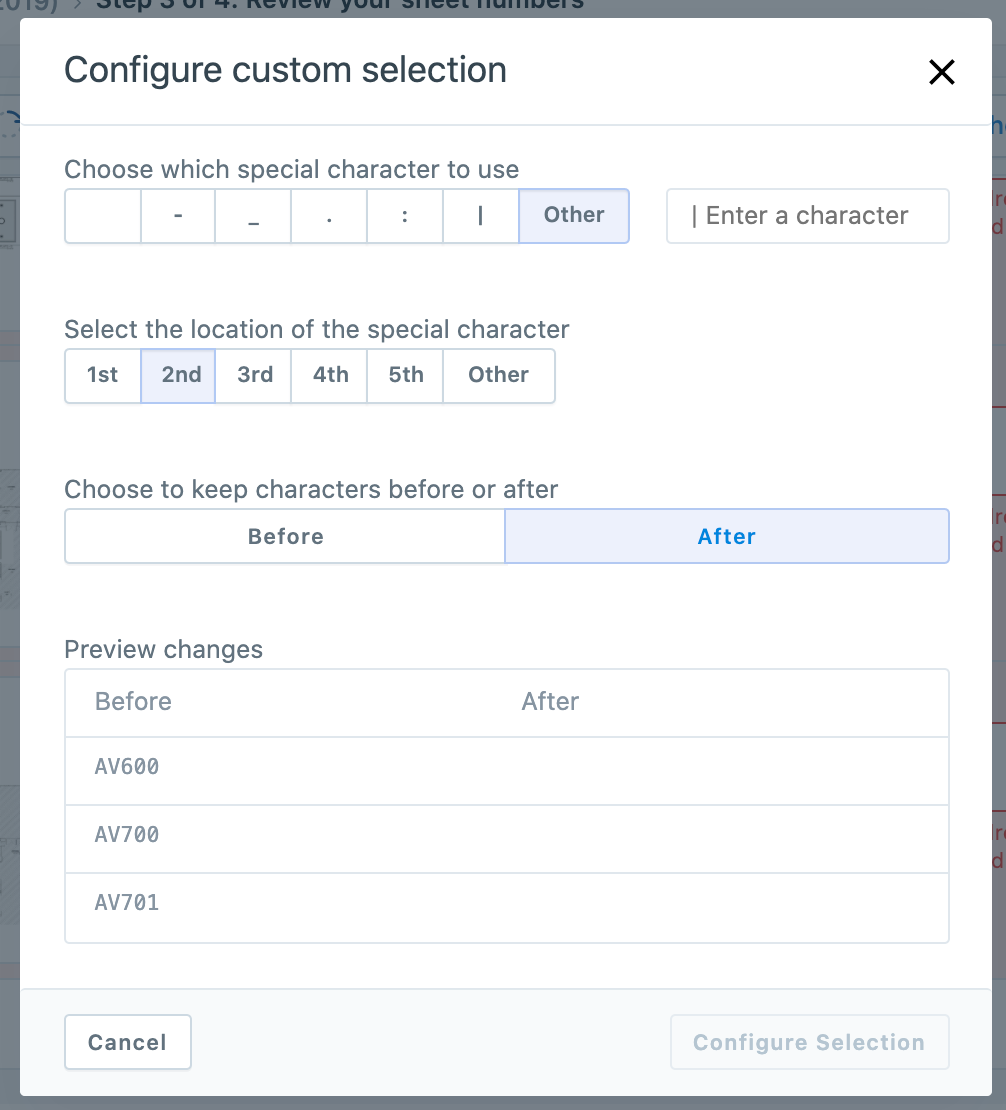
To create a custom selection using a special character, such as a colon or dash, first select the sheets you want to edit using the checkboxes on the left side of the sheets table. Next, click “Edit Sheet Numbers” and then select “Configure custom selection.”
- Choose which special character to use—this is a character in your sheet number that you'll use to edit all selected sheet numbers.
- Choose which instance of the special character to use. For instance, if you have two periods in your sheet number and you want to configure based on the second one, you'd choose "2nd."
- Choose whether to keep the characters before or after your selection
- Verify your changes in the "Preview changes" table
- Click "Delimit Names"
Delete and rotate sheets
To rotate sheets after they have been published, you will need to delete the sheets and re-upload them. When you are re-uploading, you can rotate them in step 3 or 4 of the upload process:
- Select the sheets that you want to either rotate or delete using the checkboxes on the left side of the sheets table
- Click on the rotate (90 degrees right, 90 degrees left, 180 degrees) or delete buttons
Reordering Sheets after Publishing
Once your sheets have been uploaded to the project, you can manage their sort order. PlanGrid will automatically define a prefix order based on the order of the sheets uploaded. Sheet ordering relies on discipline prefixes in your sheet numbers. Disciplines represent the first alphabetical characters of a sheet number (or the number zero, which is currently the only numerical character that can be defined as a discipline). Admins can add/remove/edit disciplines in the “Manage > Sheet Order” section of the Sheets tab.
On upload of new sheets to a new project, PlanGrid will automatically define a prefix order based on the order of the sheets uploaded. Project admins can then navigate to the management page to refine or adjust the ordering before choosing to save and apply.
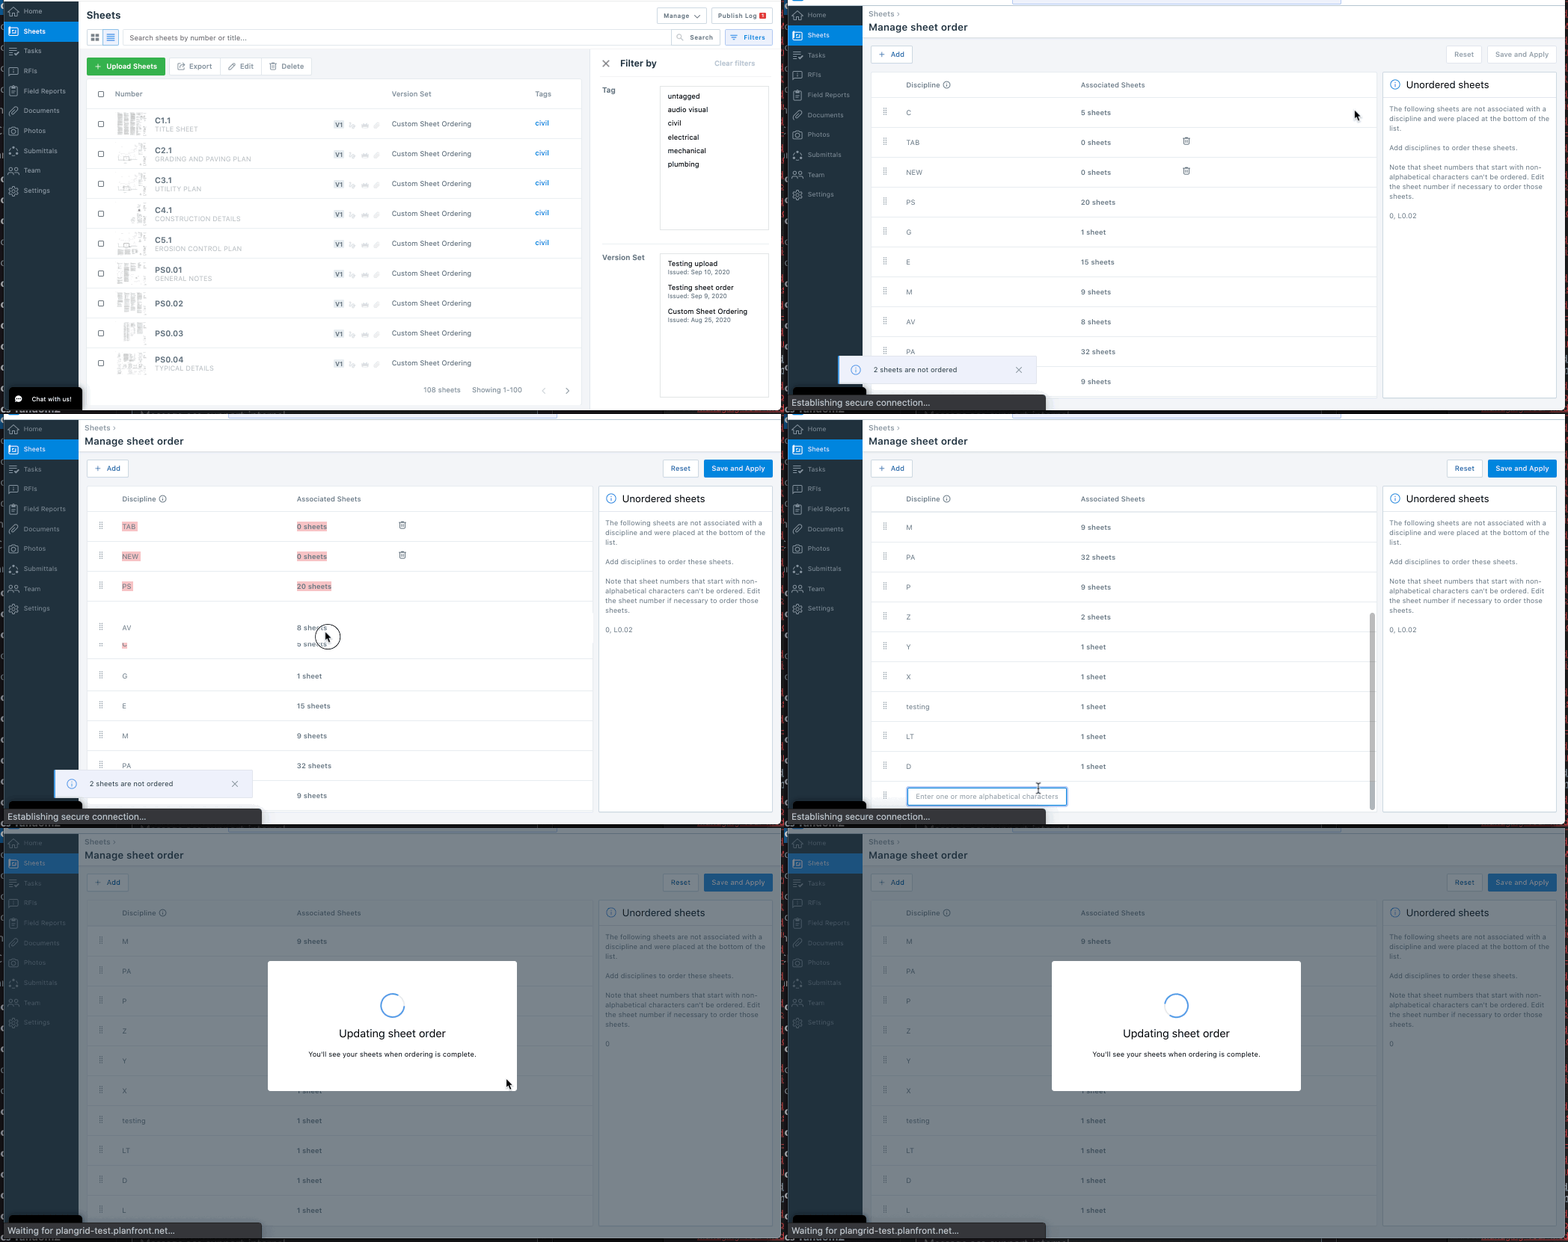
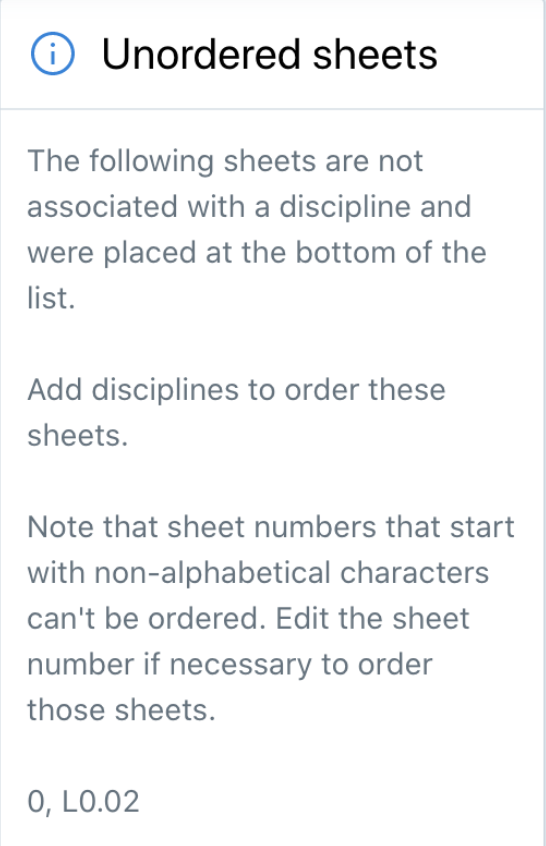
Any sheets that do not have a prefix will move to the bottom of the sorted list, and be defaulted back to an alpha-numeric sort order. When you are in the “manage > sheet order” section, there will be an indication showing that sheets are not part of an existing discipline .
See more about ordering sheet in the Sheet Sort FAQ
Related Articles:
- Troubleshooting FAQ
- Account Settings: Viewing and Managing Account Details
- Downloading Projects to My Android Device
- Downloading Projects to My iPad or iPhone
- Deleting a Project Permanently for All Users
