Sharing my project with other users
Adding team members on the website
Adding team members on iOS
Adding team members on the Windows app
Importing team members from other projects
Understanding PlanGrid's permission levels
Managing user permission levels
Managing user permission levels on the web
Managing user permission levels on Windows
Sharing my project with other users
In order to share your project with other PlanGrid users, you’ll need to add them to your project team. Team members can only be invited by a project Admin and can be assigned different permission levels. See more on on permission levels below.
With PlanGrid, all changes to the published project—published markups, RFI postings, Documents, and Sheet revisions—will automatically sync to all team members on that project.
Adding team members on the website
1. Login at app.plangrid.com and open the project you want to share.
2. Click on the "Team" icon
3. Click on the "Add Team Members" button
4. Enter the email address of the user you want to add and select their permission level
5. Click "Add Team Members"

Adding team members on iOS
1. Open the project you'd like to share
2. Select the "Team" tab across the bottom
3. Tap the "add user" icon in the upper center
4. Choose to add from your contacts or with a user's email
5. Type in the collaborator’s email address and then tap “OK.”
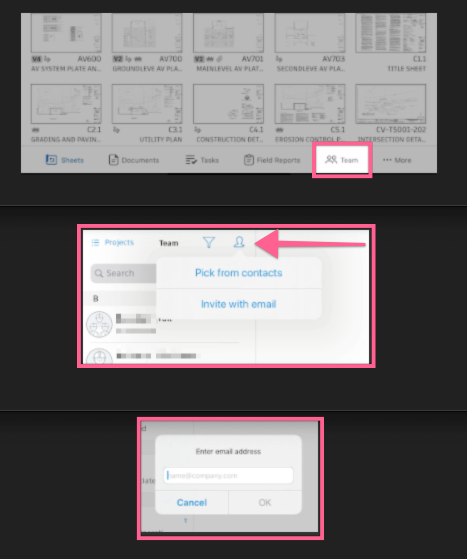
You can only invite one user at a time. To add several users from an existing project use the import tool below to import those users from other project teams. You cannot select a permission level when adding via mobile - added users will be given Collaborator permission which can be updated on the web.
If you add a user to the project team and see a gray “Invited” under their email address, it means they don’t currently have a PlanGrid account with that email address. Your invitation will send them an email prompting them to create an account.
Adding team members on the Windows app
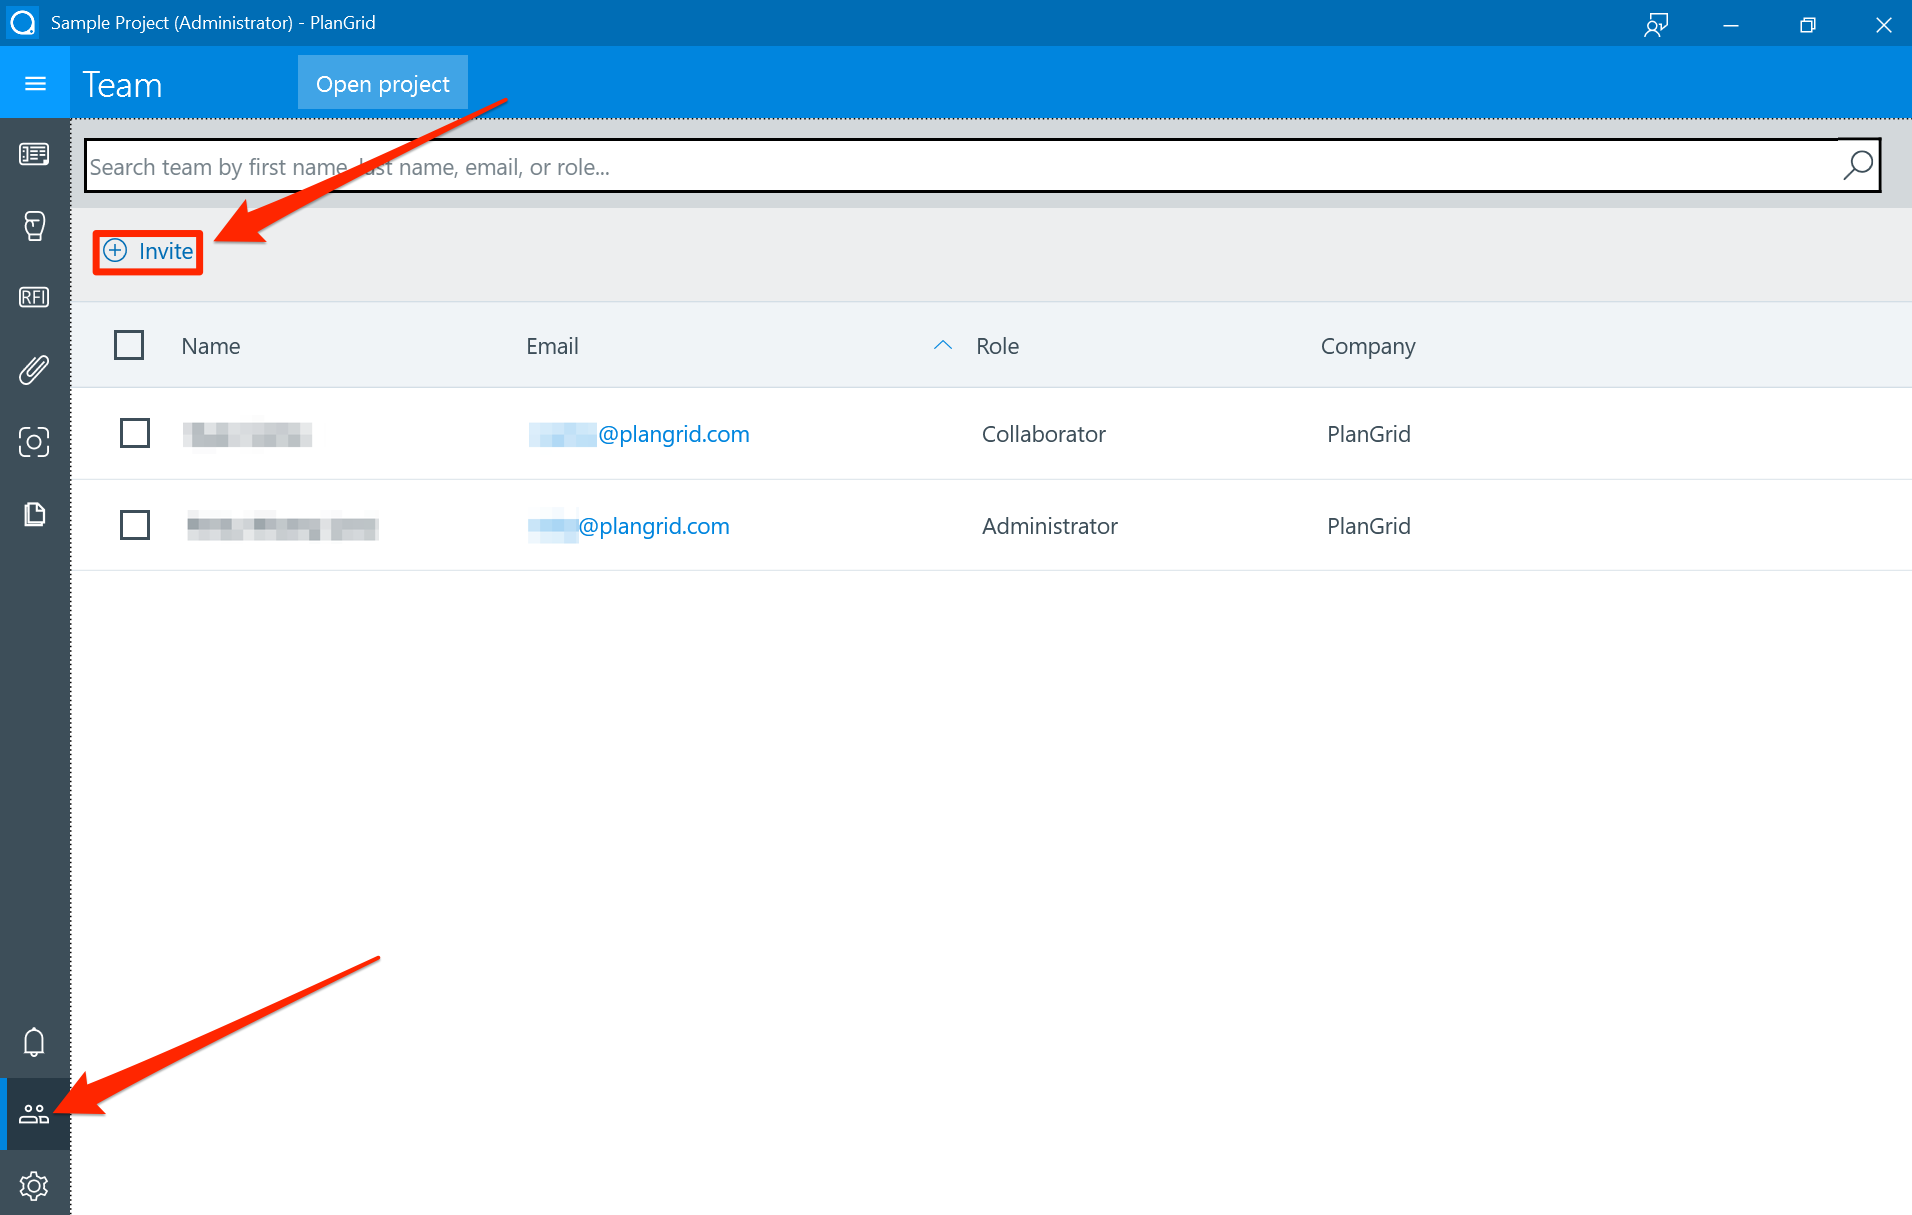
1. Open your project and click on the "Team" icon
2. Click "Invite"
3. Enter the email address or addresses, separated by commas or semicolons, of the user you want to add and click “Invite”
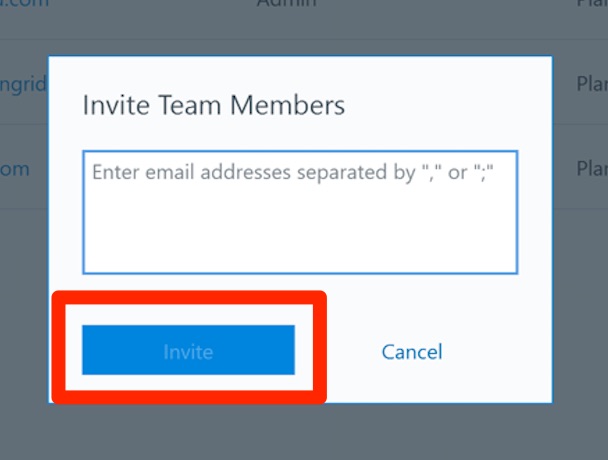
When you invite a team member on Windows, they’ll be added as a collaborator by default. For instructions on how to change permission levels, see Managing Permission Levels.
Importing Team Members from Other Projects
You can add several team members to a new project at once by importing them from another project. To begin, make sure that all of the team members have been added to a different project, which will allow you to bulk import them to a new one.
1. Open the project that you’d like to share with users
2. Click on the "Team" icon and click "Add Team Members

3. Select "Import from another project..."

4. Select the project from which you'd like to import
5. Select the members to import and click "Import," or click "Select All"

Understanding PlanGrid's Permission Levels
PlanGrid has three user permission levels: Admin, Power Collaborator, and Collaborator. Every user has a permission level.
All team members can view and download sheets in a project, view published markups, create personal markups, and access and view all PlanGrid RFIs. In addition, all team members have access to Progress Photos and Issues by logging into the project on the website.
Permission levels are specific to each project and need to be changed within each project, even if the same user is in multiple projects.
Admin: Has full rights and powers within the project, can upload and delete sheets and documents, and can manage the project team, can edit any Task, even if the user is designated as a Watcher.
Power Collaborator: Can share notes with the team but cannot upload or delete drawings, project documents, or team members, can edit any Task, even if the user is designated as a Watcher.
Collaborators: Read-only. Can view all sheets, documents, and published markups. Can change an issue’s status when the issue is assigned to them. Cannot share notes with the team, add or delete sheets or documents, or edit the project team. This is the only permission level where a user cannot edit a Task.

If an project is organization-linked, the project admin will only be able to delete the project if they are an organization admin as well.
Managing User Permission Levels
Managing permission levels on the web
A project Admin is able to manage permission levels and remove users from a project. To begin, open the project on the website.
1. Select the "Team" tab
2. Select the user whose permission level you'd like to change

3. Select the new permission level in the “Permissions” drop-down menu

4. Click "Save"
To remove a user from a project, select the user from the Team menu, choose “Remove From Project,” and confirm the removal.

Managing user permission levels Windows
A project Admin is able to manage permission levels and remove users from a project. To begin, open the project.
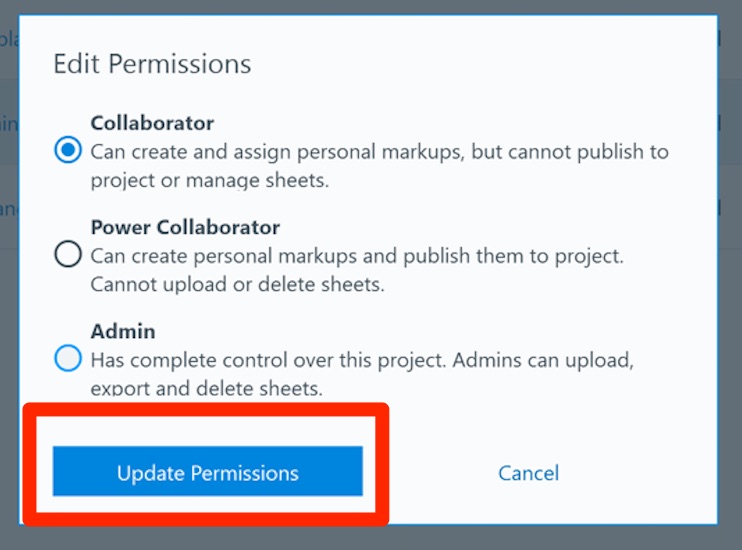
1. Check the box next to the team member you’d like to manage and click “Edit Permissions.” You can also select multiple team members and edit their permission levels at the same time.
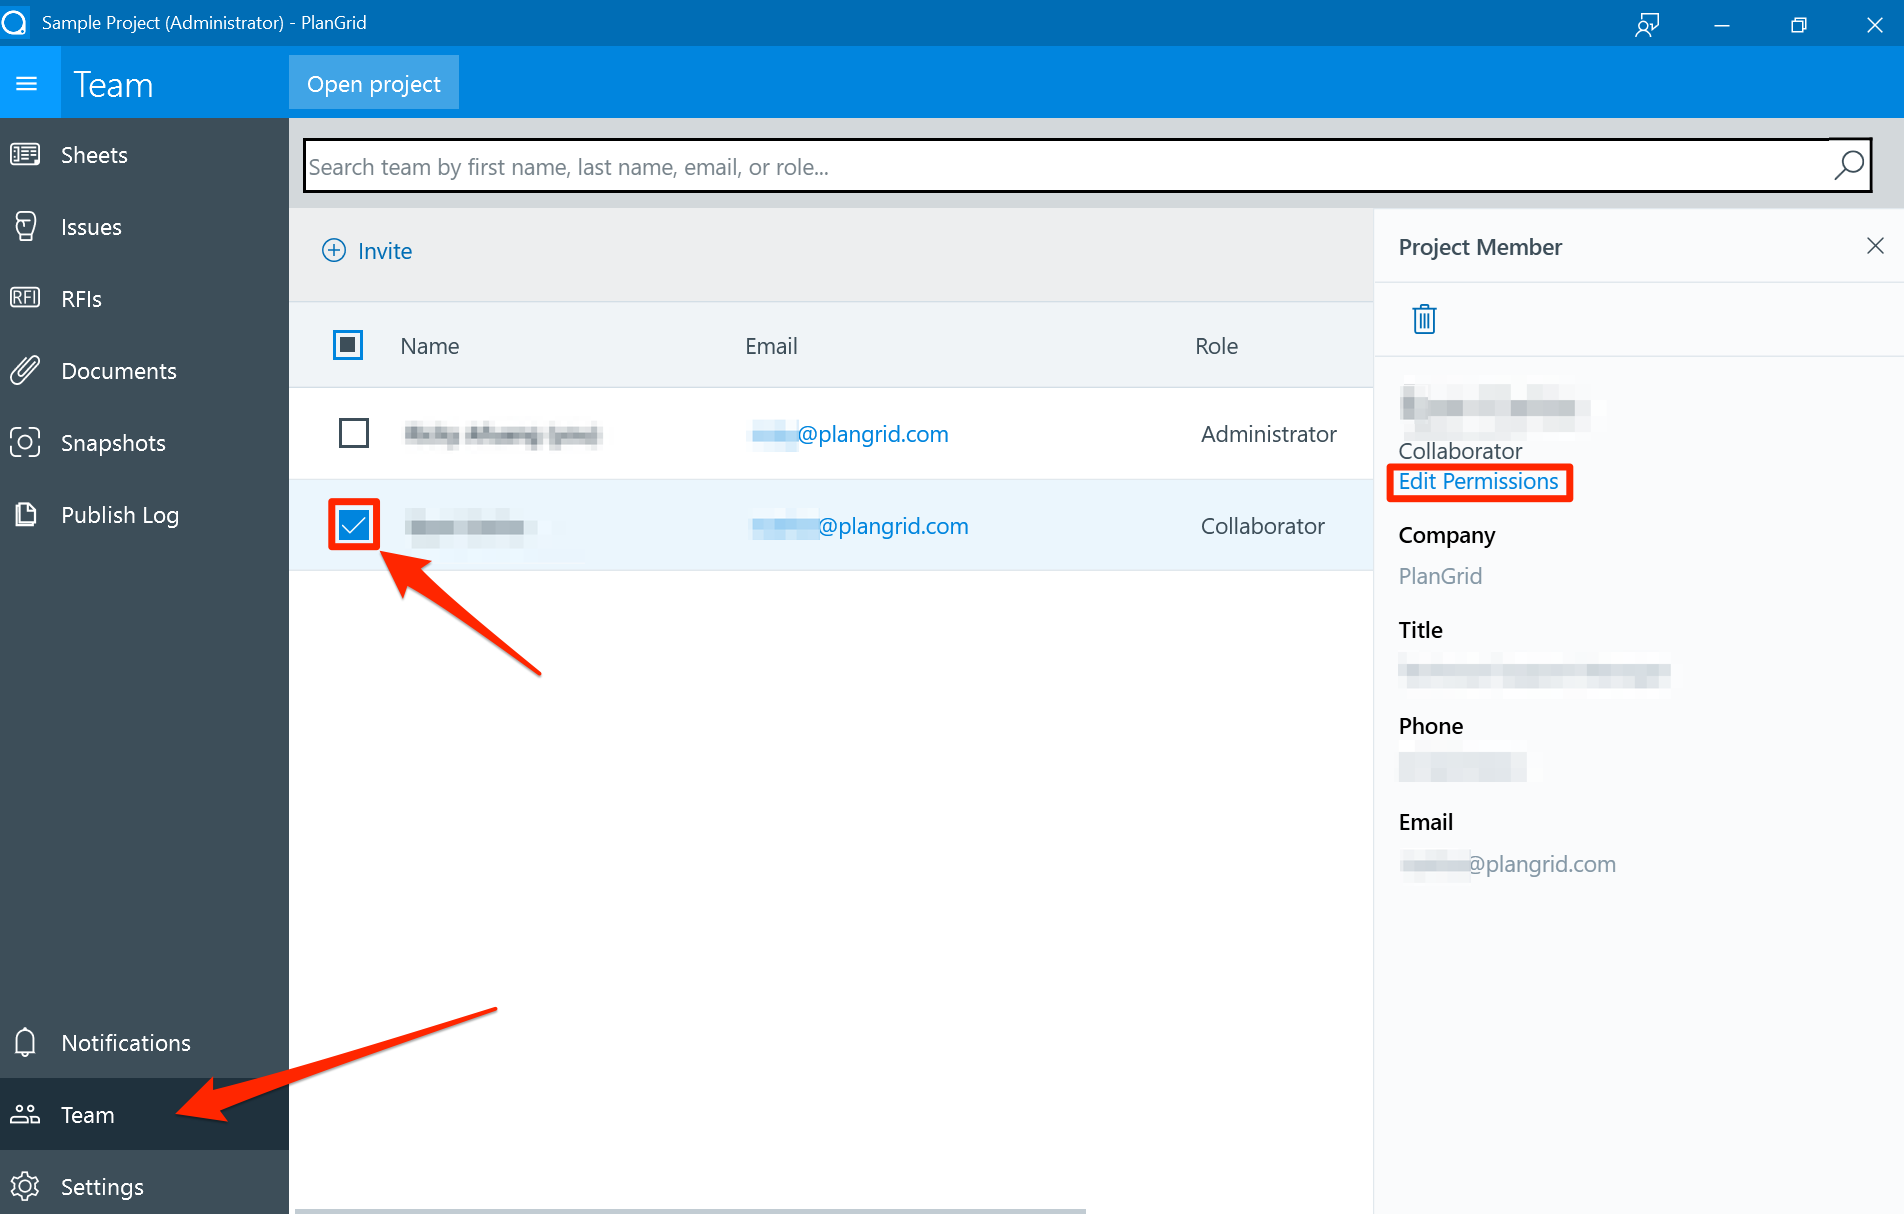
2. Select the new permission level, and click on "Update permissions."
To remove a team member from the project, select that user from the “Team” tab and click on the trash can.

Related Articles: