Featured:
Using PlanGrid Offline in the Field
Viewing Project and Sheet History
Viewing User Info
Customizing Your View on iOS
• Grid Size
• Sheet View
• Viewing Sheets Fullscreen
• Comparing Sheets
• Toolbars
Using the Recently Viewed Menu
• On iOS
• On Android
Using Markup Filters and Layers
• What Are Markup Filters/Layers
• Creating a Custom Markup Layers
• Using Layers to Filter Markups
Using PlanGrid Offline in the Field
You do not need Wi-Fi or a cellular connection to view drawings that are already downloaded to your tablet. However, to download projects to the device, or to update your plans with changes, you will need either Wi-Fi or a 3G/4G connection to download them to your device. Any markups made while offline will automatically sync to the cloud when a wi-fi or cellular connection is regained.
For more information about downloading projects and viewing PlanGrid offline in the field, go here.
Viewing Project and Sheet History
You can view a list of changes made to your project and sheets throughout the project lifetime on your iOS or Android tablet/ phone.
Please note: This feature is currently only available on the iOS and Android mobile apps.
1. To view the project history: open your project, tap the file cabinet icon in the top right-hand corner, and tap "History".


iOS Android
2. To view the sheet history: tap to view a specific sheet, tap the file cabinet icon in the top right hand corner, and tap “History” (iOS) or “Sheet History” (Android).


iOS Android
You can view a comprehensive list of changes made to the project or sheet. On iOS, tap the “>” to view more information about an event.

iOS

Android
Viewing User Info
To access your account info:
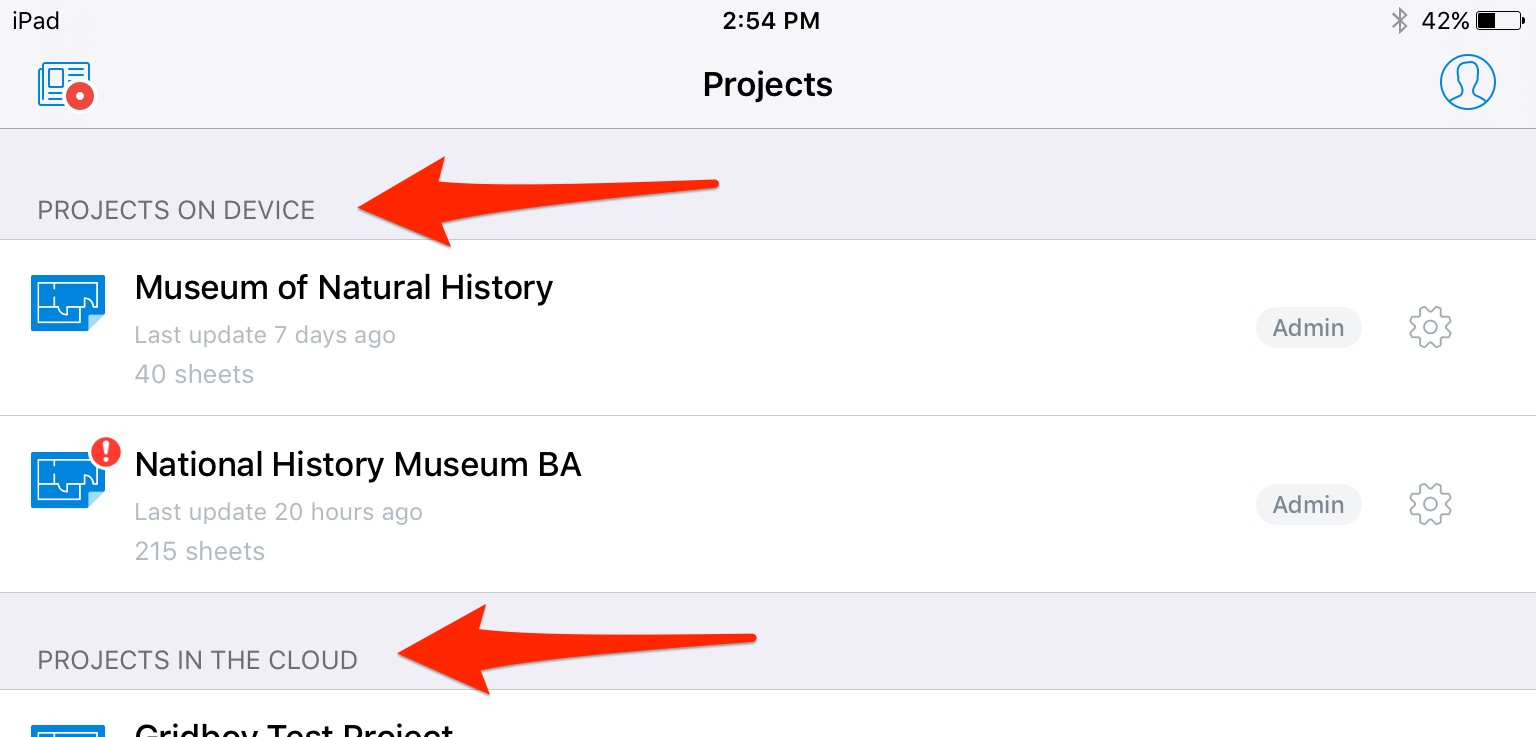
1. From the main projects screen, tap on the person icon in the upper right corner. On Android, tap the menu button.

iOS

Android
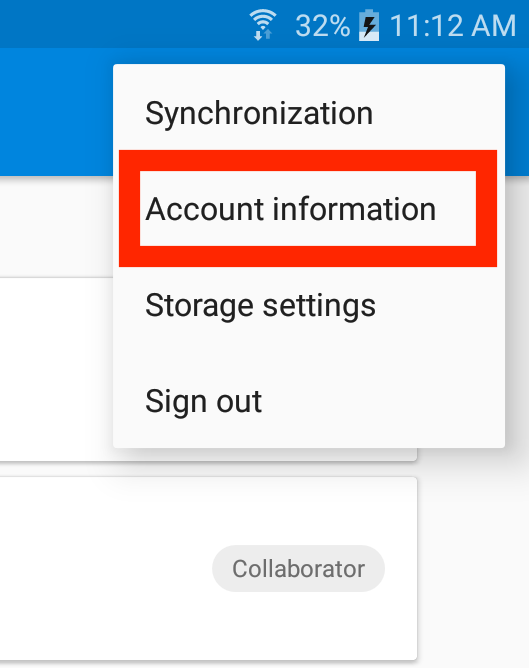
2. Tap “Account Info” on iOS and “Account information” on Android.

iOS

Android
3. In your account info you can view your subscription, name, email, company, job title, and phone. You can also add and update your profile picture. For more information about adding a profile picture, click here.
Grid Size
To make your thumbnails larger in grid view, use your fingers to expand the page. Place two fingers in the middle of the screen and pull apart and you will see the thumbnails get bigger.
Sheet View
The view menu allows you to manage your sheet view on the iOS app. To get to the view menu on iOS, tap on a sheet you want to view and then tap on the “eyeball” icon.
Inside the view menu, you can view plans fullscreen, enter sheet compare, turn off or on toolbars.

Viewing Sheets Fullscreen
When viewing any sheet on the iPad, tap the "eyeball" icon to select which tools and toolbars appear. Tap the arrows icon to enter fullscreen, or selectively toggle the markups bar, mini-map, navigation, and details information from the screen.
The mini-map will always be disabled when you are viewing the sheet in its entirety, fully zoomed out.

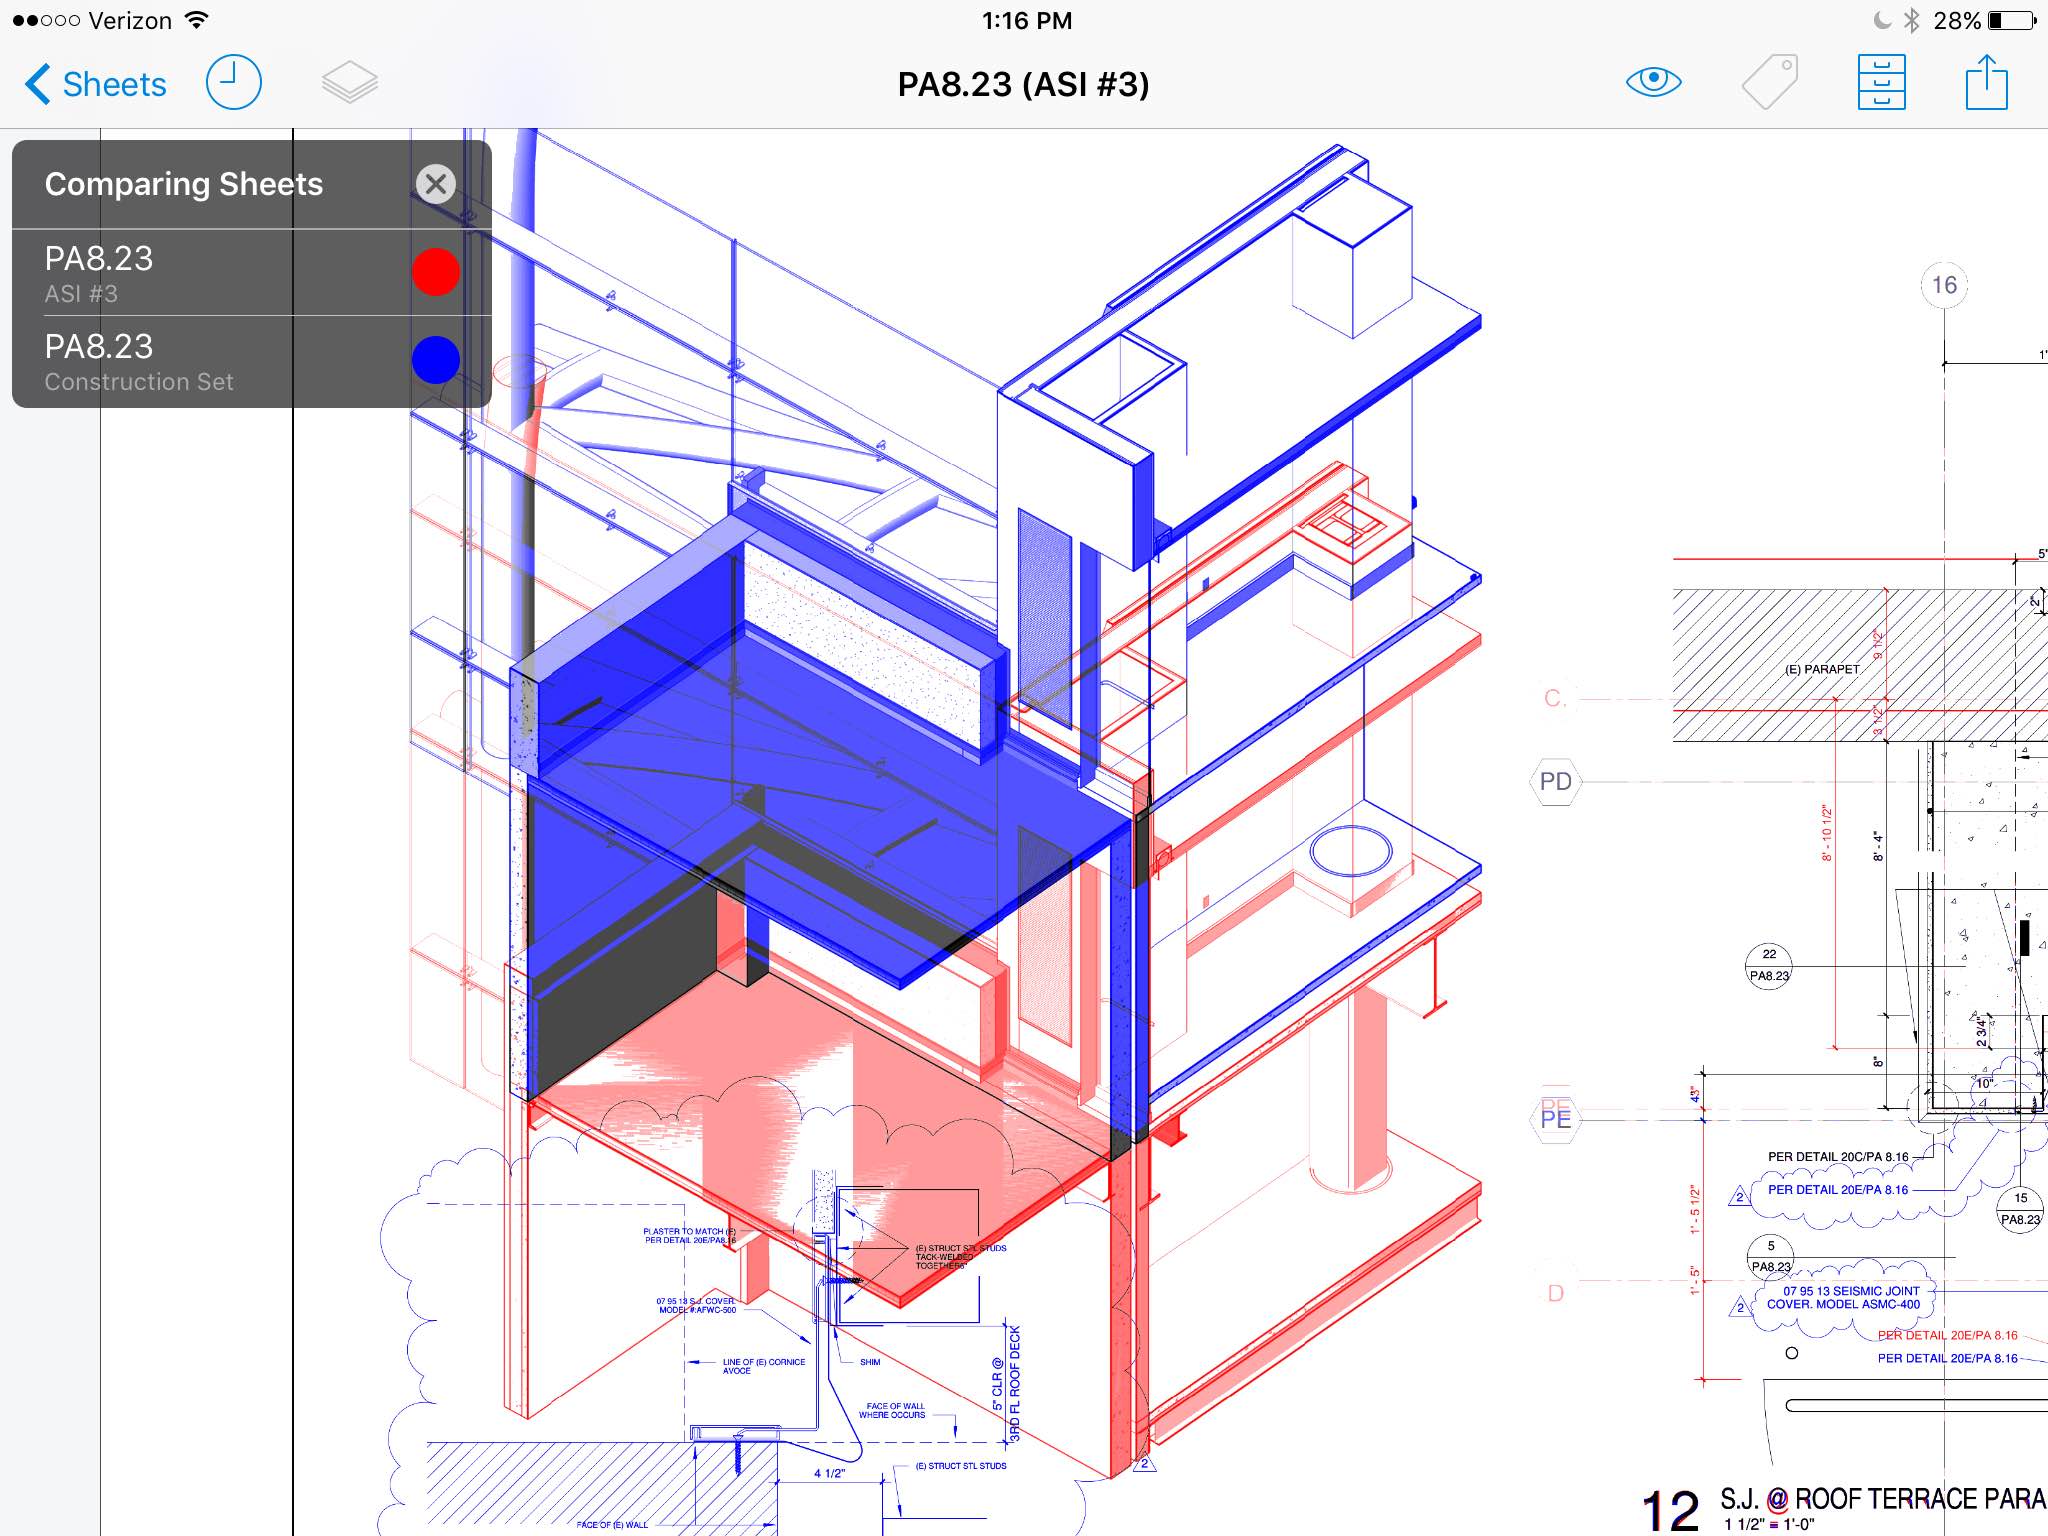
Comparing Sheets
With PlanGrid for iOS you can compare your sheets by overlaying one over the other. This can be done with different versions of the same sheet, or two unrelated sheets, and allows you to easily see the changes and differences between the sheets.
For more information about sheet compare on iOS, click here.
Toolbars

1. Markup Toolbar
2. Mini-Map
3. Navigation
To turn the toolbar off or on, just tap on the item.
Using the Recently Viewed Menu
If you tap on a detail callout and jump to a referenced sheet, it’s easy to go back to the sheet you were just viewing.
On iOS:
1. From the sheet, tap on the clock icon in the top left of the iOS screen.
2. Tap on the top sheet listed

On Android:
1. From Grid View, tap the Filters icon
2. Then, select "Recently viewed", and tap on the thumbnail view to view the filtered results.

Please note that this filter on Android will show recent sheets in alphanumeric order, and not in the order they were viewed in, so you’ll need to find the needed sheet from the filtered results and open it to view.
Using Markup Filters and Layers
What are markups filters/layers?
Layers are available on all of the PlanGrid apps - iOS, Windows and Android. To mark up your plans or share them without the clutter of too many markups, you can organize those markups into different layers and filter their visibility while viewing the sheet. We show all markups by default, but once you group markups into custom layers, you can turn the visibility of those layers on or off.
Markup layers make it easy to group specific markups together. If you group published markups onto a custom layer, that layer will be shared with your entire project team on the PlanGrid apps. To learn more about published markups, and how to publish markups to the project, go here.
The layer or layers you choose to view will maintain when navigating between sheets on the app.
Creating a Custom Markup Layer
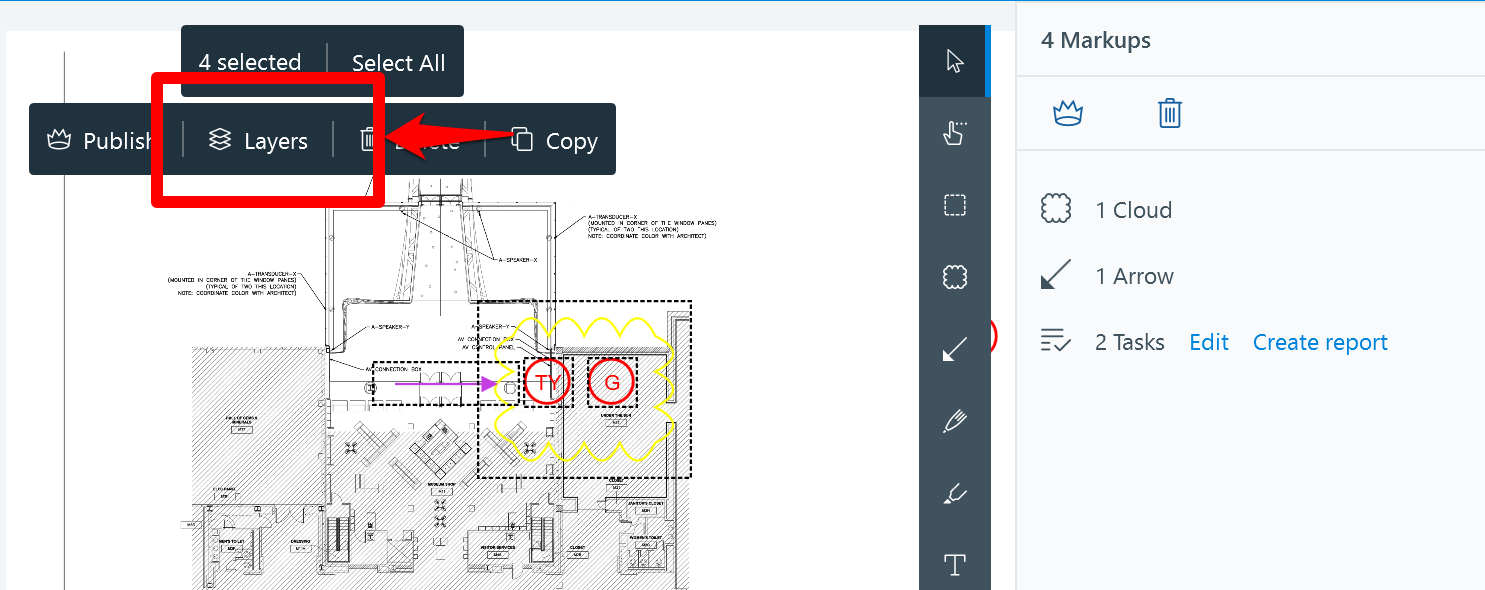
1. First, select the markups you want to group together by using the multi-select tool. Tap the tool, and draw a path over the markups you want to select. When at least one markup is selected, the menu to select layers will appear.
 iOS
iOS
 Android
 Windows
2. You can either choose to add the selected markups to a new layer, or tap one of the existing layers to add the markups to that layer.

3. If creating a new layer, you will next be asked to name the layer.

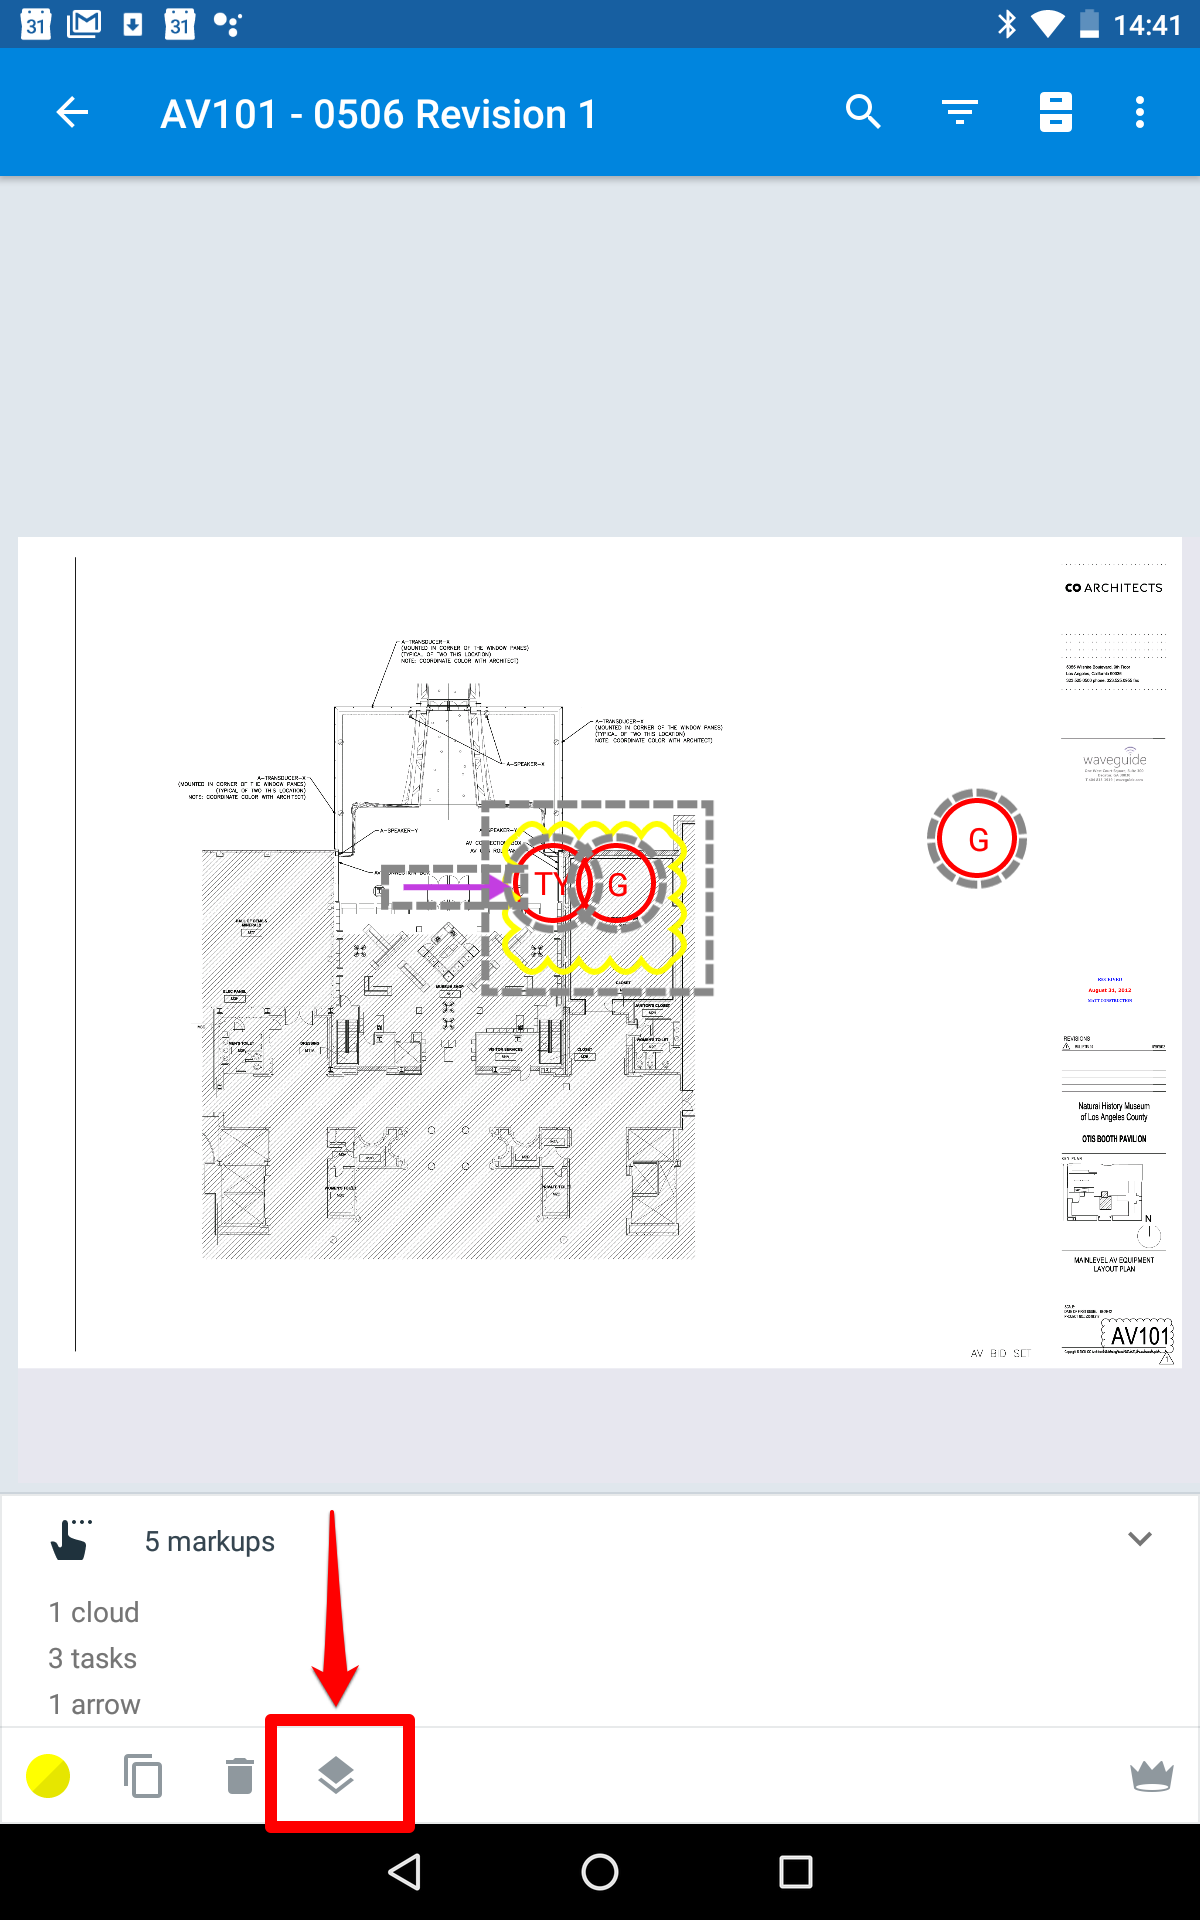
Using Layers to Filter Markups
PlanGrid's Markup Layers and Filters allow you to filter out specific markups so you can view just the mark ups you need in the field.
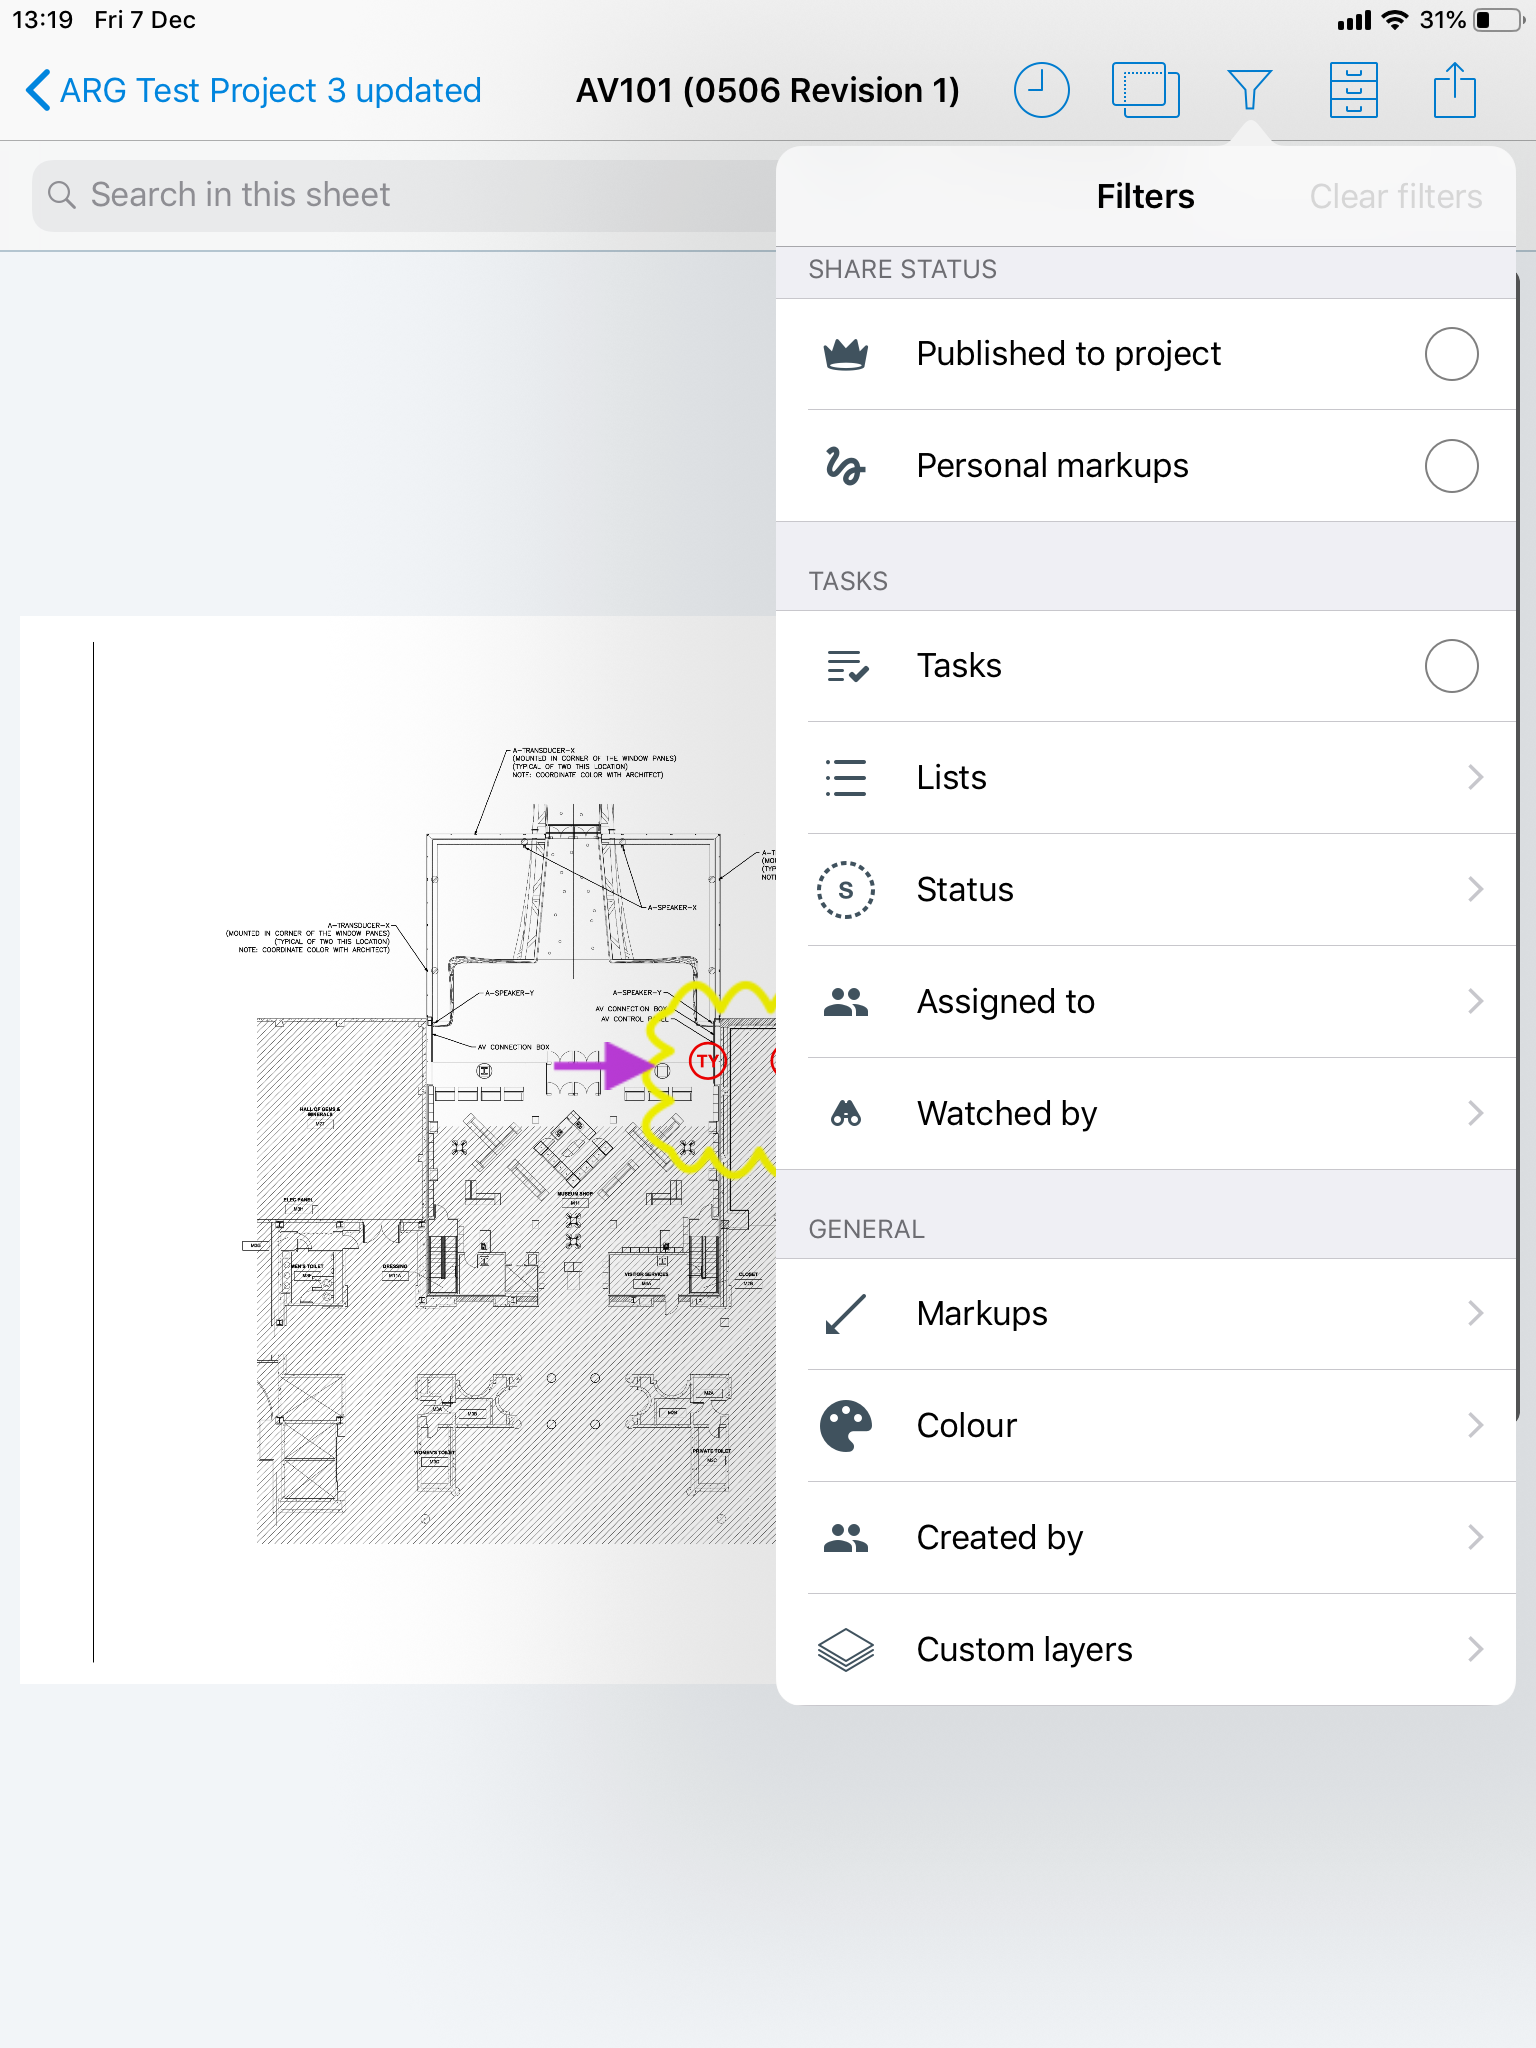
1. To open the Filters menu, tap filters on the top bar.
 iOS
iOS
 Android
 Windows
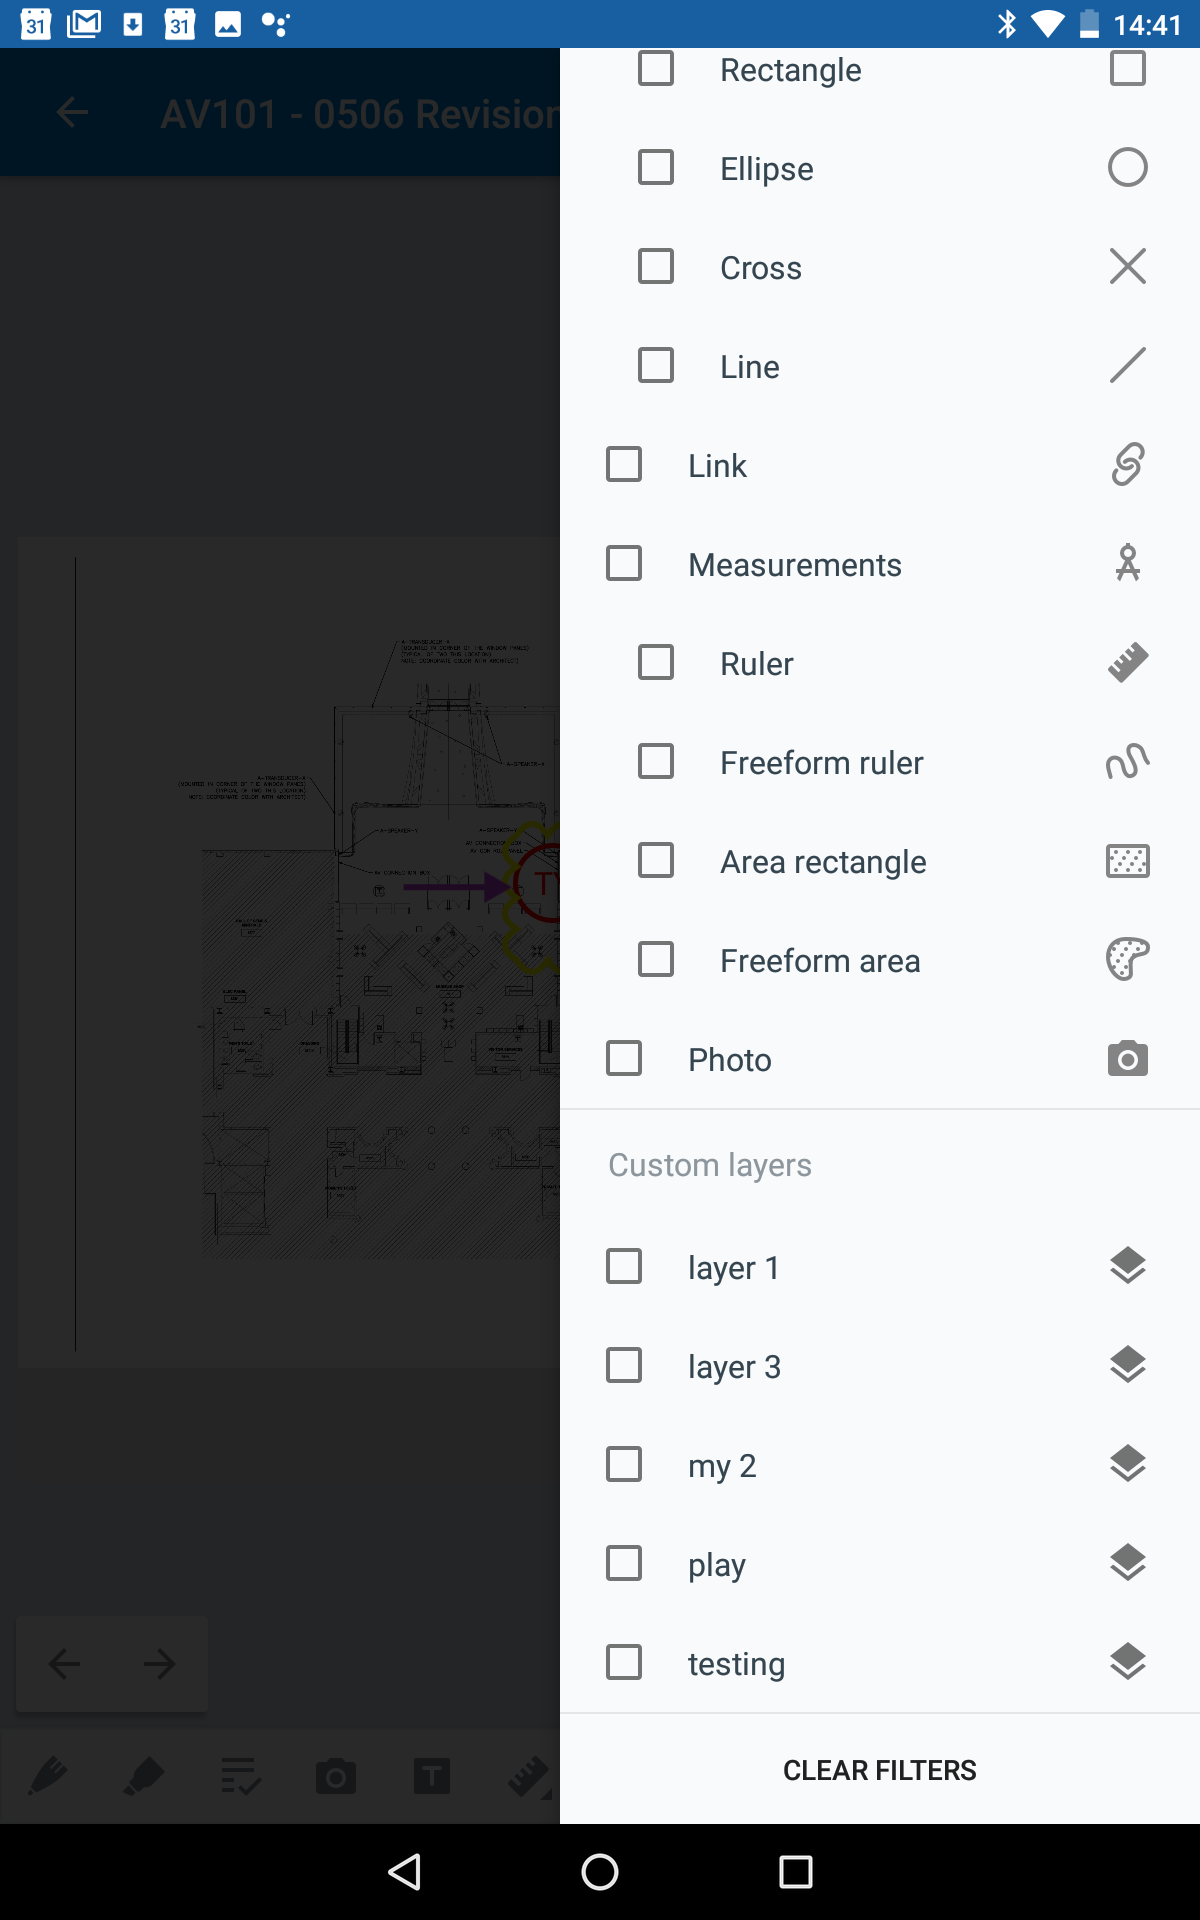
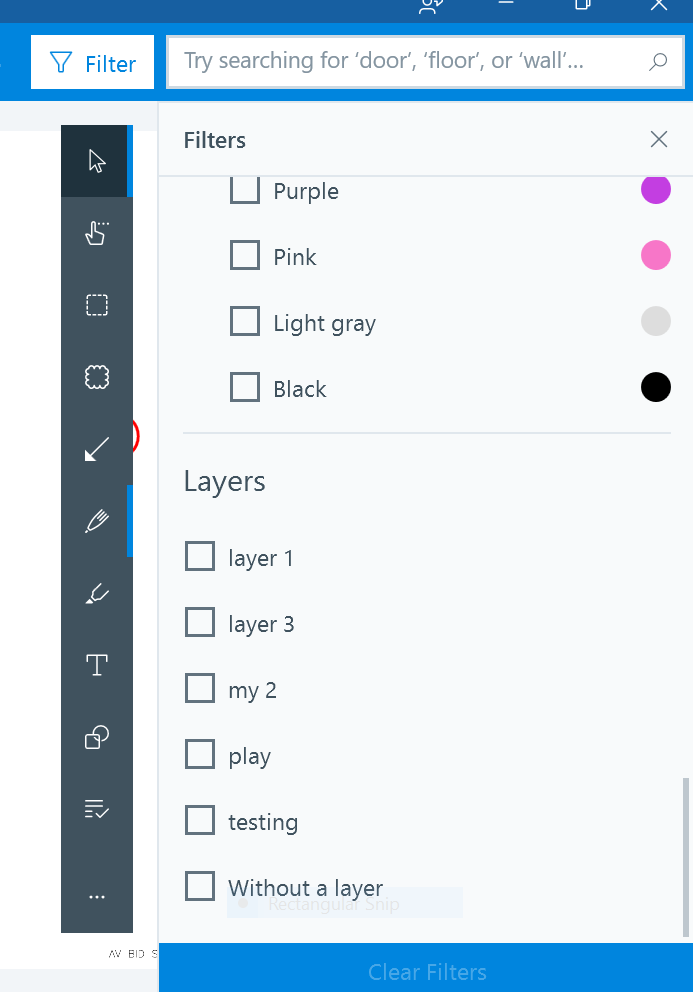
2. Check any filters you want to view. Choose from:
- Hide everything
- Share Status (Personal vs Published Markups)
- Issues (Issues, Status, Assigned to)
- General
- Markup Type (Cloud, Arrow, Ruler, Text, Photo, Line, Hyperlink, etc)
- Color of markup
- Created by
- Custom Layers
3. Once a filter is selected, you’ll see a “Filtering On” message at the bottom left of the screen. To turn off filtering and once again view all of your markups, tap the "x" next to "Filtering On".

Remove Layers
To remove layers from a project, you need to remove all the mark-ups from the sheet under that layer. This will be need to be repeated for all the sheets that the layer is placed on. Once all mark-ups are removed, navigate to the projects page and refresh the project.
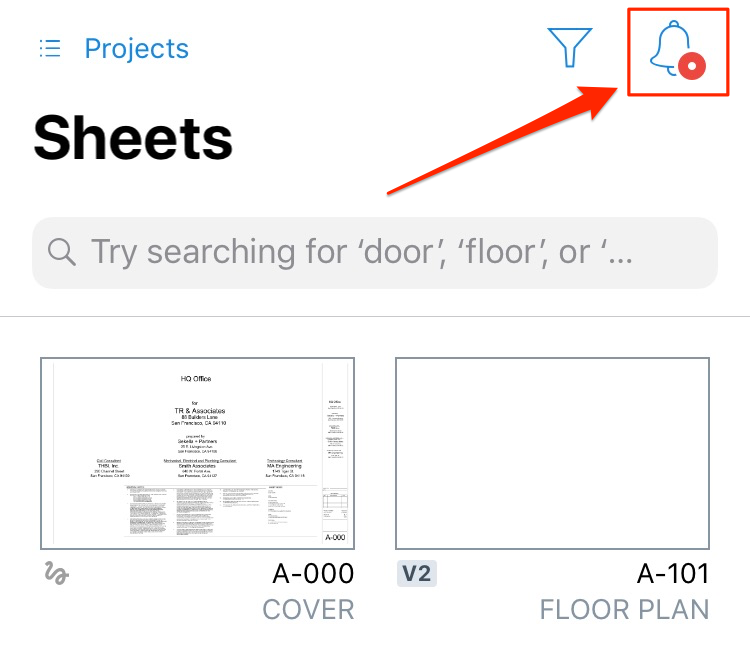
Upon accessing a project for iOS, you will notice the icon of a Bell on the top right. This icon will show a red dot when the following actions have been done:
• When you are @ mentioned in a comment
• Task is created
• Task is assigned to you
• Task status is changed
• Task is followed by you
• Sheets are published into the project
• Users are added to the project
• Users are removed from the project
• Sheetless Tasks are added to a sheet
• A Task on a sheet is removed, and becomes sheetless
Related Articles: