With PlanGrid for iOS, Windows and Android you can compare your sheets by overlaying one over the other. This can be done with different versions of the same sheet, or two unrelated sheets, and allows you to easily see the changes and differences between the sheets. You can also manually align sheets that were issued with different margins / formatting.***
Notes:
• The manual alignment feature does not work on iPhone 5c and below, iPad fourth generation and below, or iPad mini first generation.
Featured:
Comparing Sheets on Web
Comparing Sheets on iOS
Comparing Sheets on Windows
Comparing Sheets on Android
Comparing Sheets on Web
1. Open a sheet on the website to view, and then click the 'Compare Sheets' button at the top.

2. Please select the sheet and version you wish to overlay. It will offer any other version of that sheet (if it exists). You can also type in the search bar for a specific sheet, or scroll through the sheet list. Once you have found the intended result, click on 'Compare' at the bottom.

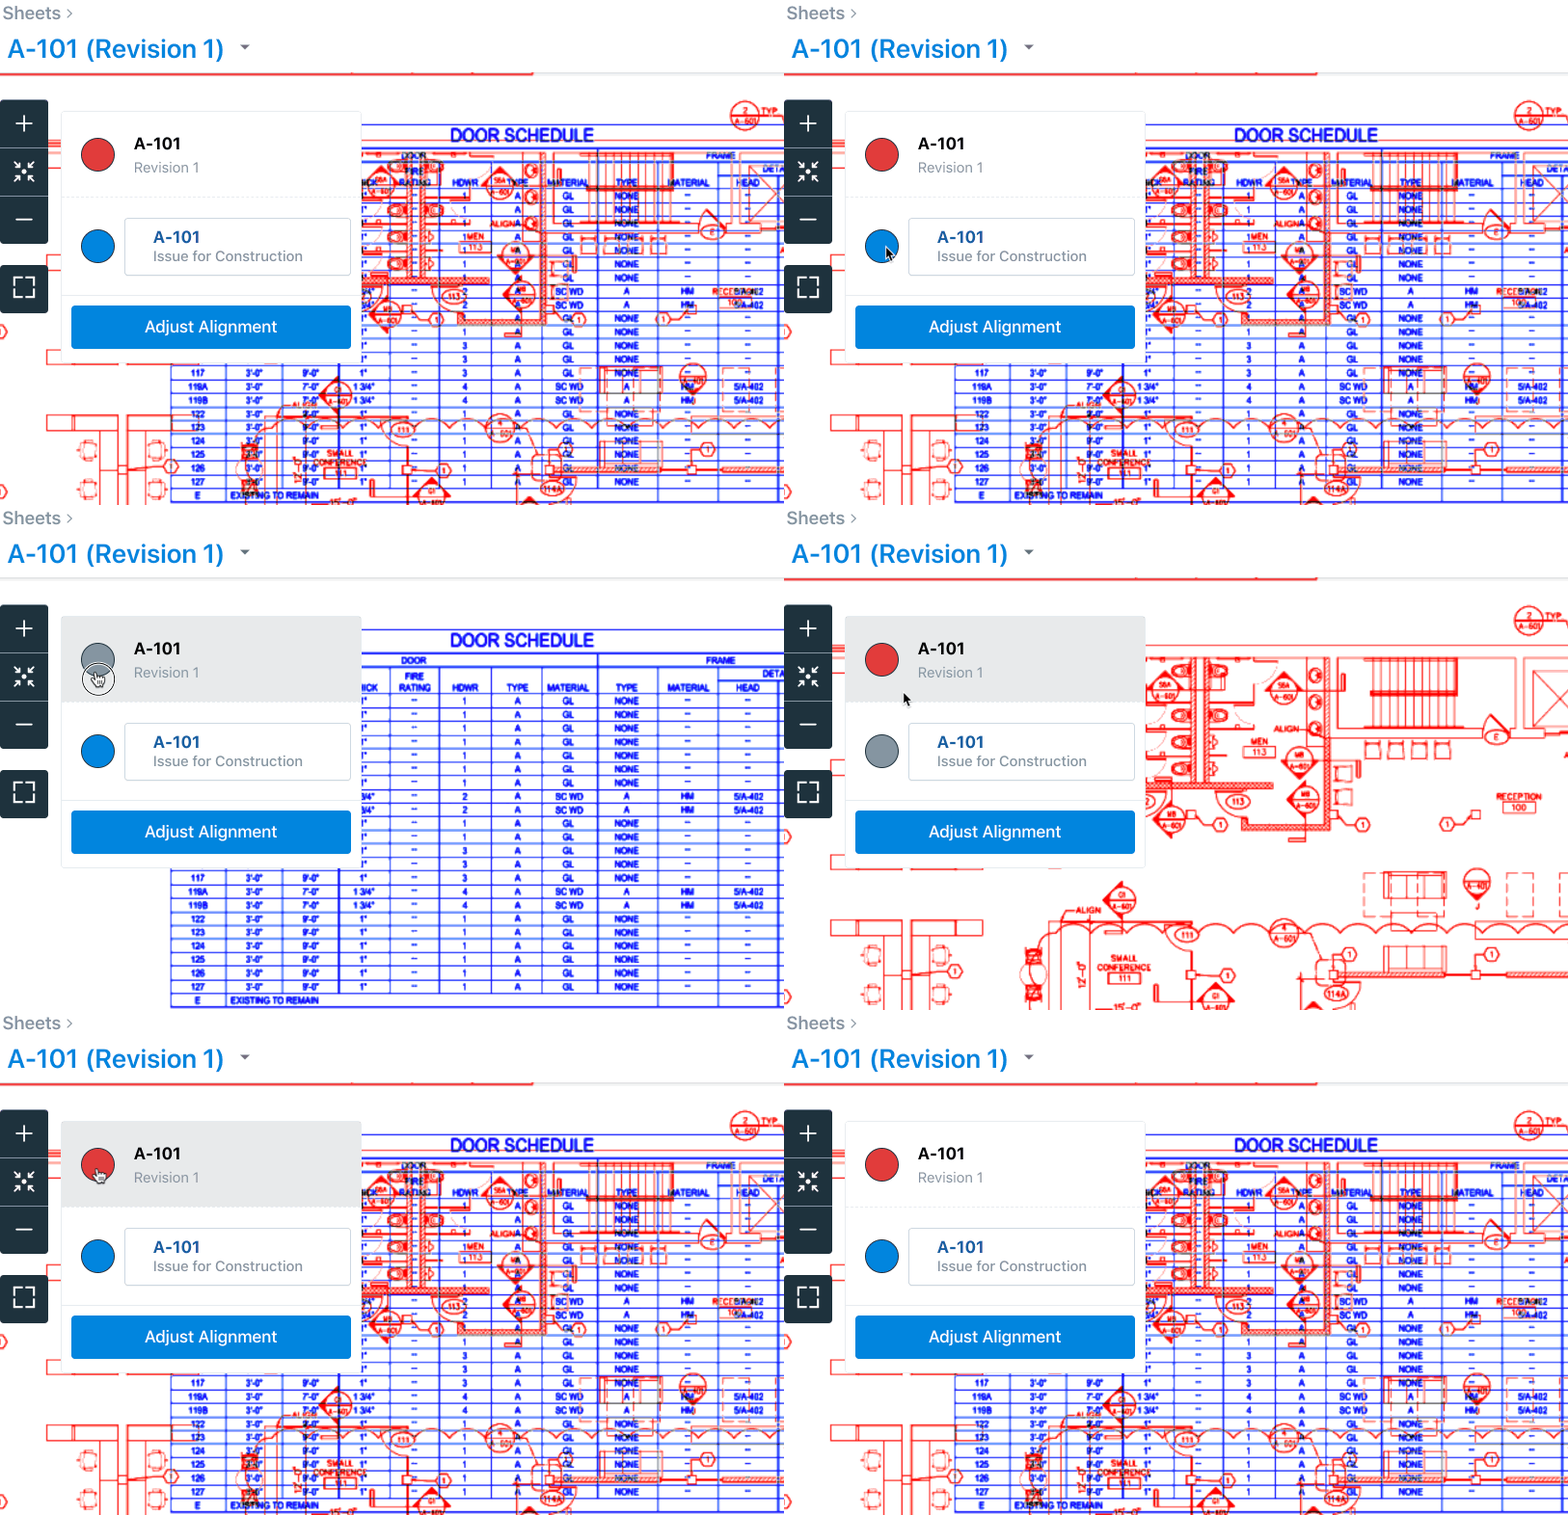
3. You can click on the bubbles pointed below to activate each sheet, as they will be separated by Red or Blue. If you click on the same bubble twice, it will enable both colors. This is where you can use the "Adjust Alignment" button to drag them into precise alignment. Please see the additional GIF below, if need be.

4. To export the sheet, please click the Export button on the top right. The "Full Sheet" option will export a full sized PDF showing the compared sheets.
At this time, this Full Sheet Compare export is currently available on Chrome, Firefox, and Safari.
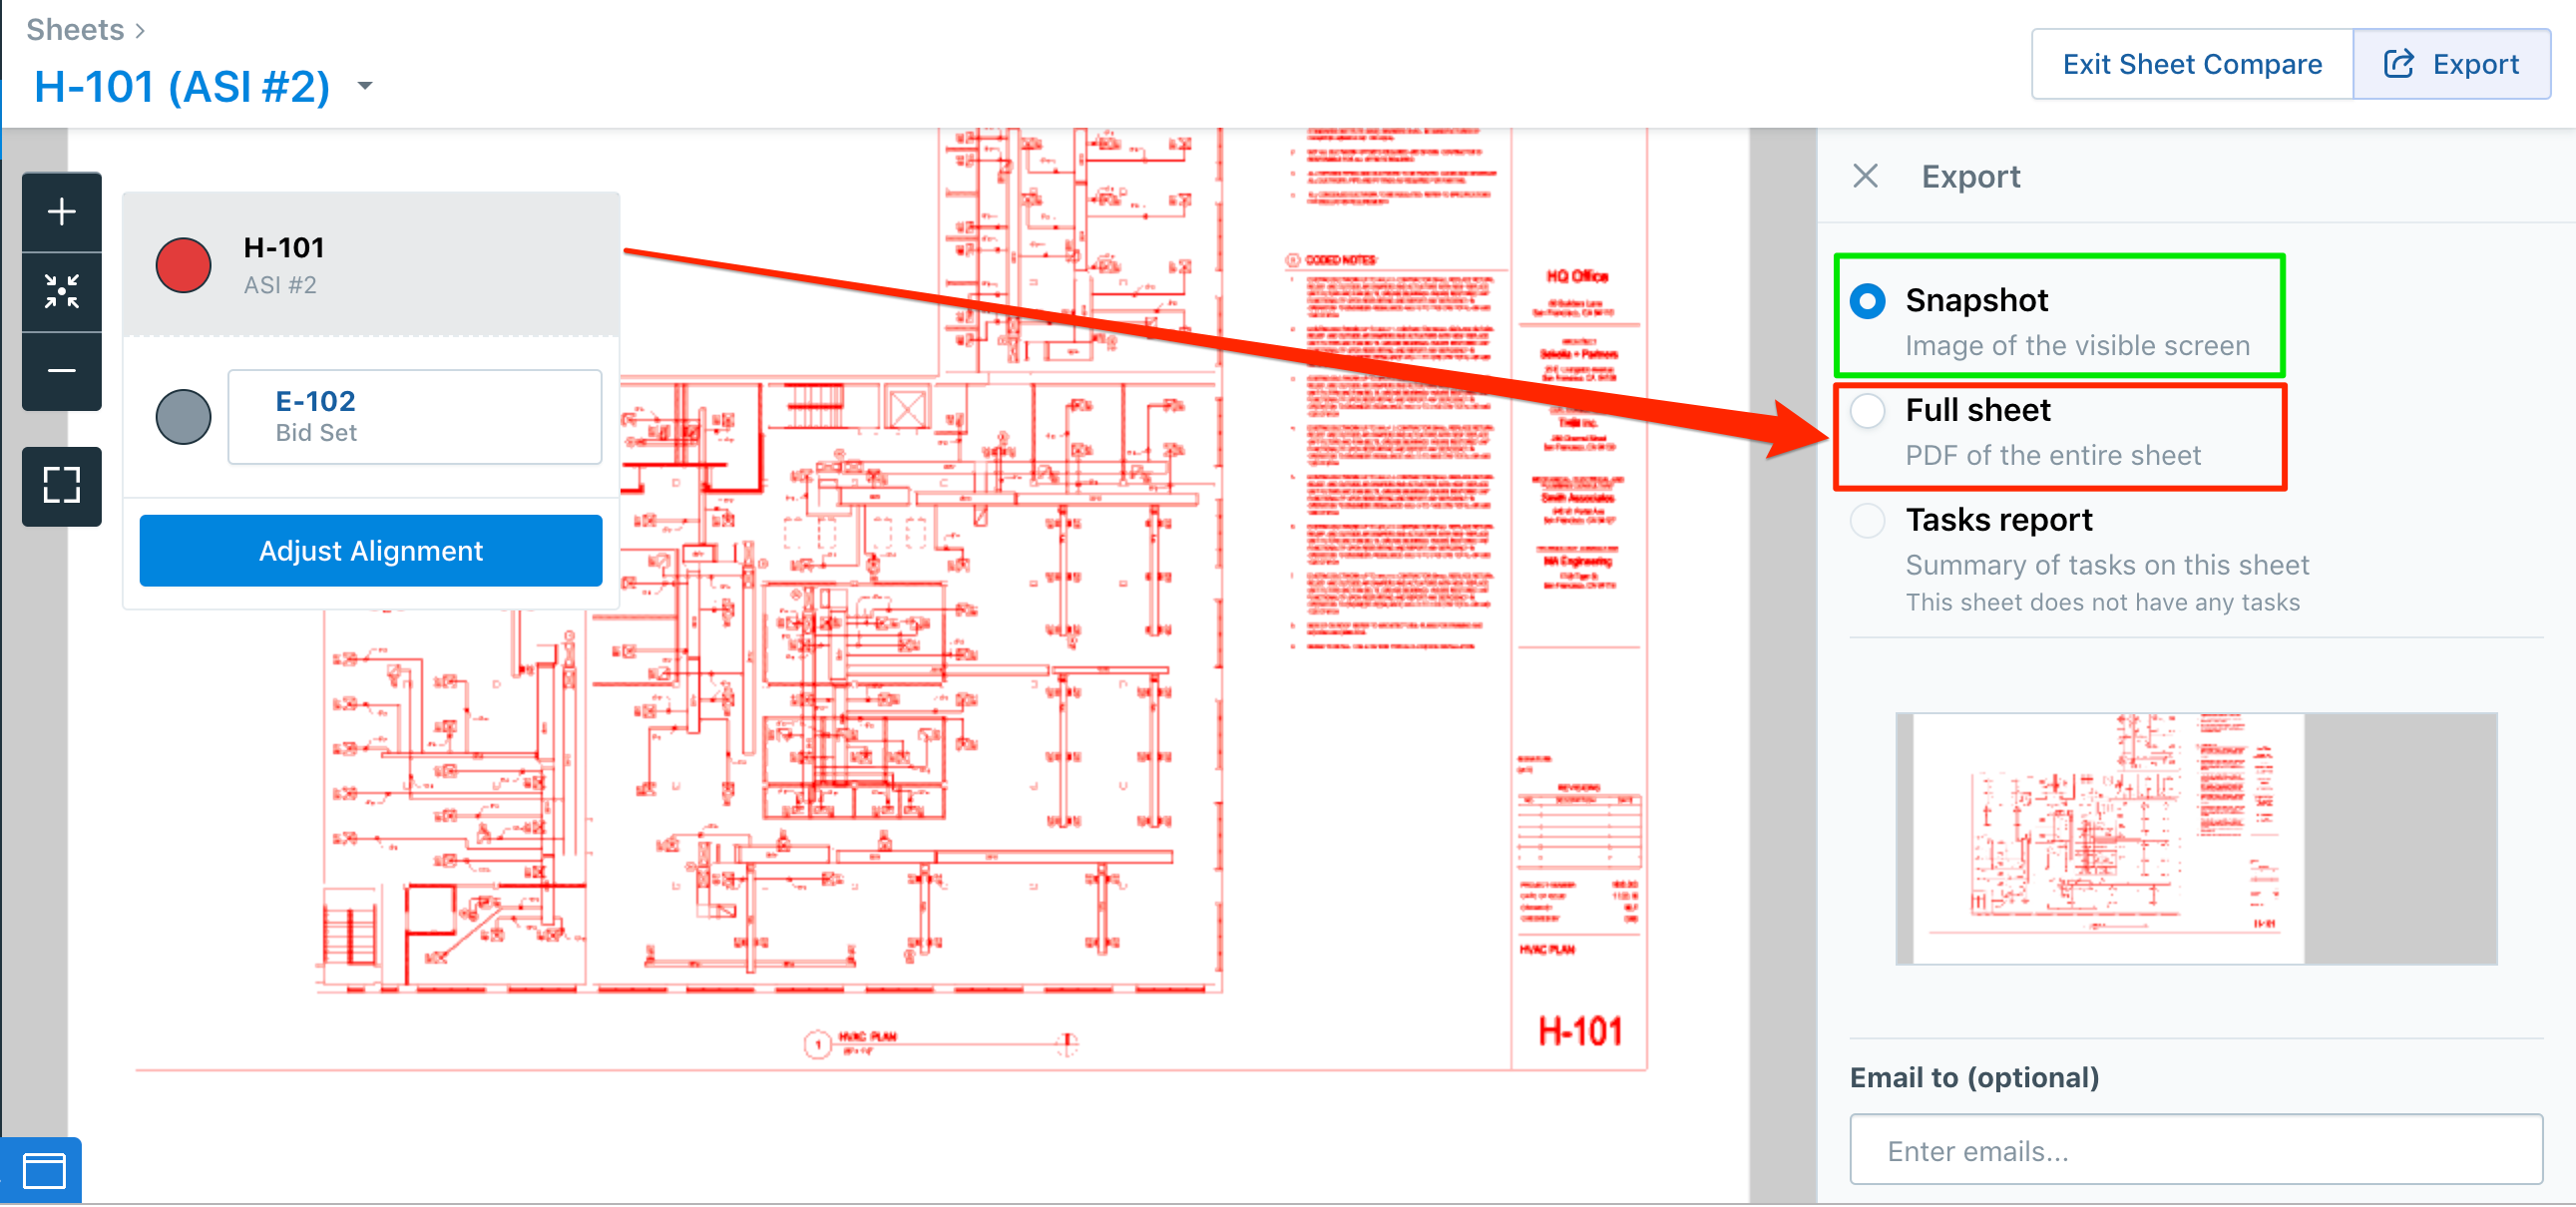
To leave Sheet Compare, please click on the Exit button to the left of the Export button.

Comparing Sheets on iOS
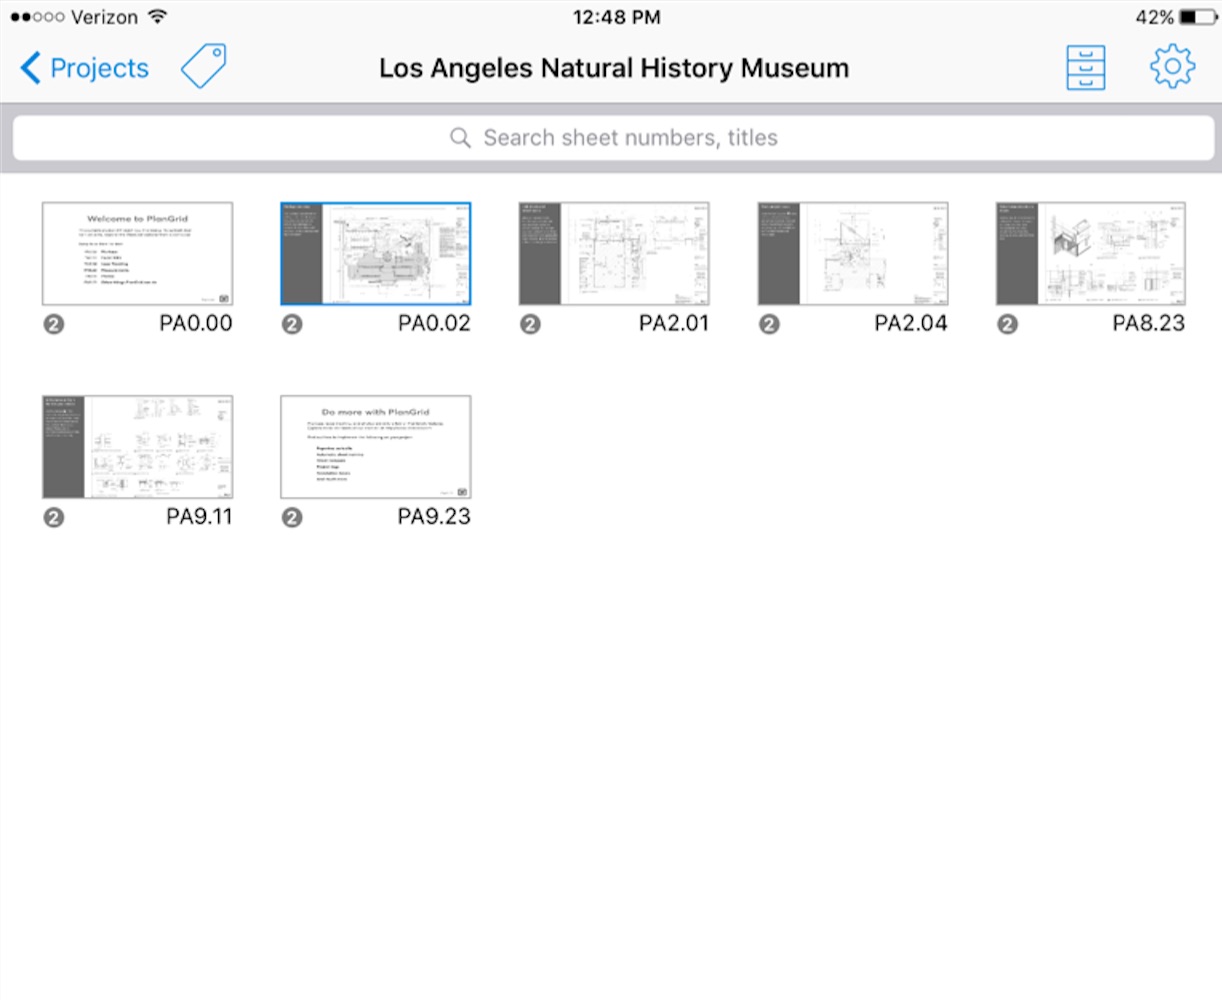
1. Open a sheet on the iOS app to view.
2. Tap the compare sheets button, and select the sheet and version you wish to overlay. To activate the search bar, begin scrolling through the list. You can then type in a sheet number to search.
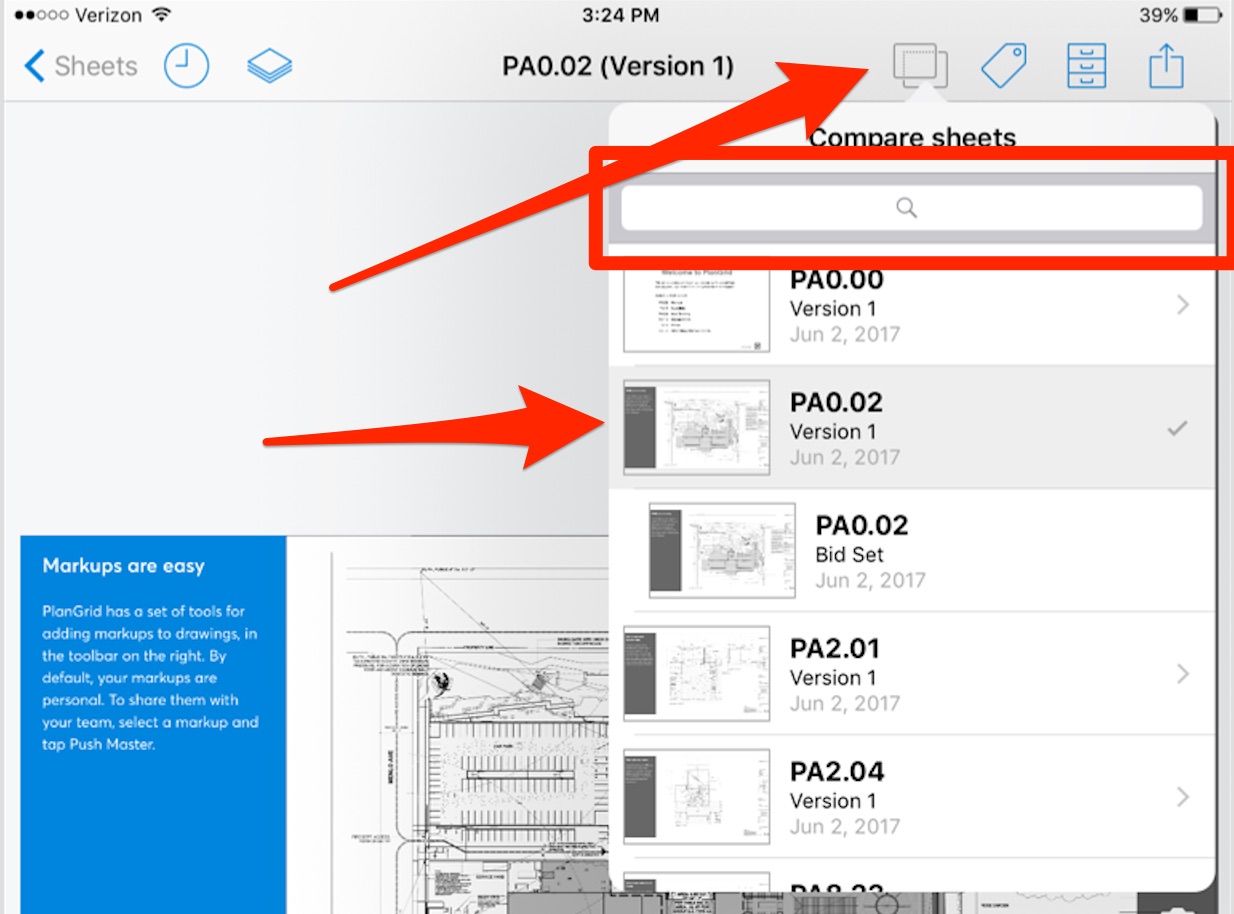
3. To access an older version of a sheet in the list, simply tap the ">" next to the sheet number.

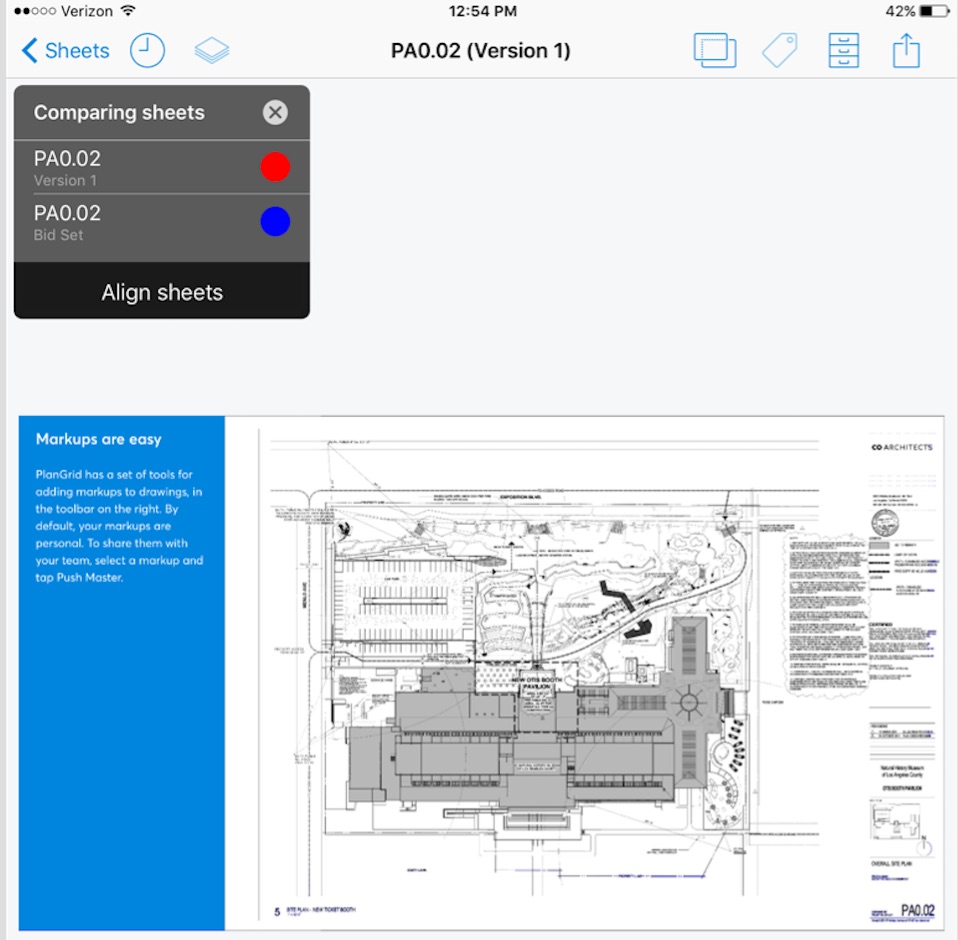
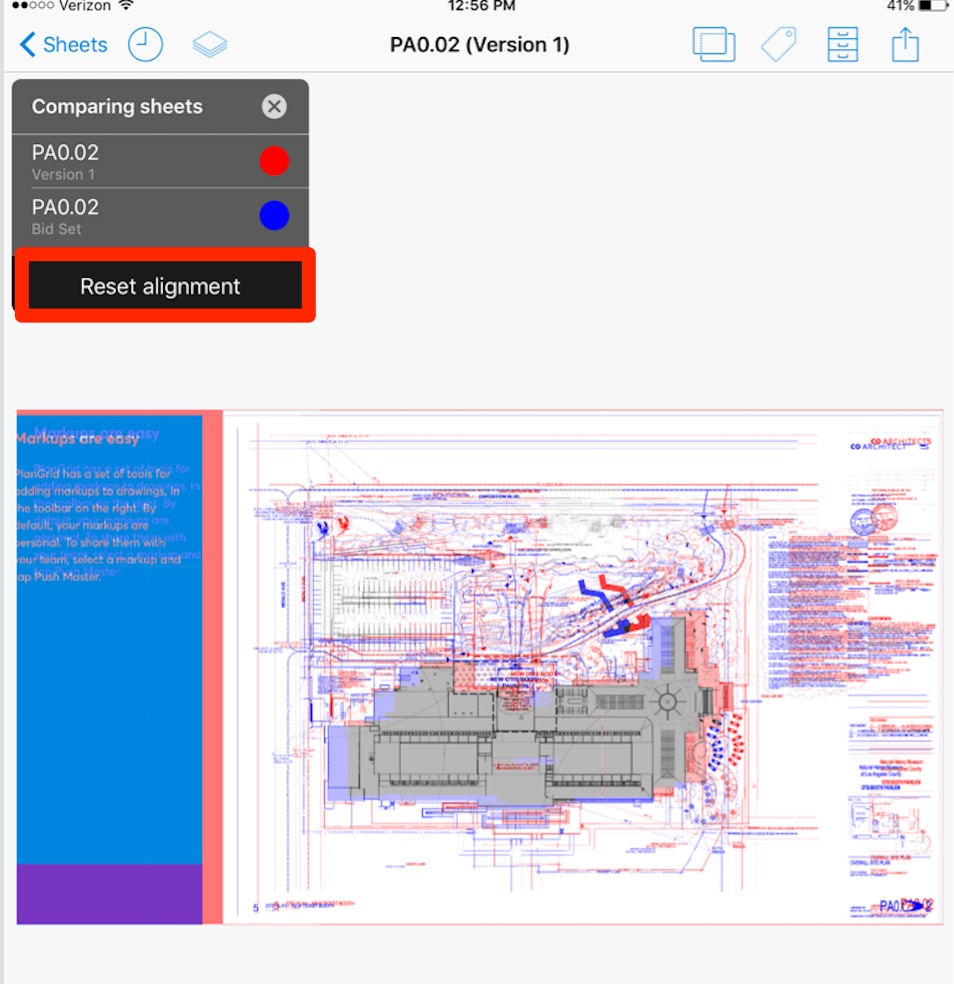
4. The sheets will be over-layed. To highlight the differences, one sheet will be highlighted in red, the other in blue.
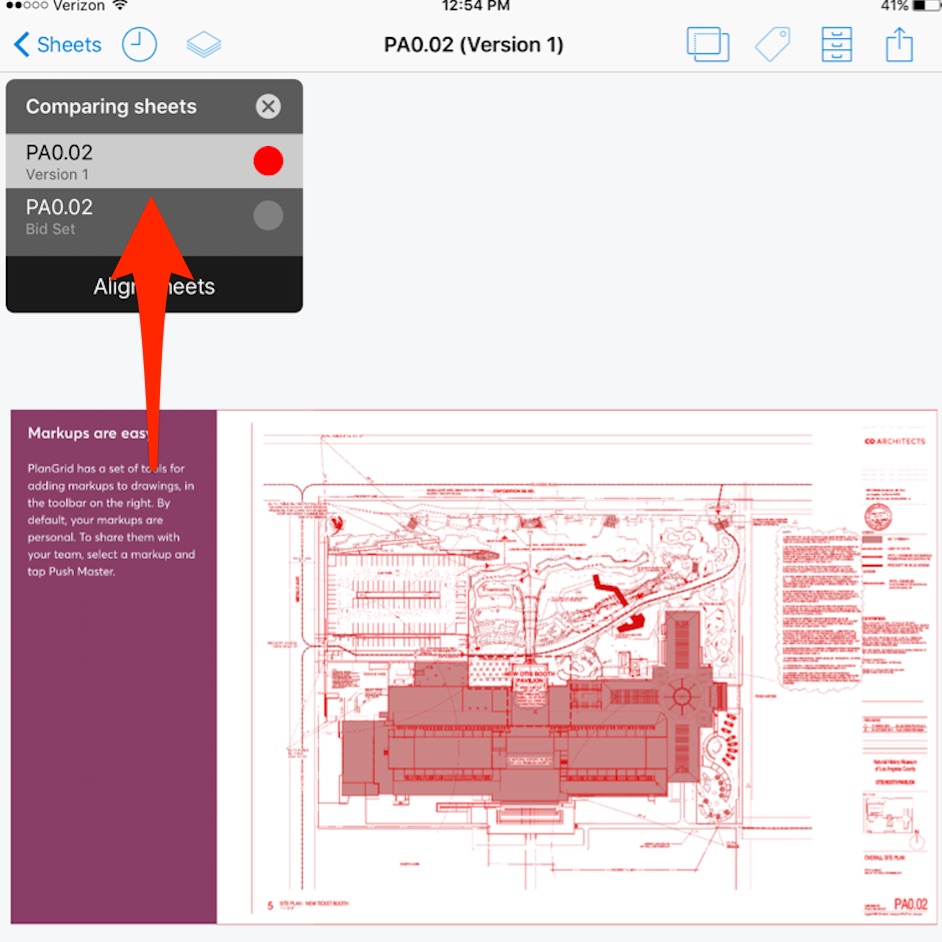
5. To highlight one sheet (and turn off the color for the other), simply tap the preferred sheet's number in the list in the upper left corner. Tap the currently highlighted sheet's number again to re-enable highlight on both sheets.
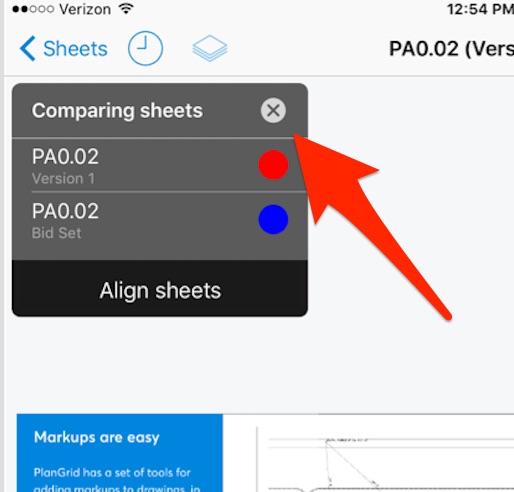
6. To end sheet compare and remove the overlayed sheet, tap the "x" in the Comparing Sheets menu in the upper left corner. You will again be viewing the original sheet.
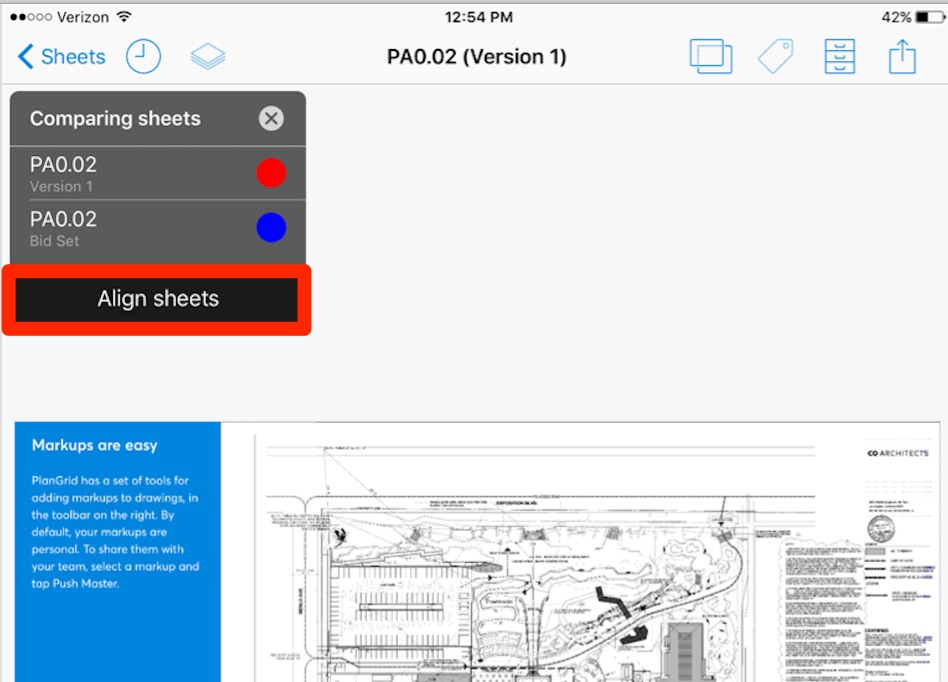
7. To manually align your sheets, click the Align Sheets button. This option appears once you've selected two sheets for comparison.
A circular window icon will appear over your sheet that allows you to focus in on a particular area and make alignment easier. Drag your finger over the screen to highlight a specific area - once your preferred area is in focus, click the blue check mark.
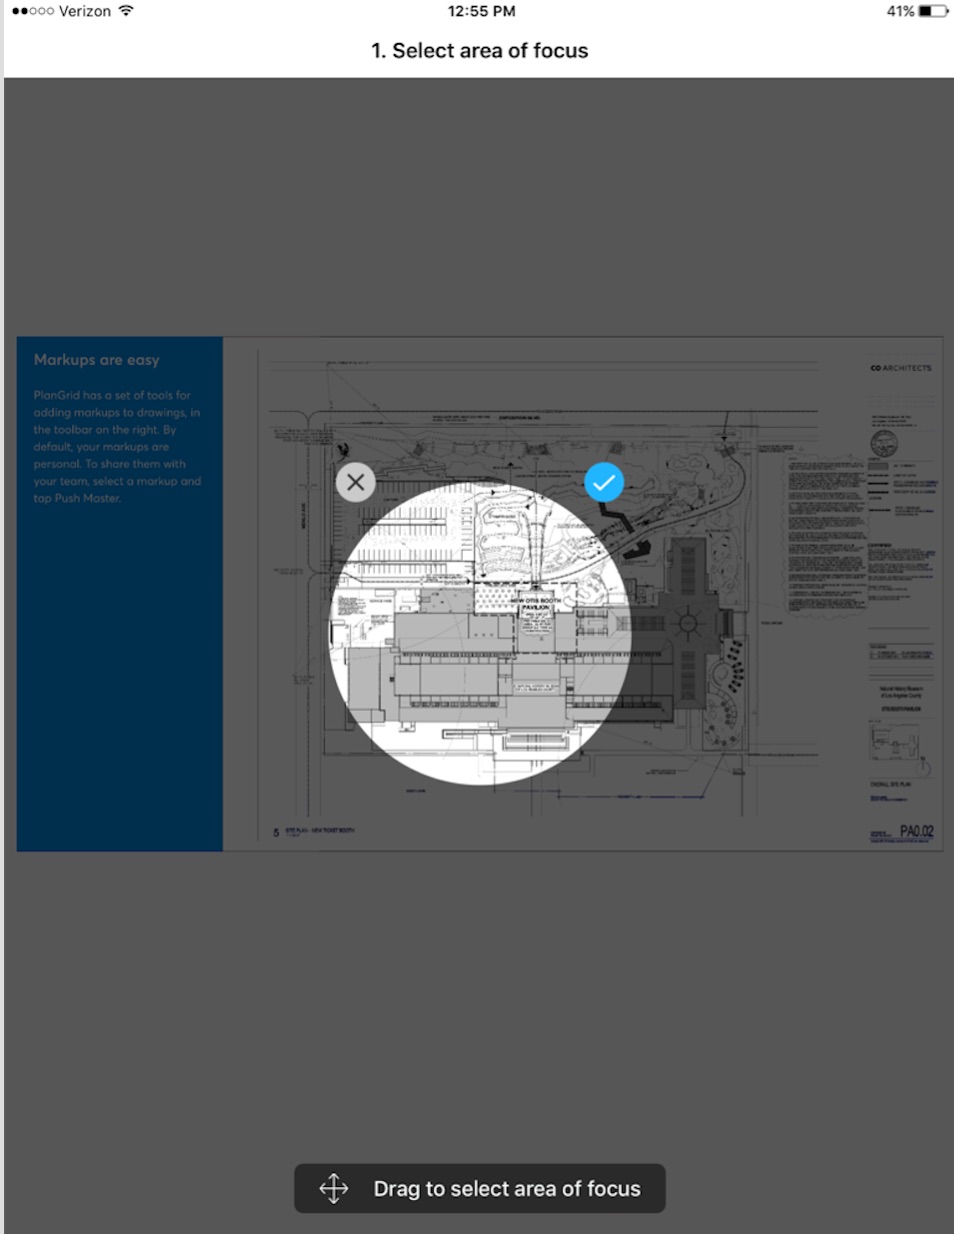
Next, click and drag on the screen to align your sheets. Properly aligned lines will appear black, and any lines that don't overlay exactly will appear either red or blue (which depicts an actual change in the drawings, or that your alignment can be more precise). Once the sheets are aligned to your preference, click Align.

Sheets are aligned
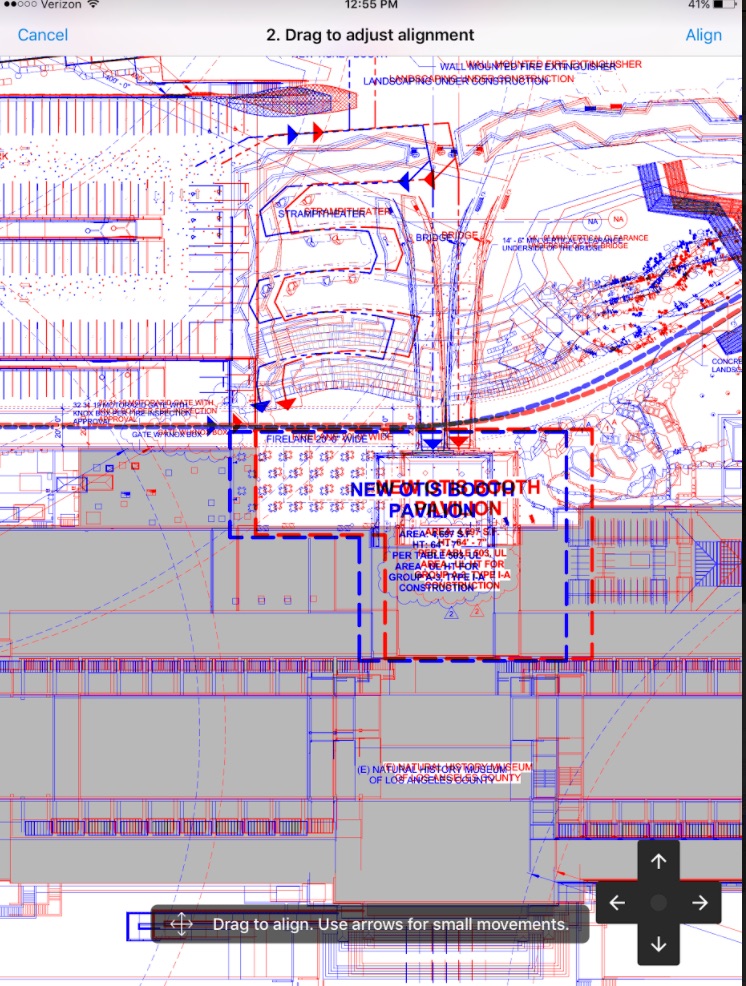
Sheets are not aligned
If you need to adjust your alignment, click the Reset Alignment button, then Align Sheets.
Comparing Sheets on Windows
1. Open a sheet on the Windows app to view.
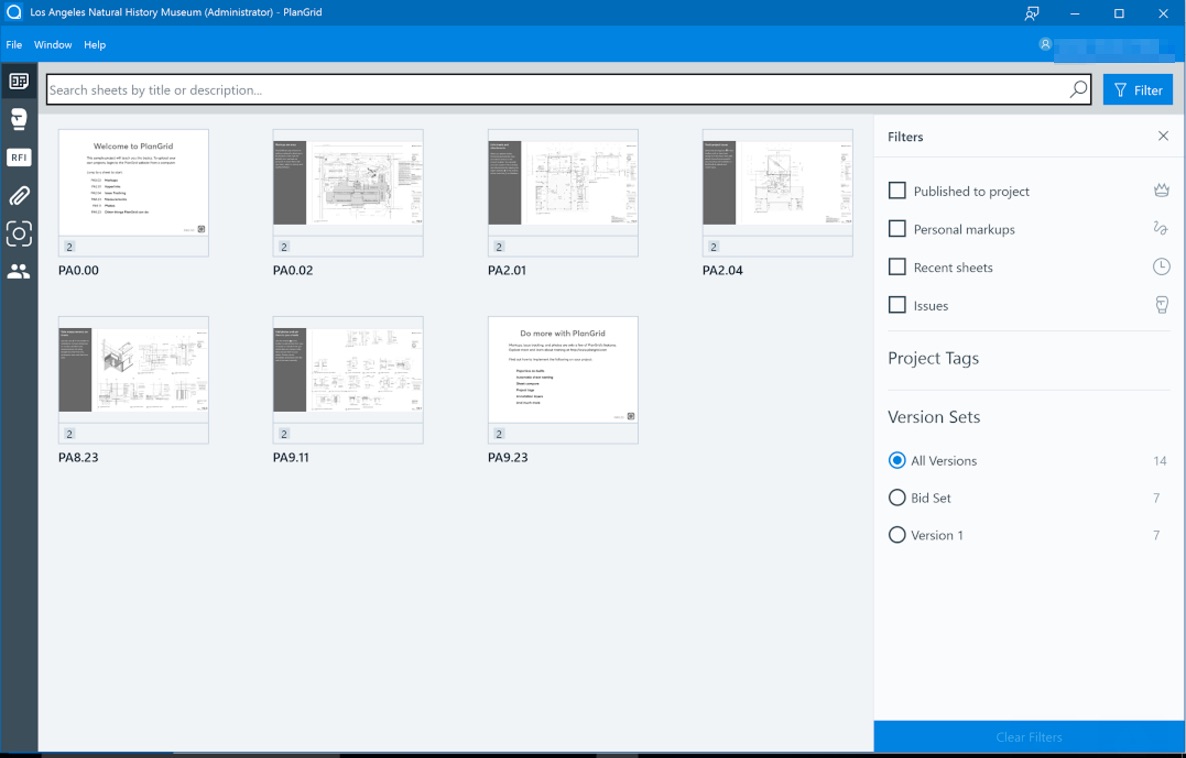
2. Tap the compare button
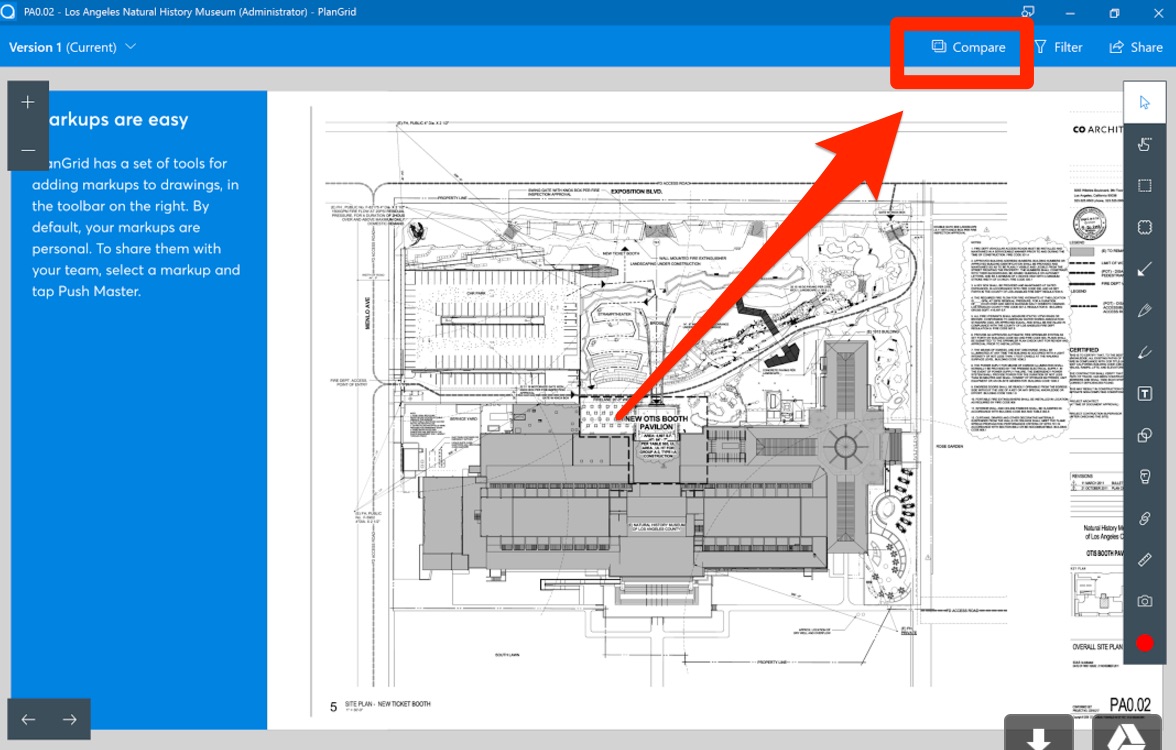
3. Select the sheet and version you wish to overlay. You can also use the search bar to type in a sheet number to search. Click "Compare"
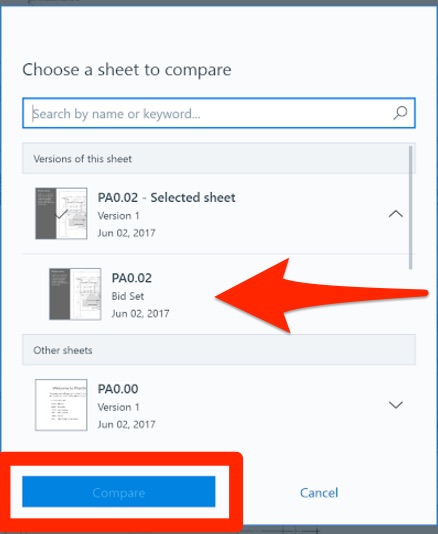
4. To access an older version of a sheet in the list, simply tap the arrow down button next to the sheet number.

5. The sheets will be over-layed. To highlight the differences, one sheet will be highlighted in red, the other in blue.
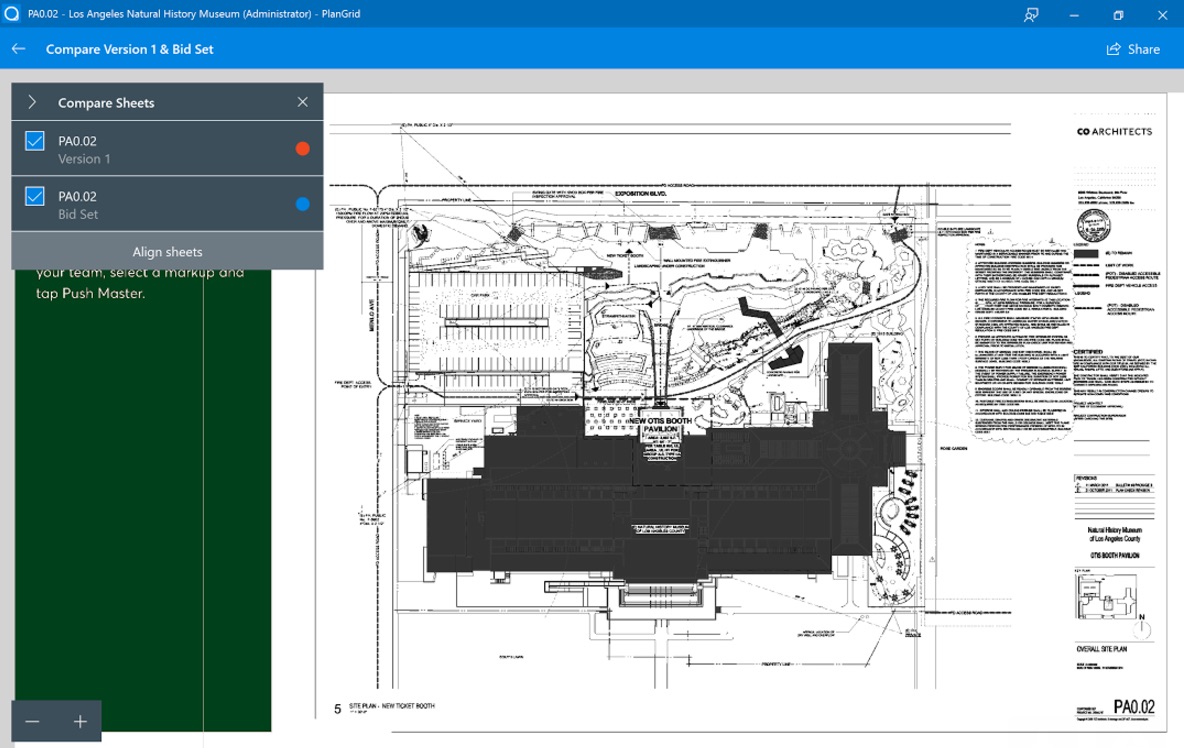
6. To highlight one sheet (and turn off the color for the other), simply tap the preferred sheet's number in the list in the upper left corner. Tap the currently highlighted sheet's number again to re-enable highlight on both sheets.
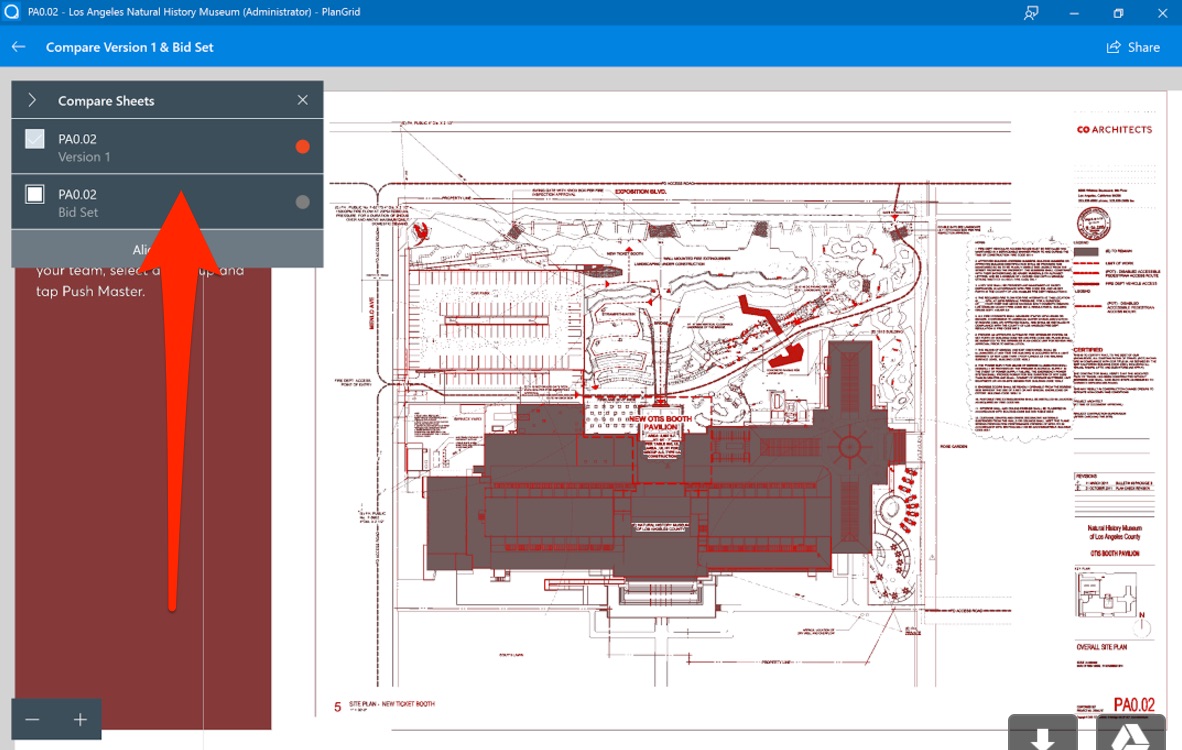
7. To end sheet compare and remove the overlayed sheet, tap the "x" in the Comparing Sheets menu in the upper left corner. You will again be viewing the original sheet.
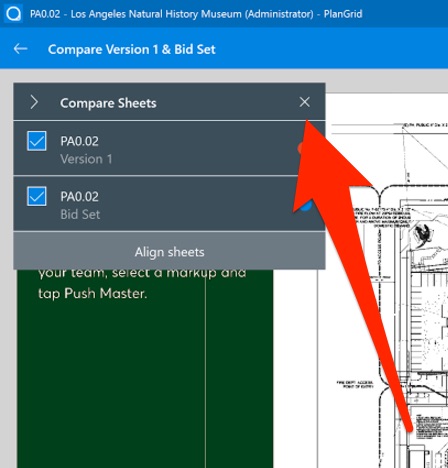
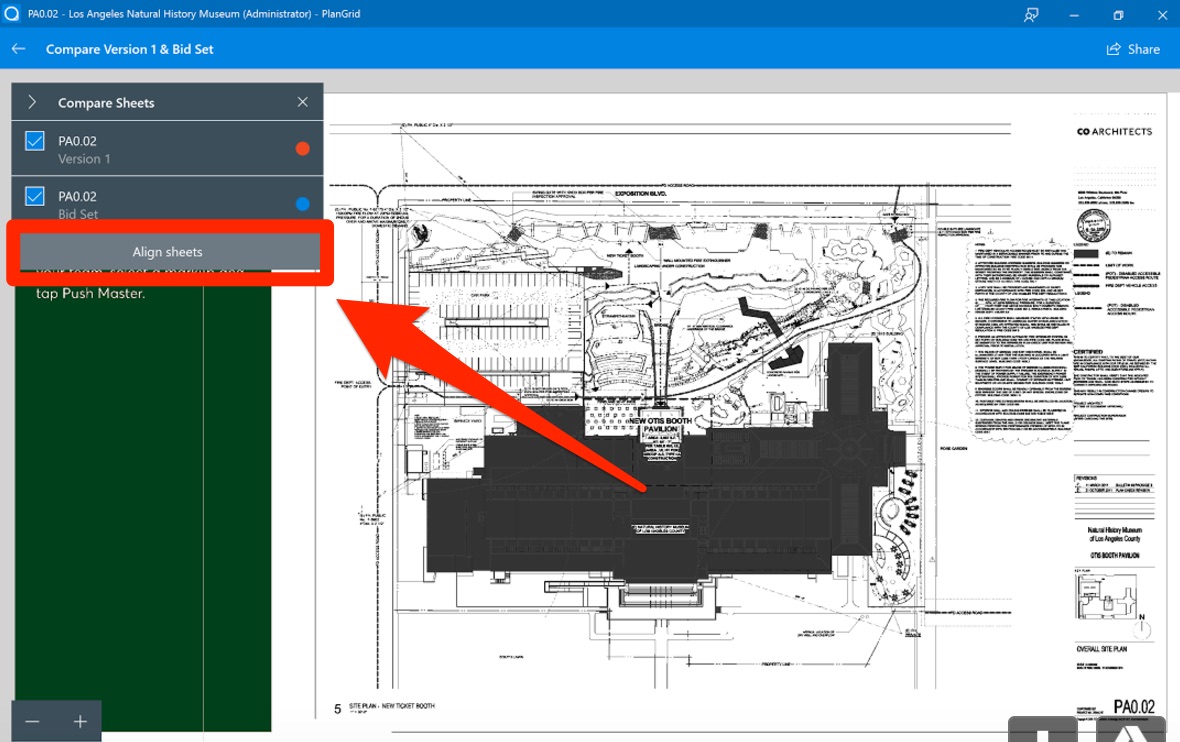
8. To manually align your sheets, click the Align Sheets button. This option appears once you've selected two sheets for comparison.
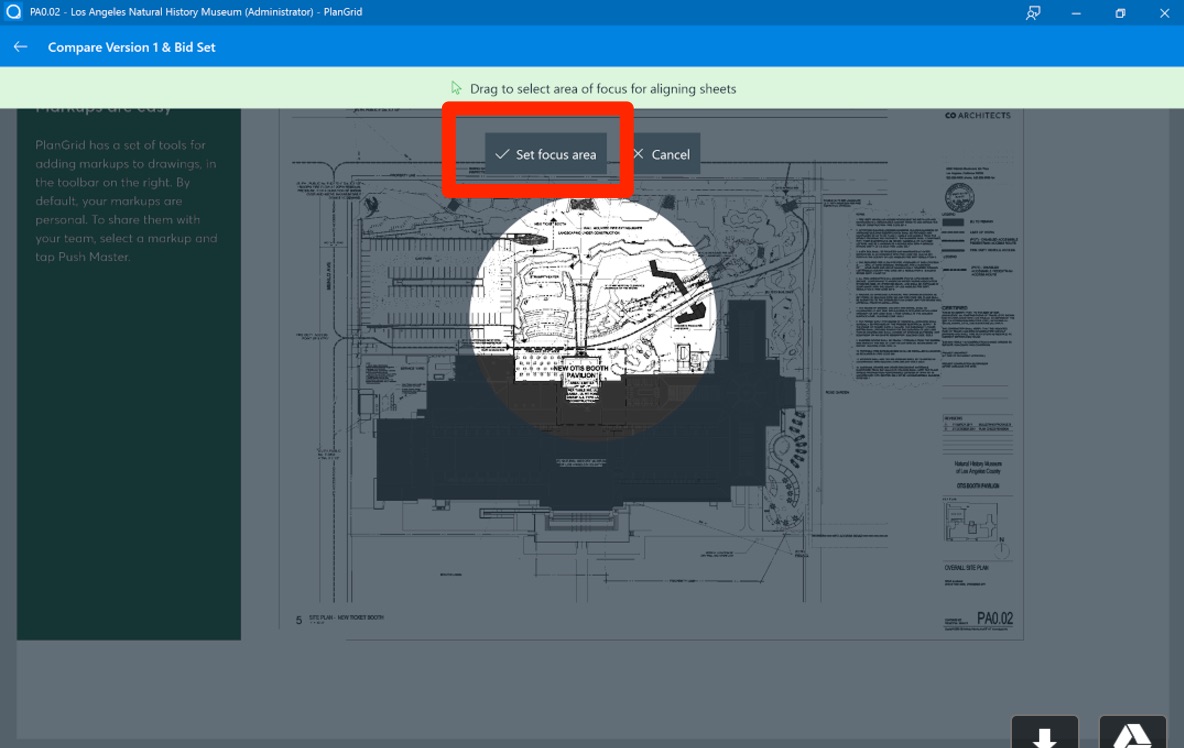
A circular window icon will appear over your sheet that allows you to focus in on a particular area and make alignment easier. Drag over the screen to highlight a specific area - once your preferred area is in focus, click "Set focus area".
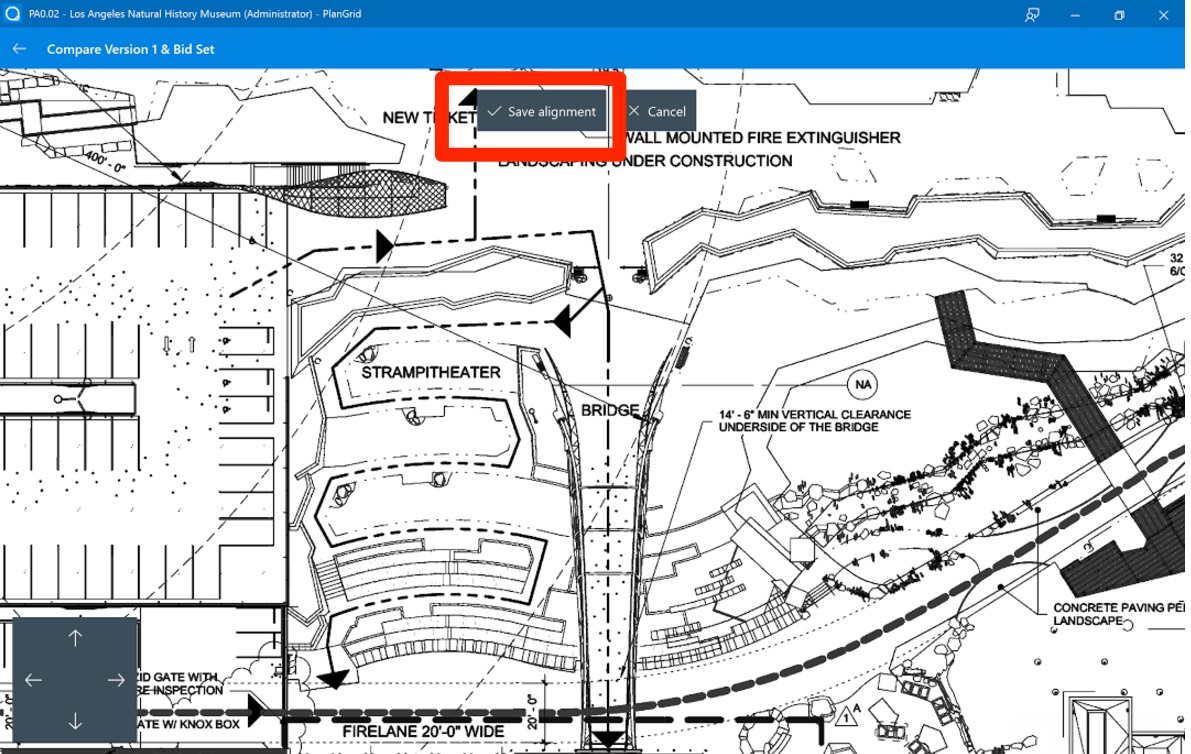
Next, click and drag on the screen to align your sheets. Properly aligned lines will appear black, and any lines that don't overlay exactly will appear either red or blue (which depicts an actual change in the drawings, or that your alignment can be more precise). Once the sheets are aligned to your preference, click Save Alignment.
Sheets are aligned
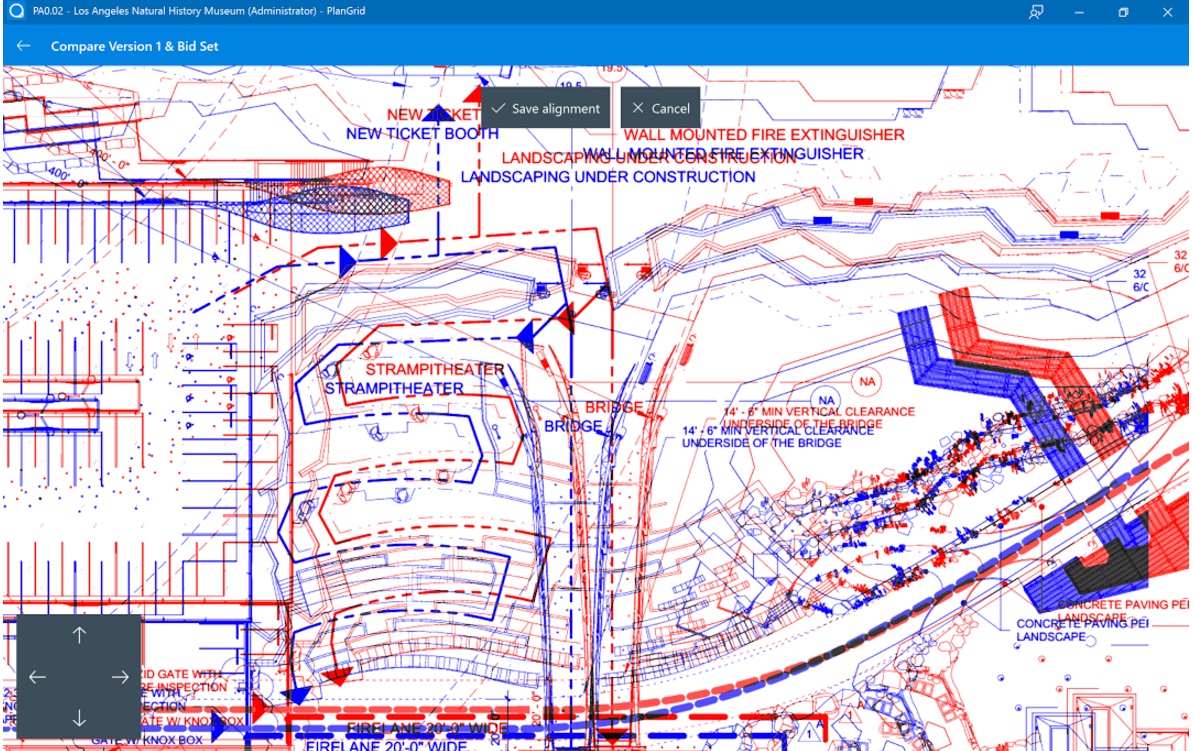
Sheets are not aligned
Comparing Sheets on Android
1. Open a sheet on the Android app to view.
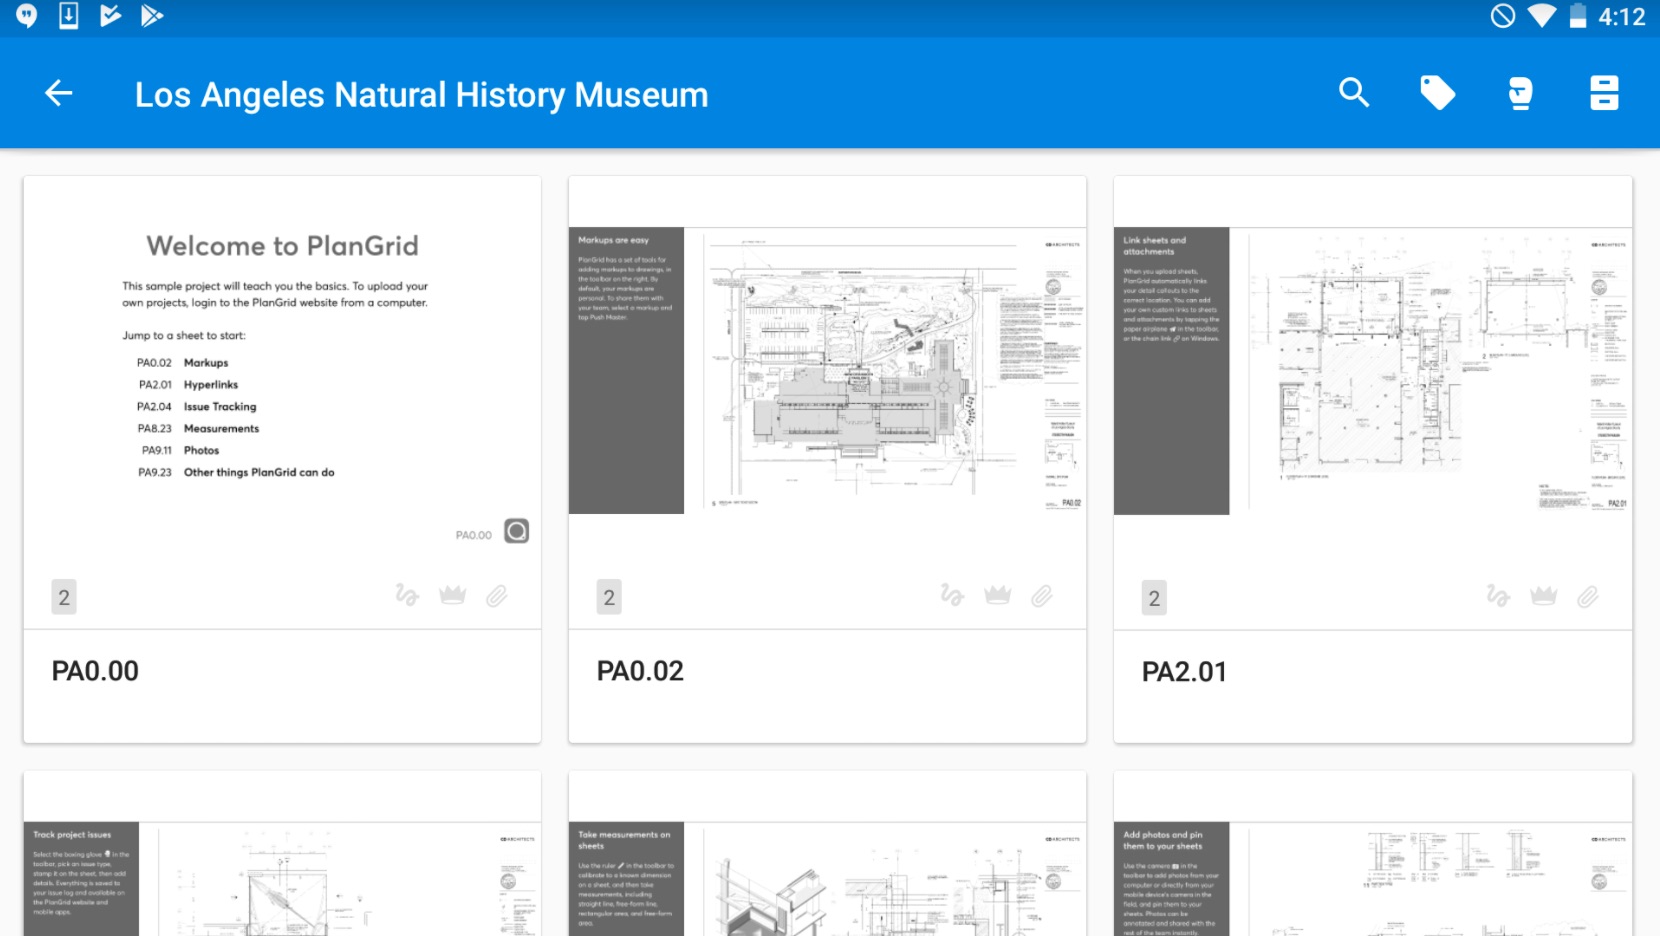
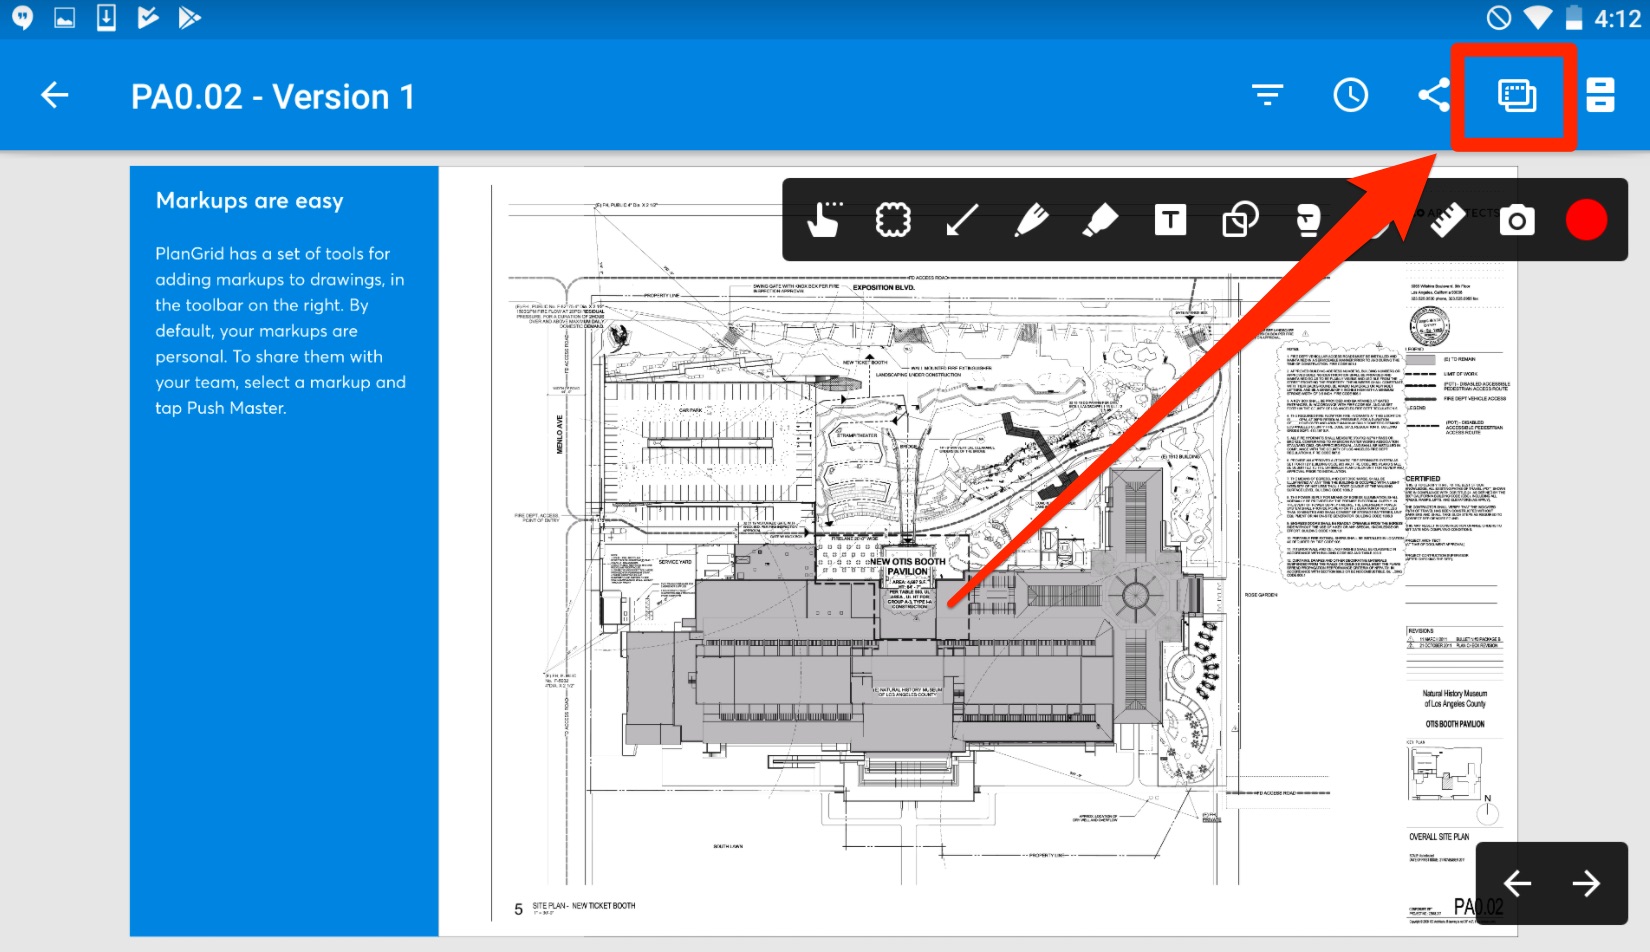
2. Tap the compare sheets button.
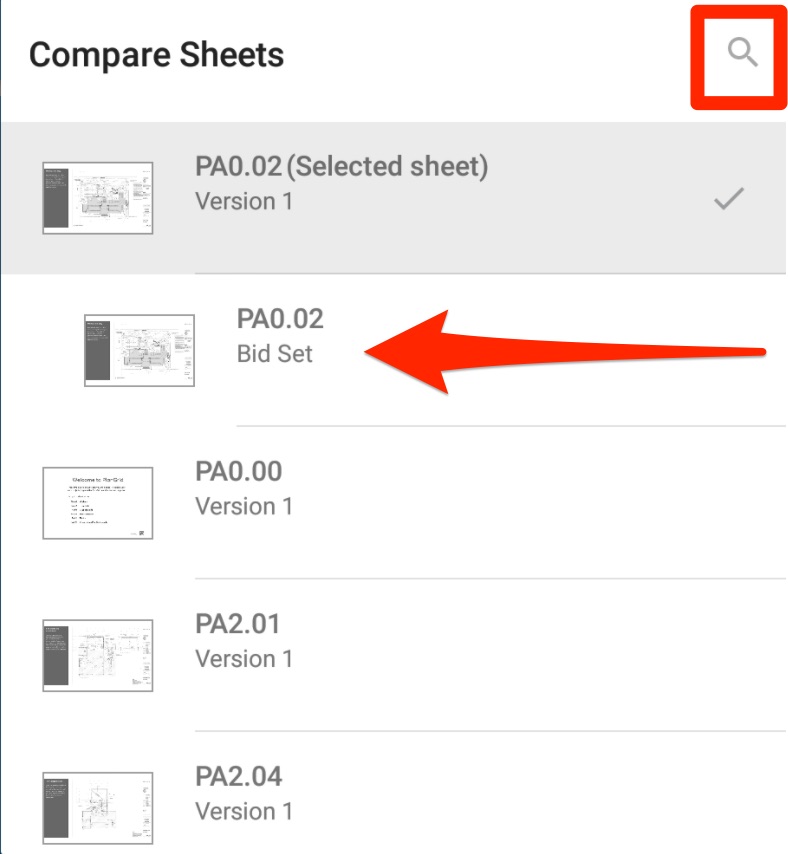
3. Tap to select the sheet and you wish to overlay. Previous versions of the sheet you are currently viewing will be slightly indented. To activate the search bar, tap on the magnifying glass
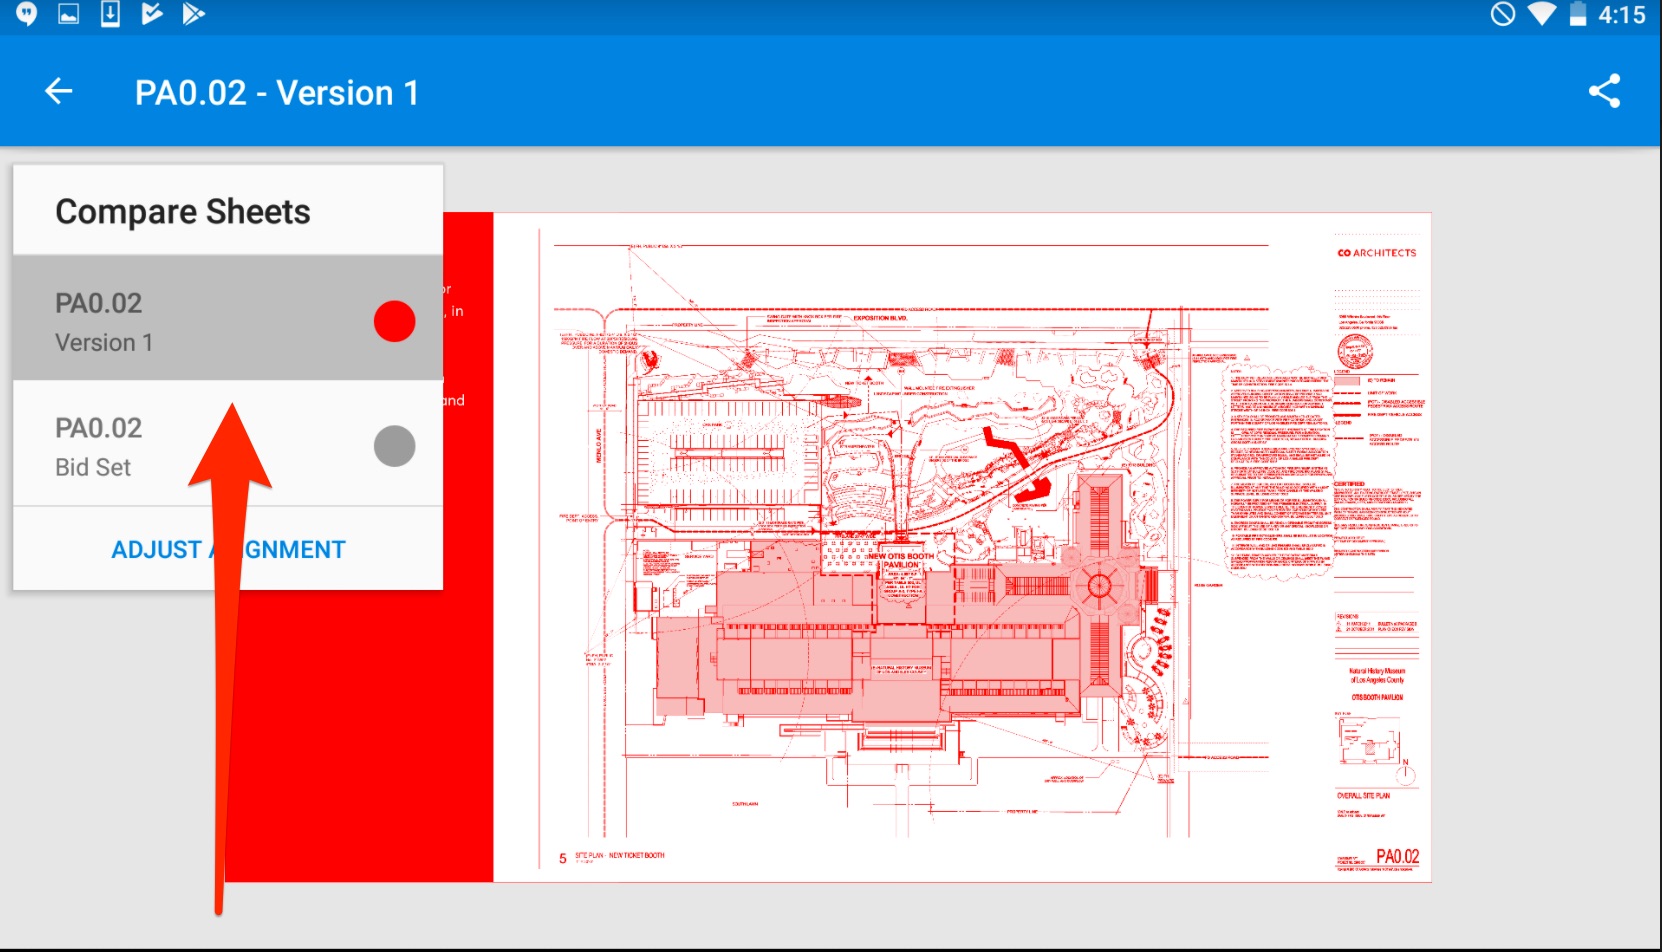
4. The sheets will be over-layed. To highlight the differences, one sheet will be highlighted in red, the other in blue.
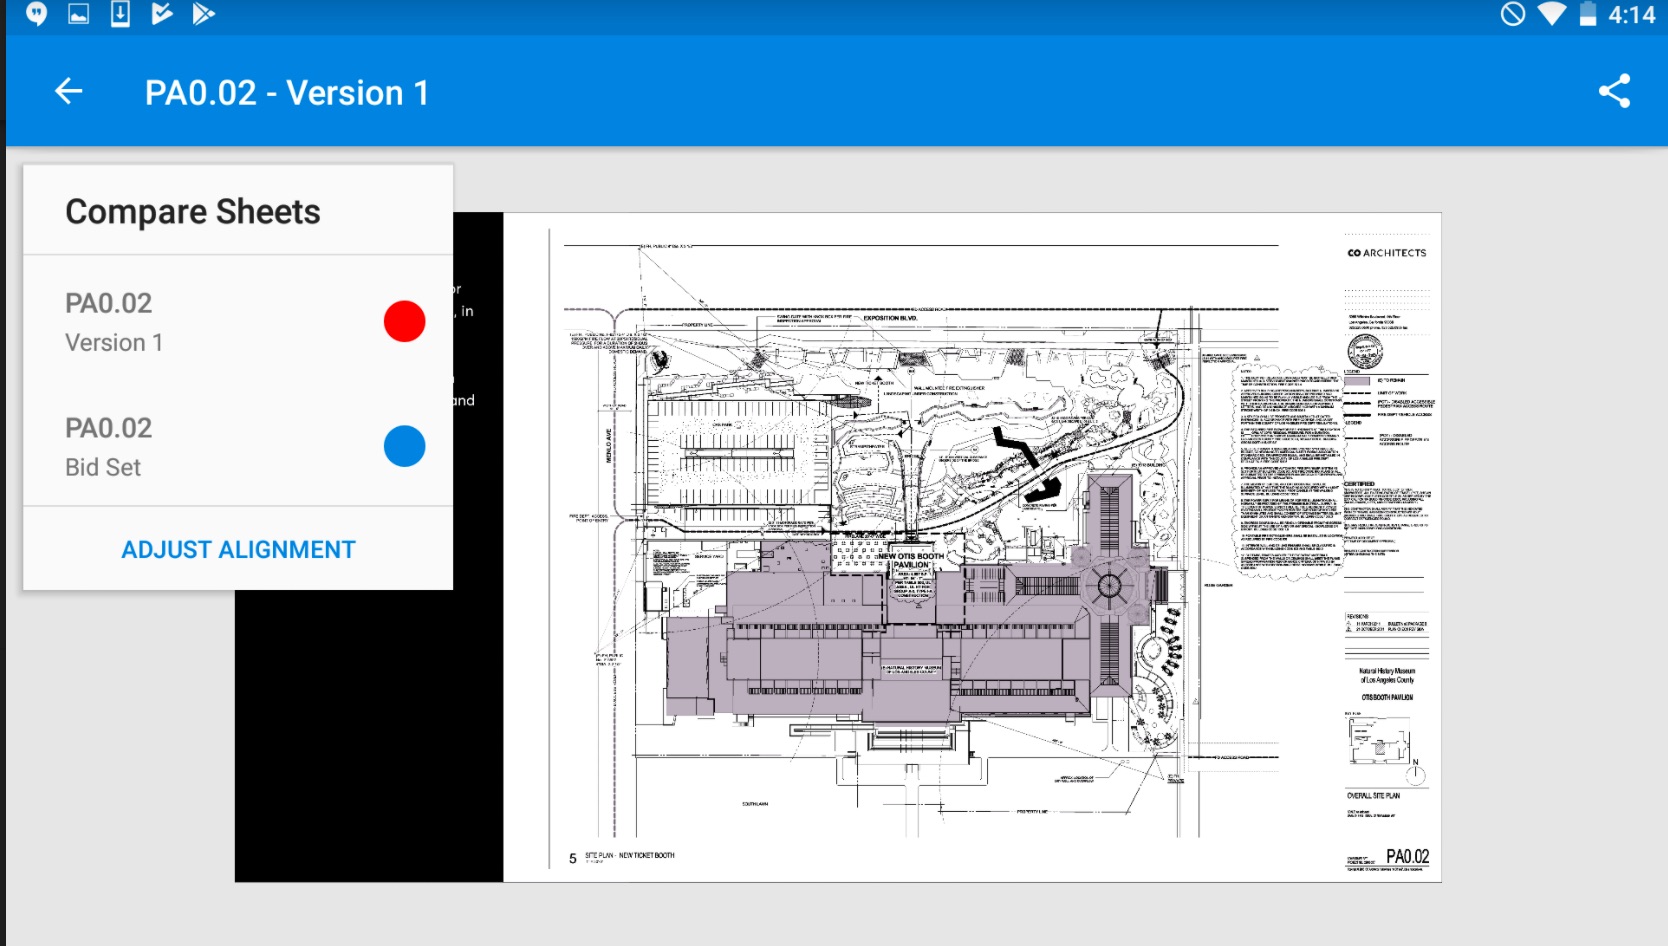
5. To highlight one sheet (and turn off the color for the other), simply tap the preferred sheet's number in the list in the upper left corner. Tap the currently highlighted sheet's number again to re-enable highlight on both sheets.
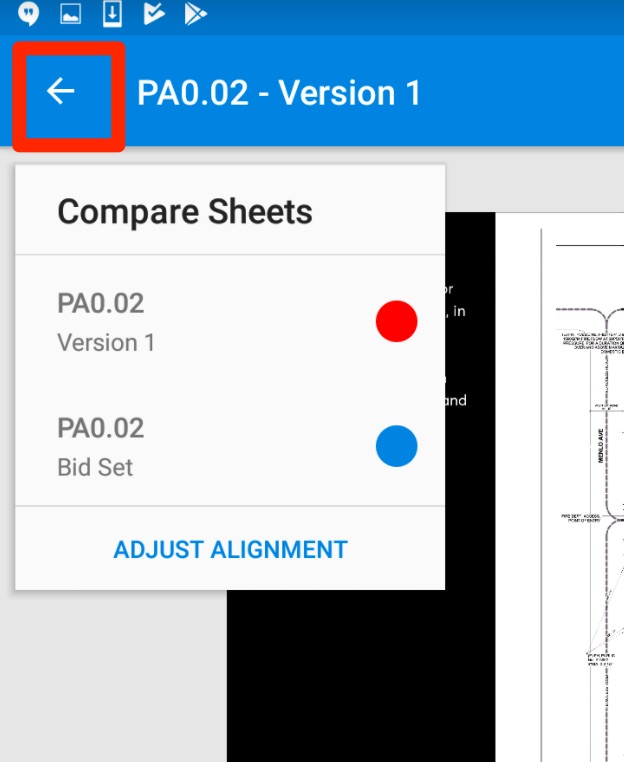
6. To end sheet compare and remove the overlayed sheet, tap the back button next to the sheet number in upper left corner. You will again be viewing the original sheet.
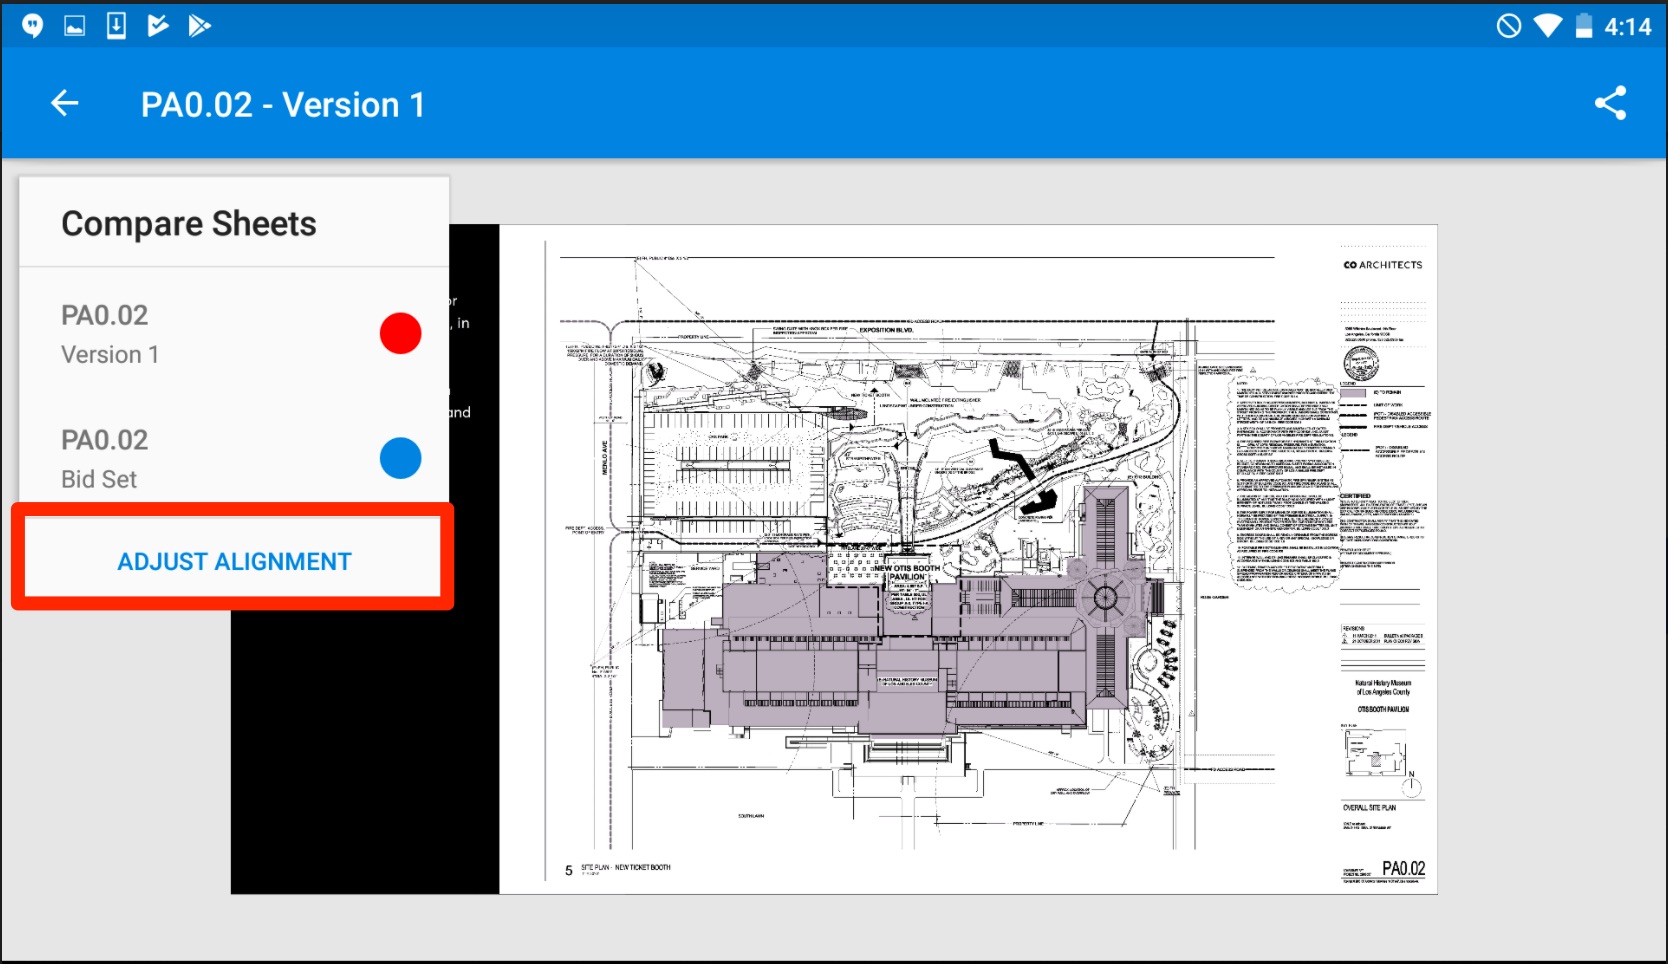
7. To manually align your sheets, tap the Adjust Alignment button. This option appears once you've selected two sheets for comparison.
A circular window icon will appear over your sheet that allows you to focus in on a particular area and make alignment easier. Drag your finger over the screen to highlight a specific area - once your preferred area is in focus, tap the blue check mark.
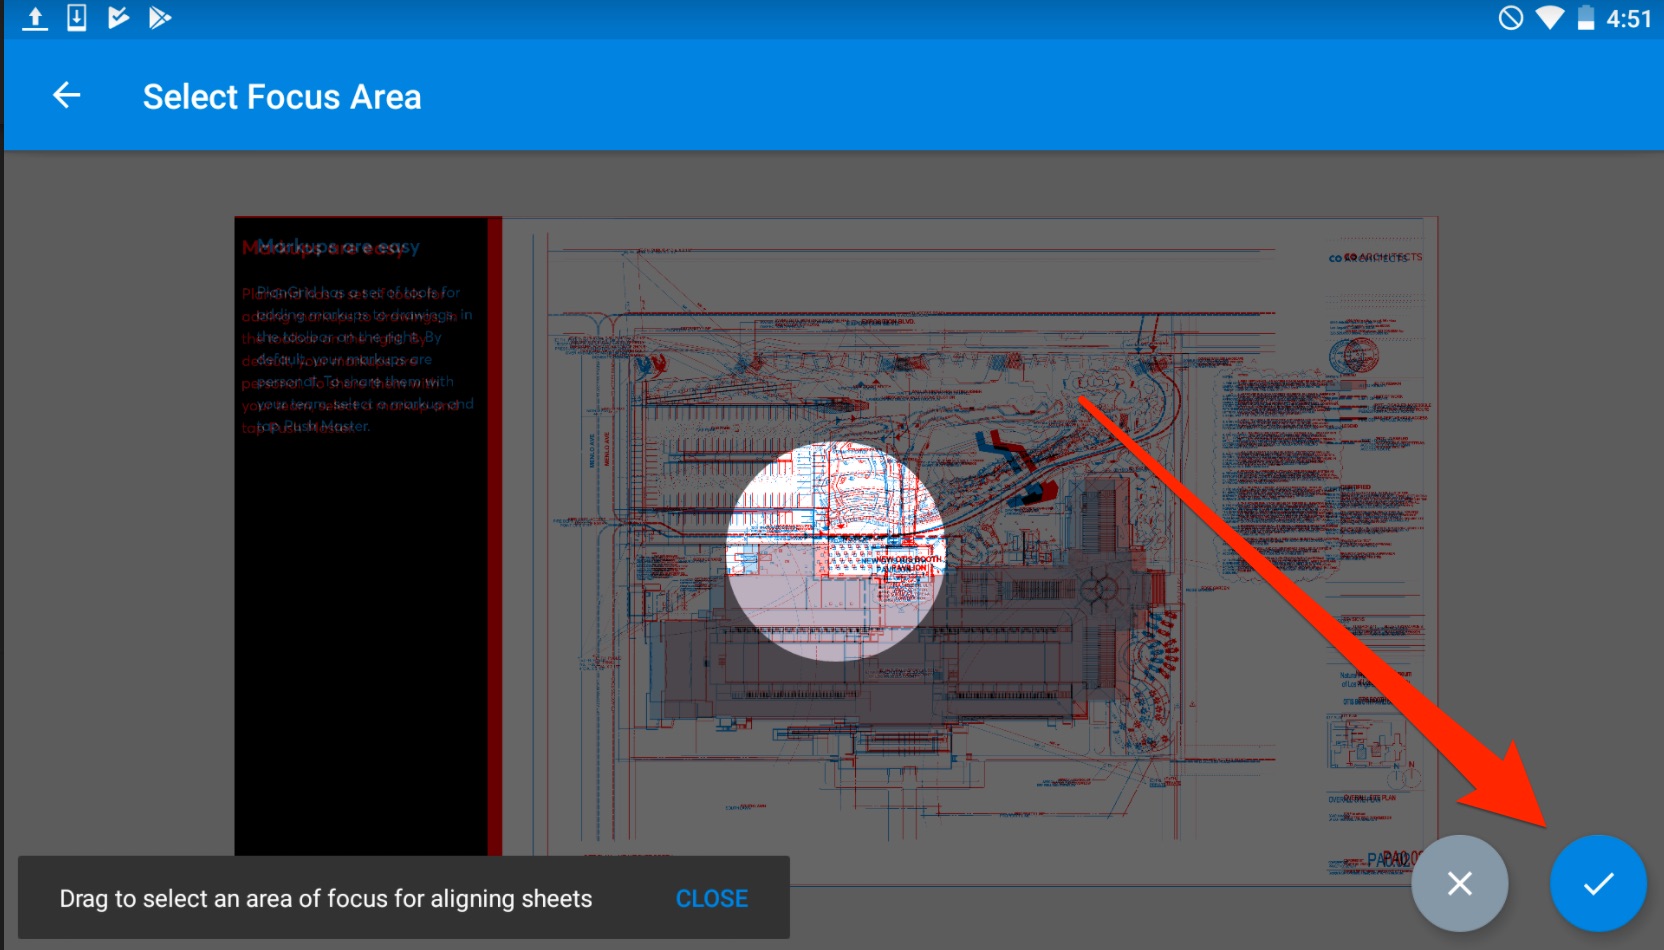
Next, click and drag on the screen to align your sheets. Properly aligned lines will appear black, and any lines that don't overlay exactly will appear either red or blue (which depicts an actual change in the drawings, or that your alignment can be more precise). Once the sheets are aligned to your preference, tap Save.
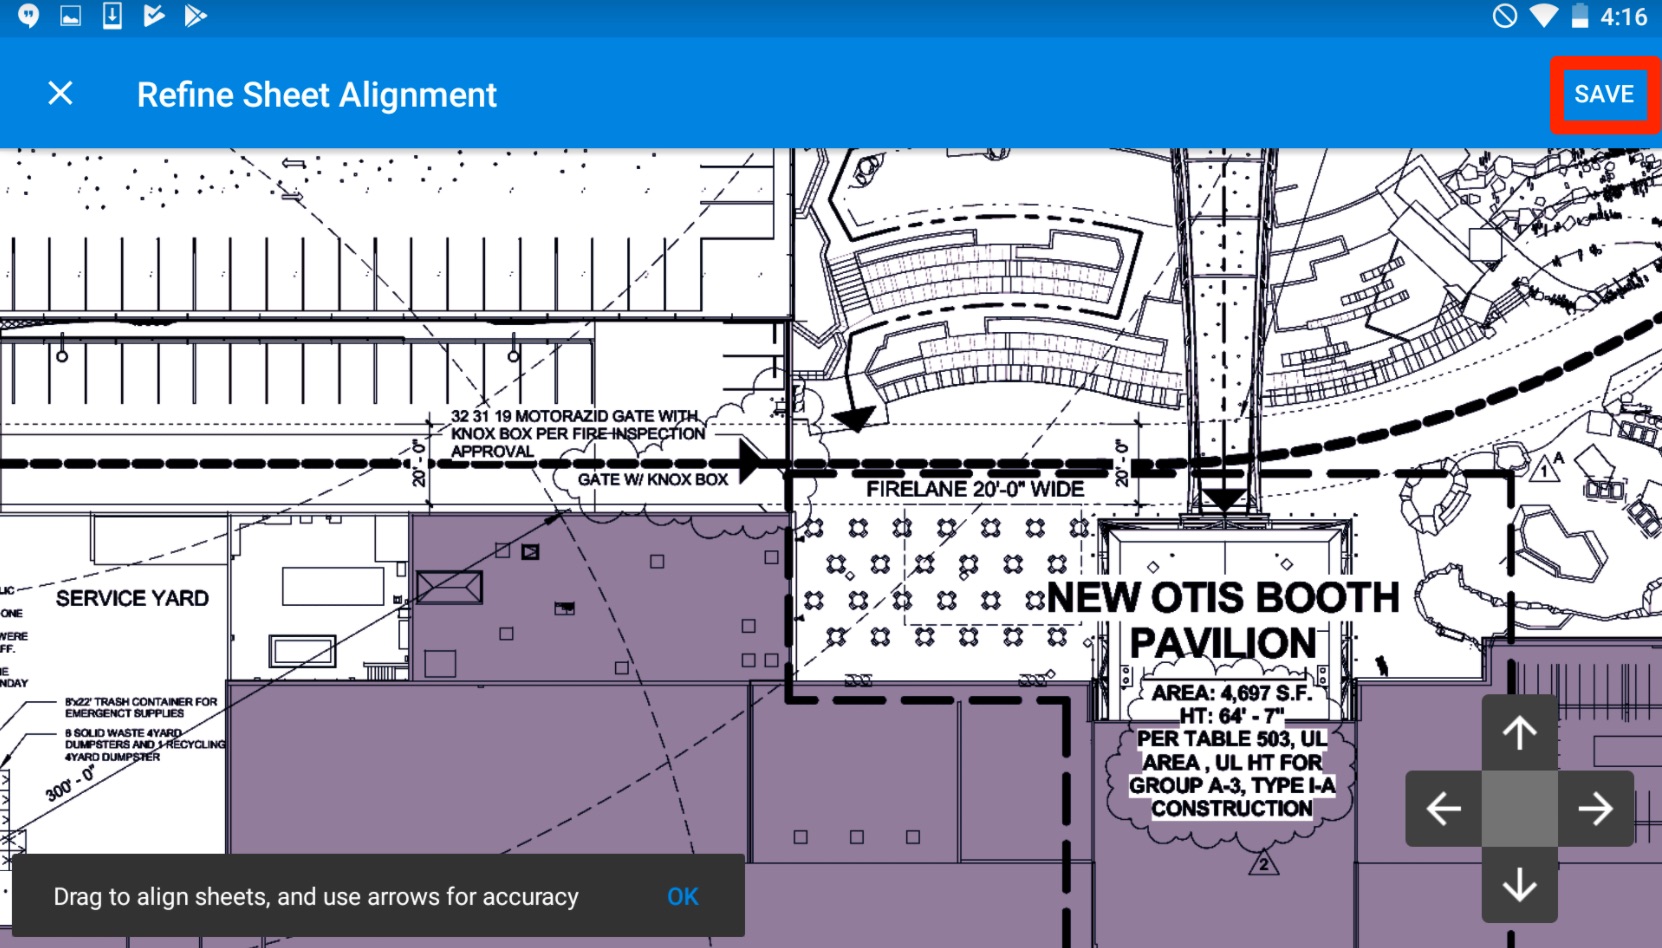
Sheets are aligned
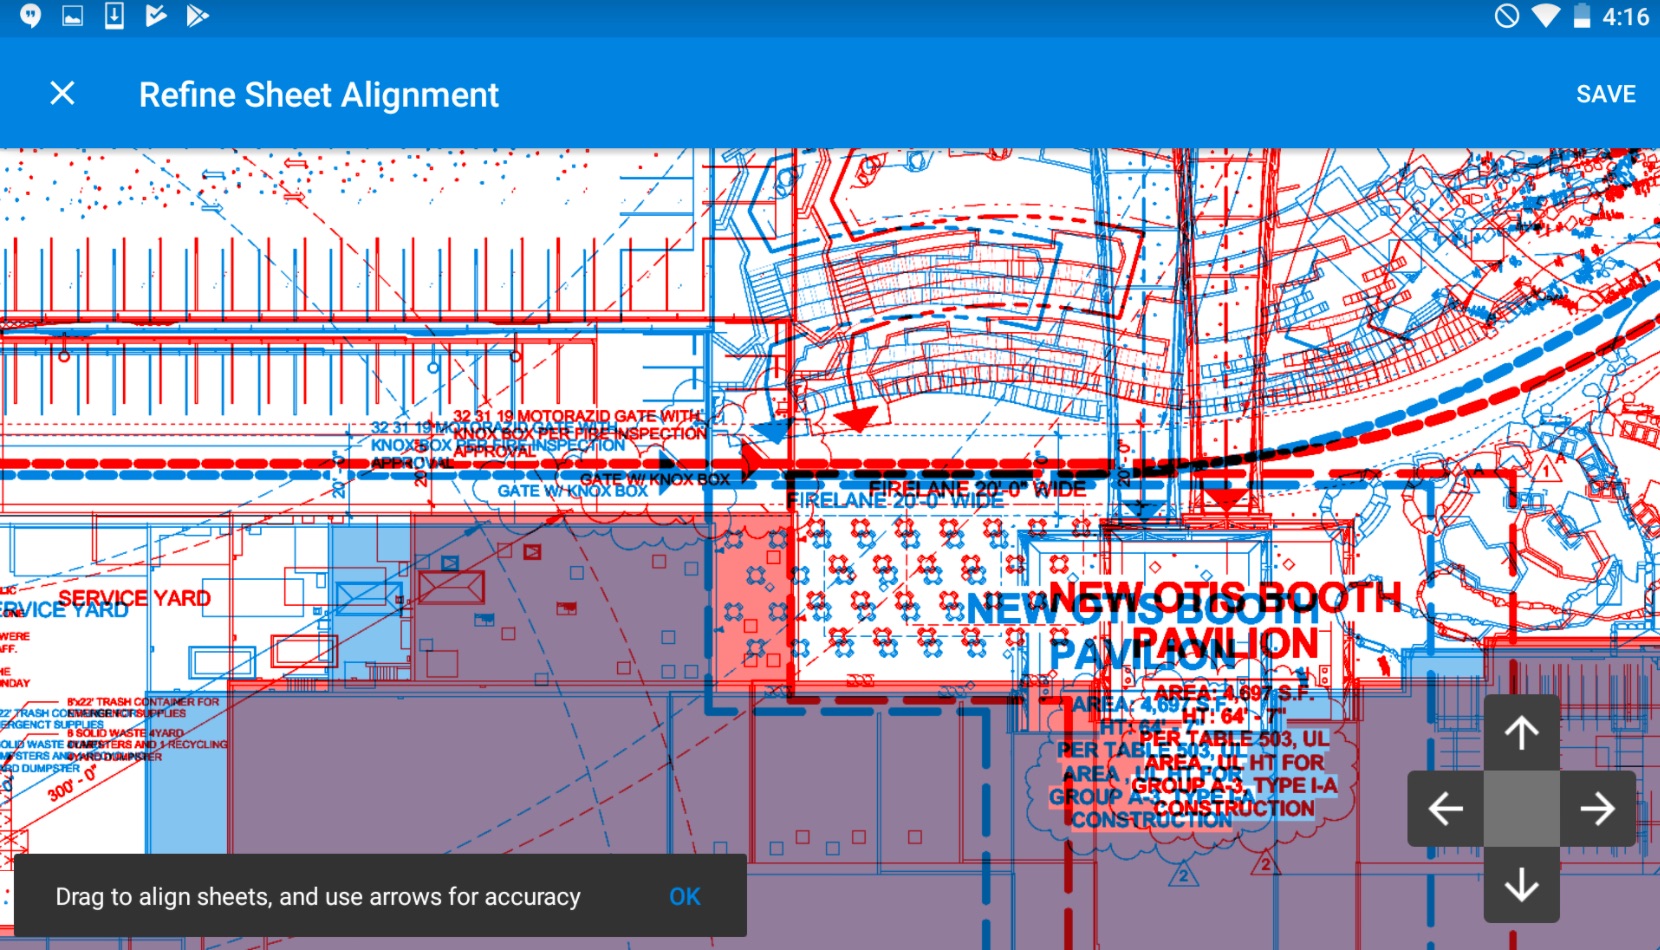
Sheets are not aligned
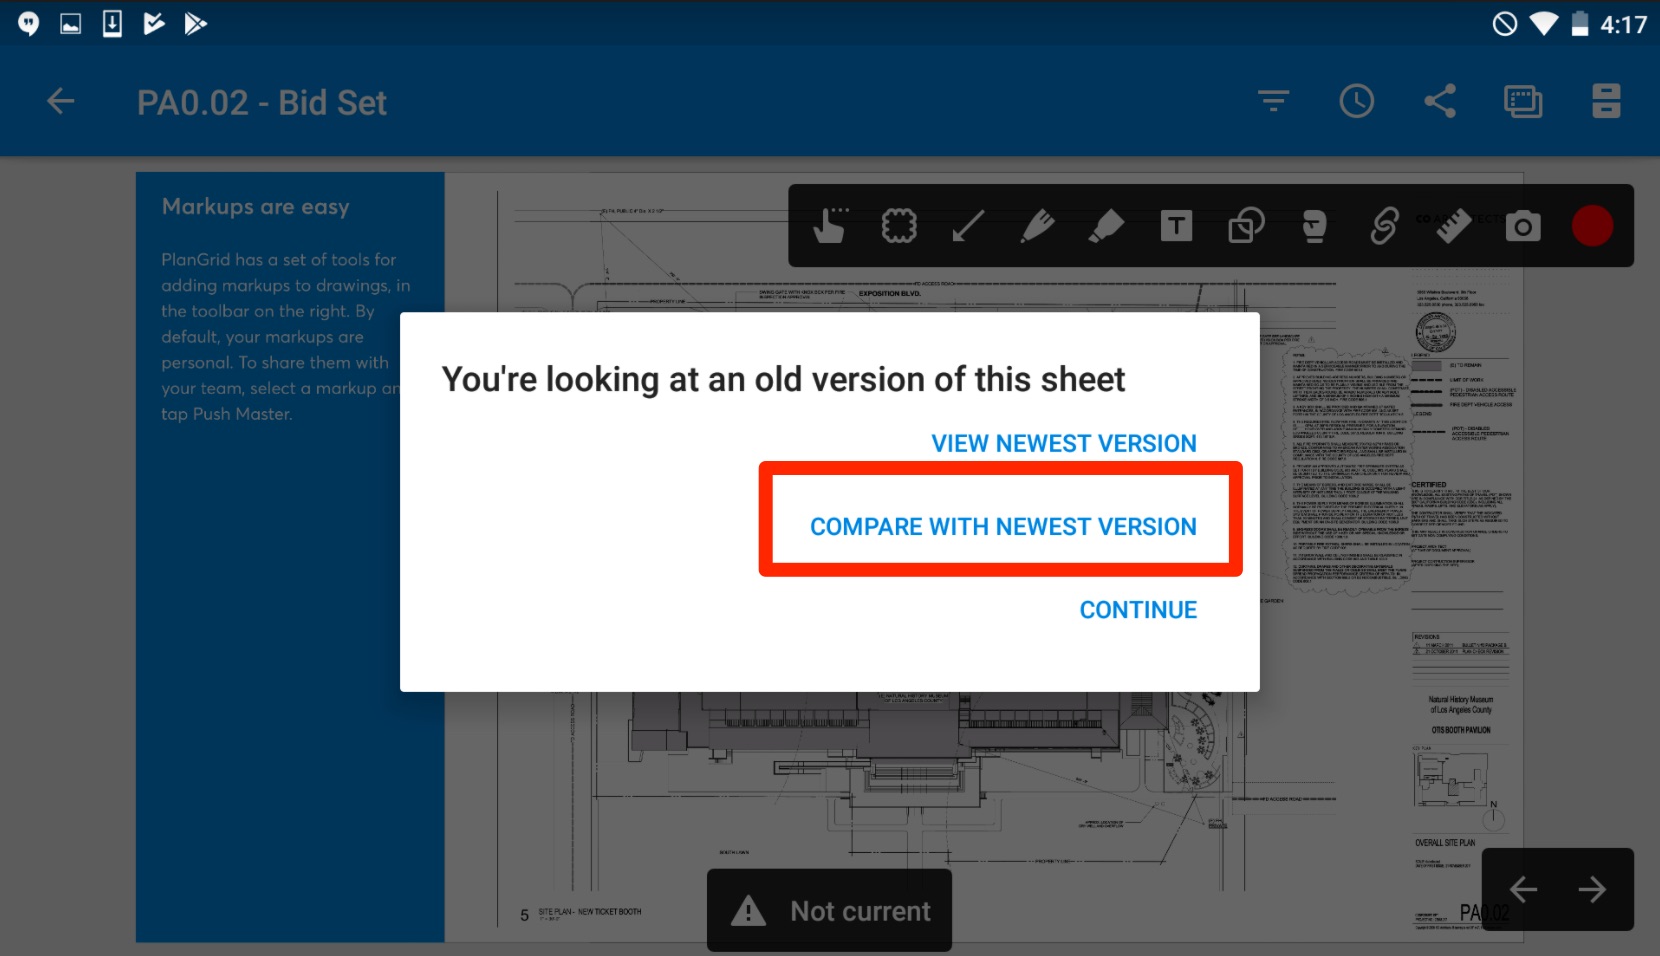
If you swipe up to see an older version of your sheet, you will also see an option to compare it with the newest version:
Related Articles: