Now you can link your already existing or new projects to your Organizations.
Featured:
Transferring existing projects to an Organization
Editing Organization linked projects
Removing an Org Link and Deleting a Project
Managing your project team for Organization linked projects
Creating Organization linked projects
Transferring existing projects to an Organization
Project Admins can transfer existing projects to an Organization via the website. Organization admins will need to be an Admin in the project as well to transfer a project.
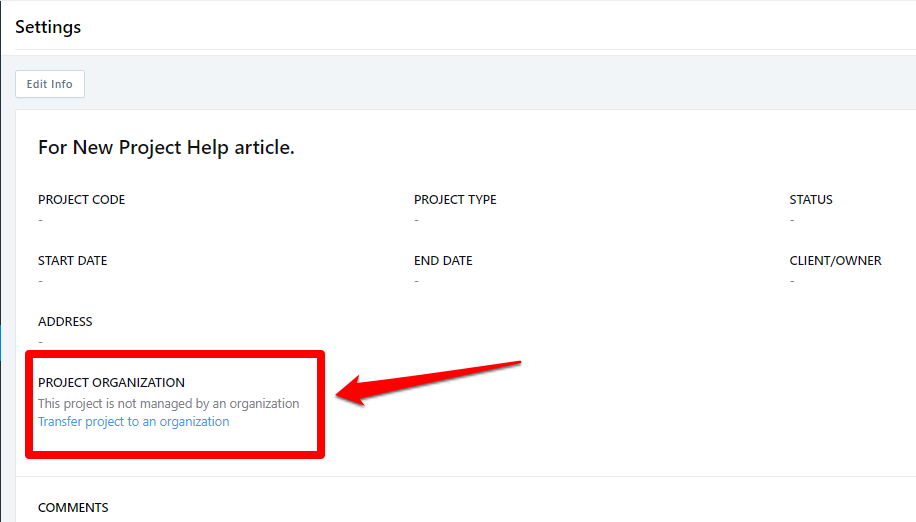
- From the project settings page on the PlanGrid website, Project Admins that are part of an Organization (i.e. have a license paid for by that Organization) and Organization Admins that are Project Admins of the project will see an option to "Transfer project to an organization".
- A pop up will appear, asking to "Select An Organization" you’d like to transfer the project to. From the drop down, select the correct organization. Once selected, click "Transfer Project" to link the project.
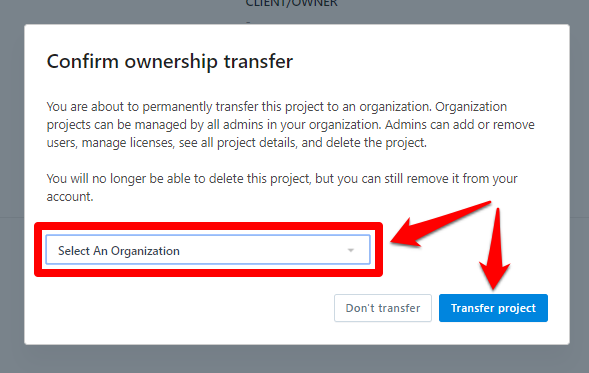
Note: Project Admins will see only one option for an Organization (the Organization that pays for their license), while Organization Admins will see any of the Organizations for which they are an admin. This option will not be available to any other project team members.
What Organization Admins can do in the project will depend on their permission level (for example, an Organization won't be able to upload sheets to it, or to link it to the Organization). The Organization Admin can change their own permission level in the Admin Console if needed.
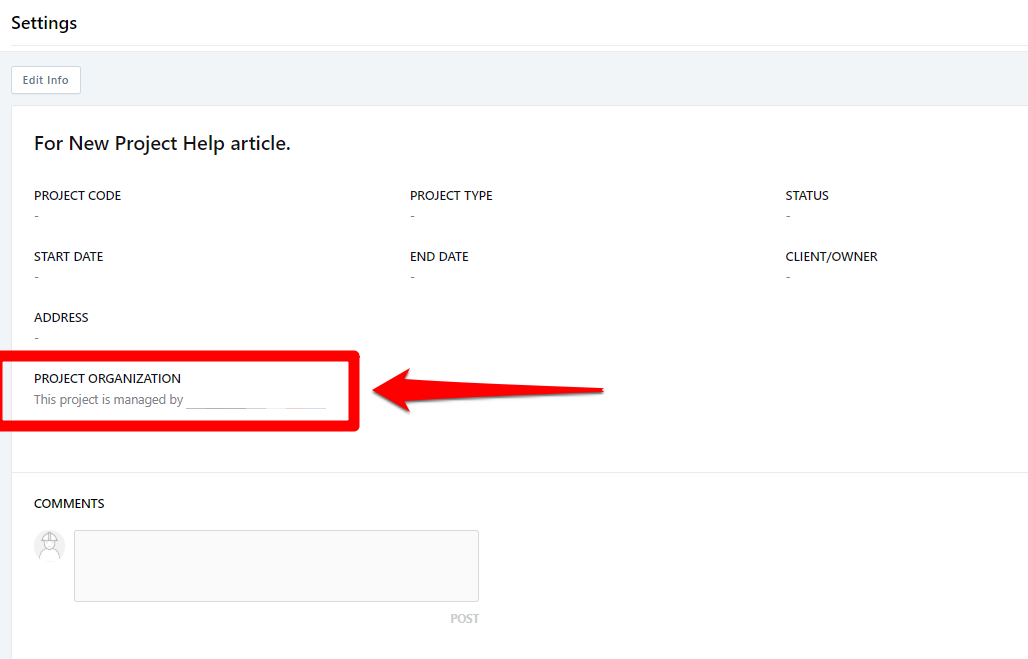
- Once a project is transferred to an Organization, within the settings page, all project team members will be able to see what Organization the project is managed by.
Editing Organization-linked projects settings
As an Organization Admin, you will now be able to edit the settings on a project.
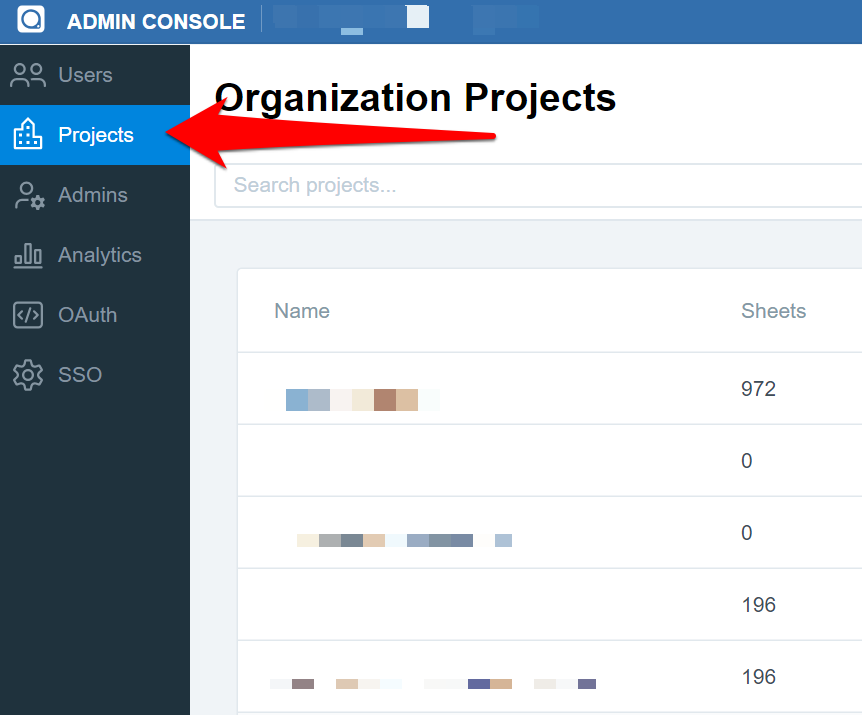
- To view your Organization's projects, go to the Projects tab in the Admin Console:
2. Click on the project name you would like to view, then click on "Settings"
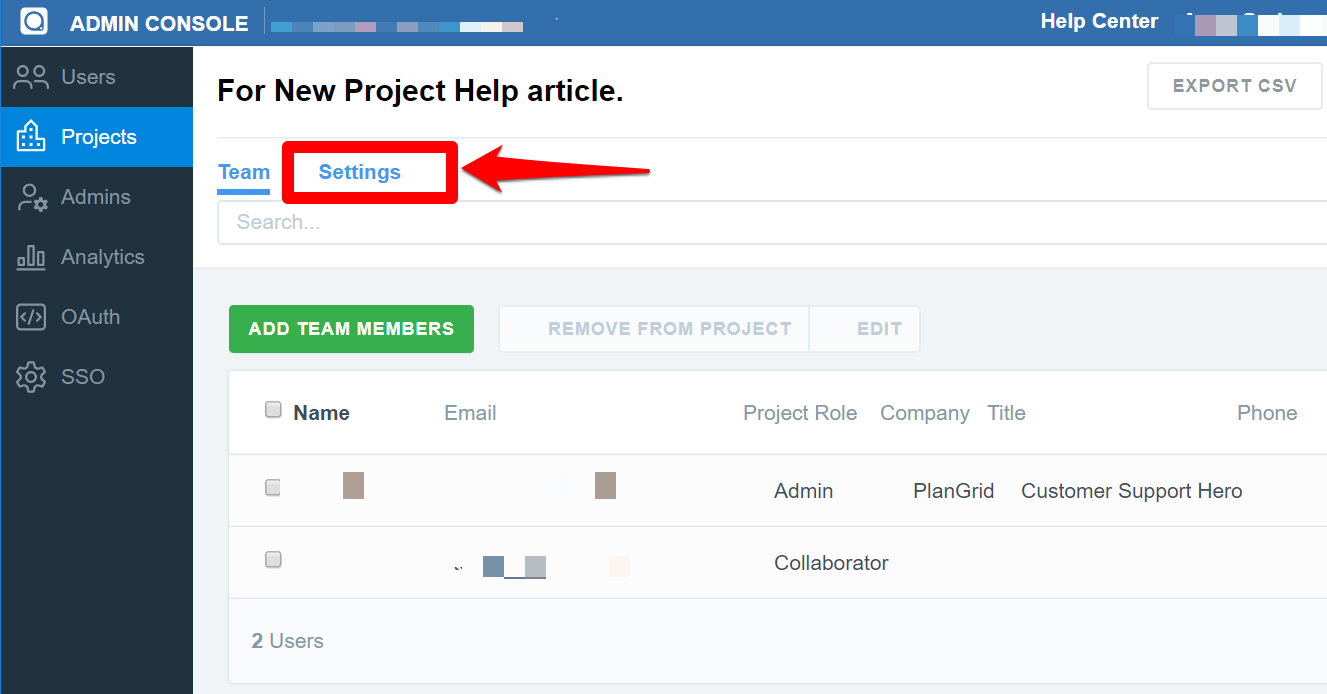
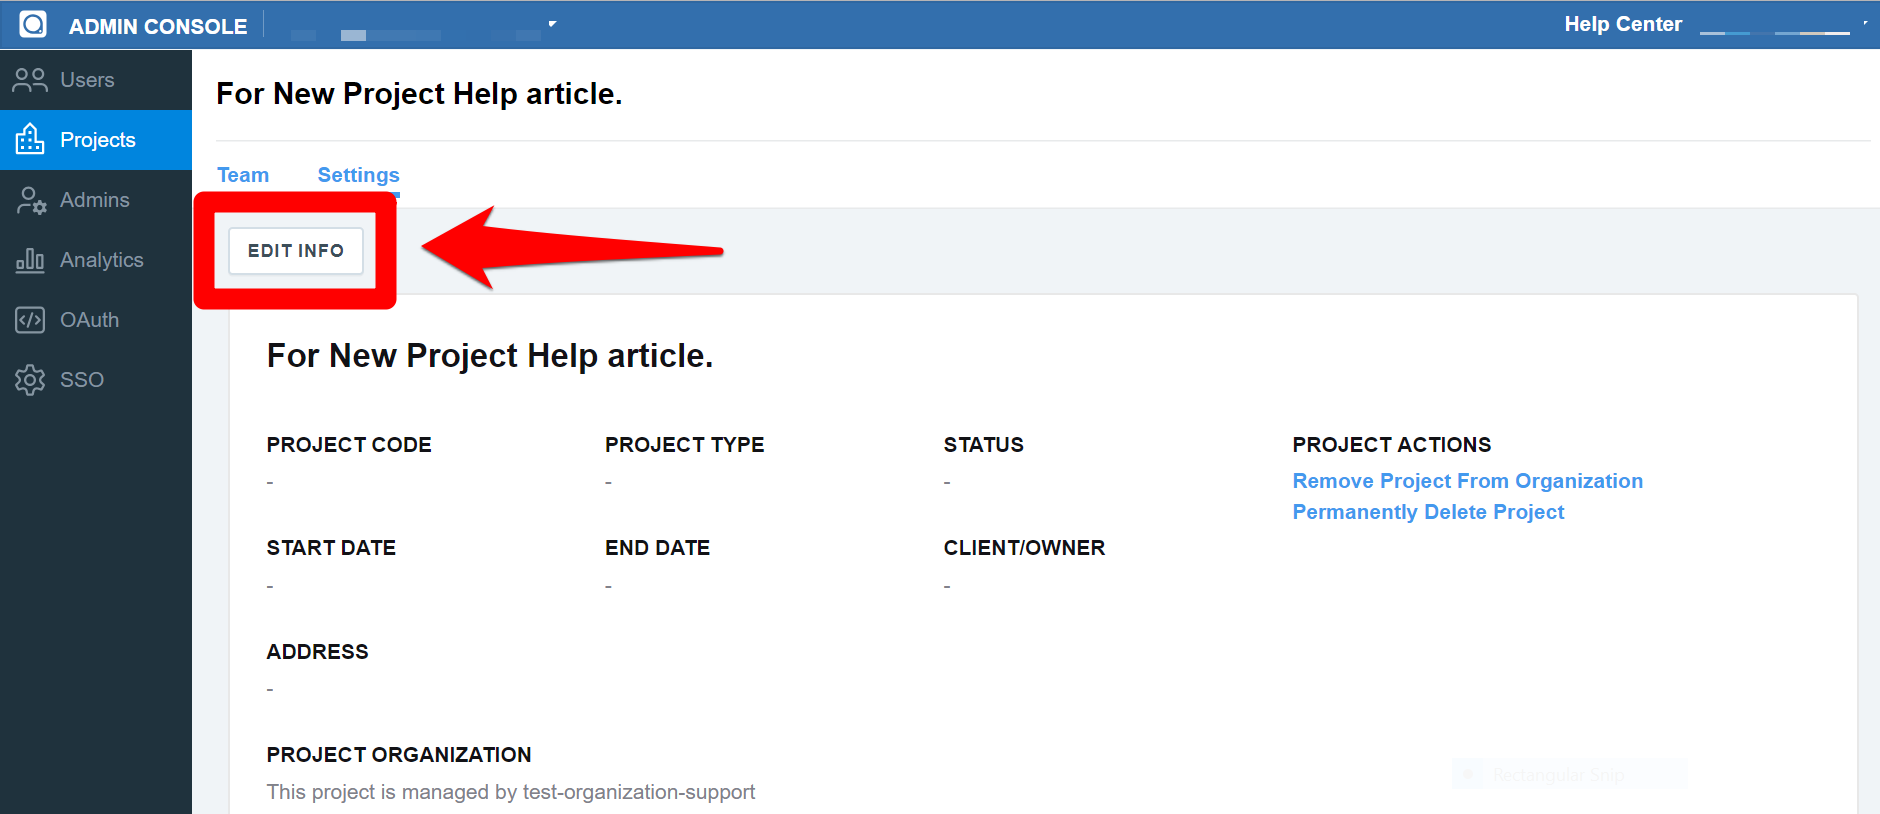
3. The view will be similar to the Project Settings page when accessing the project as a team member. To change the project's information, click on "Edit Info"
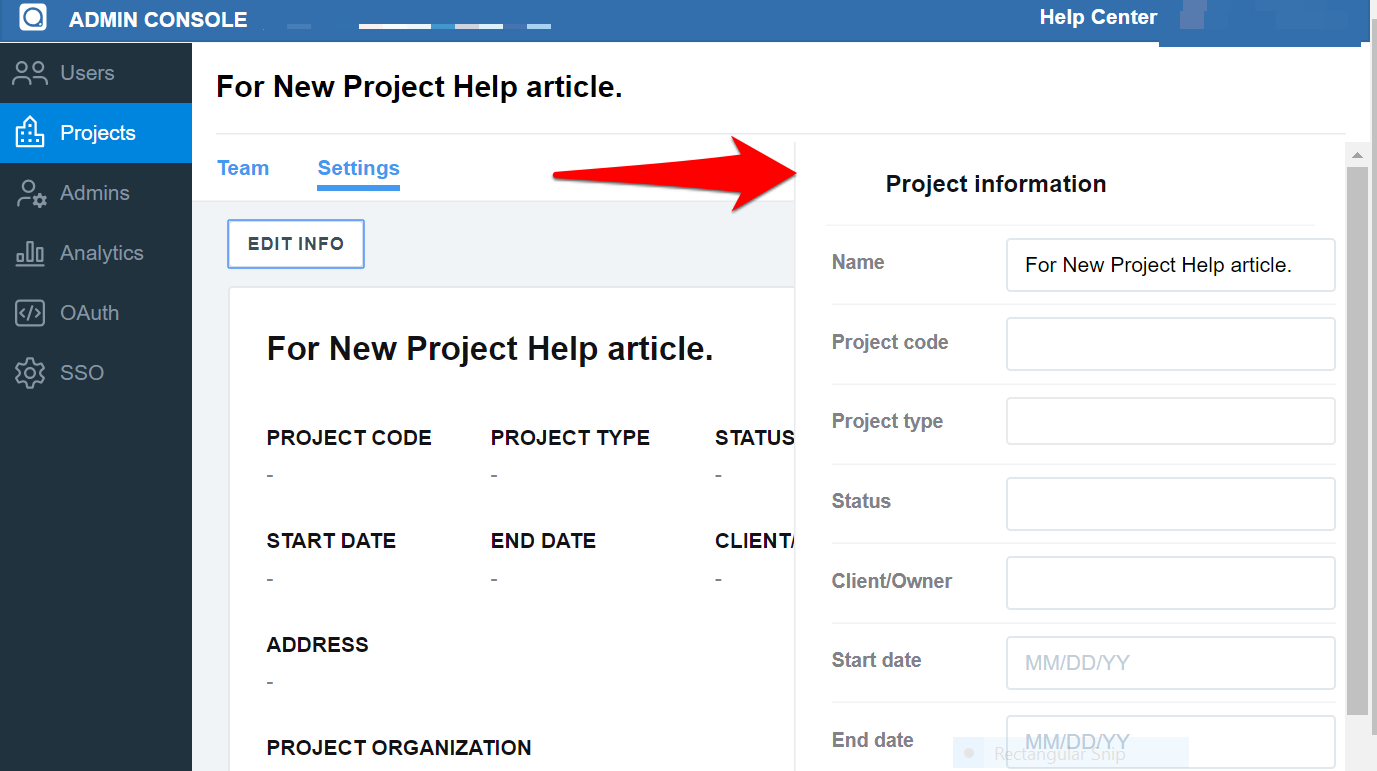
4. A side panel will open. Type the new information, and click on "Save Changes" at the bottom of the pop out.
Removing an Org Link or Deleting a Project
From the Settings tab of a project, you can remove the project from the Organization so it goes back to be managed to the original Project Admin and is no longer linked to your organization. You can also delete the project permanently for all team members here as well.
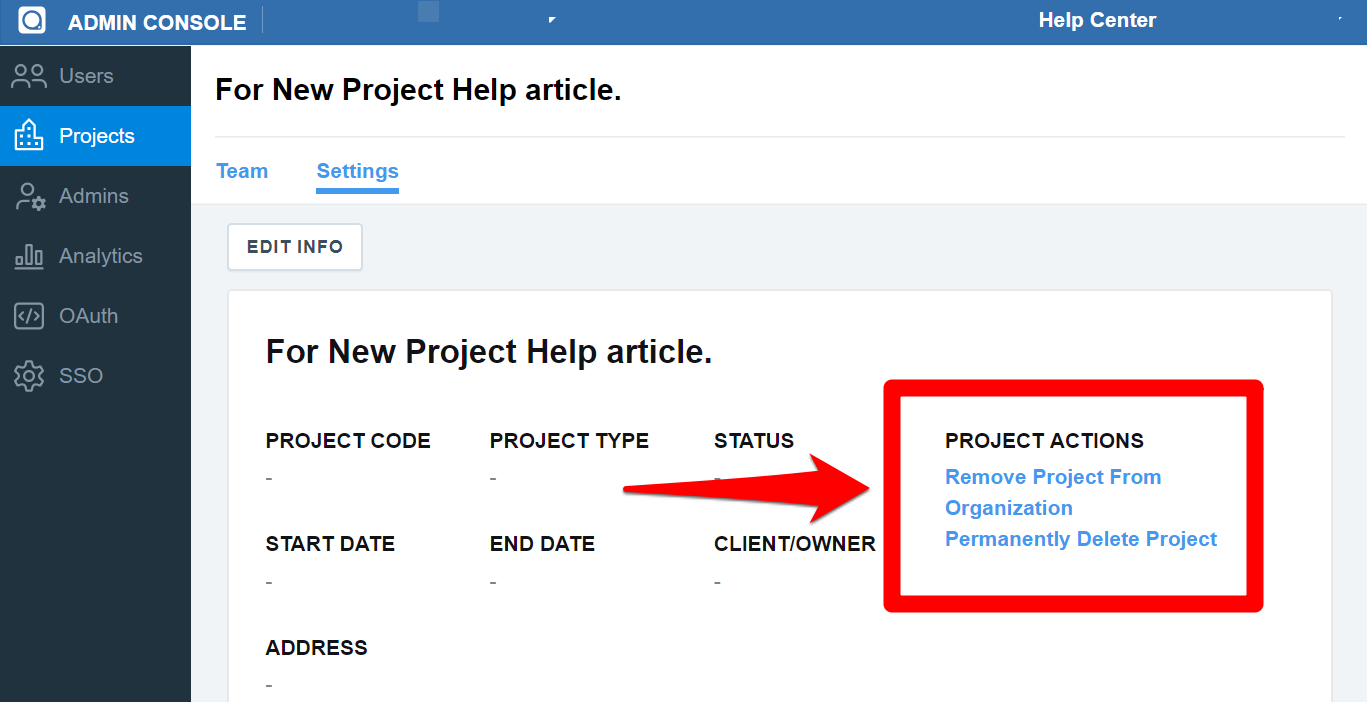
Note: Organization-linked projects can only be deleted by organization admins, not by project admins. The "Delete this project" option no longer shows up on the project settings page for project admins. Organization admins can also delete projects on the project settings page in the PlanGrid website.
Managing your project team for Organization linked projects
Organization admins can manage project teams from the Admin Console.
1. On the Organization Projects page, click on the project where you would like to manage your team.
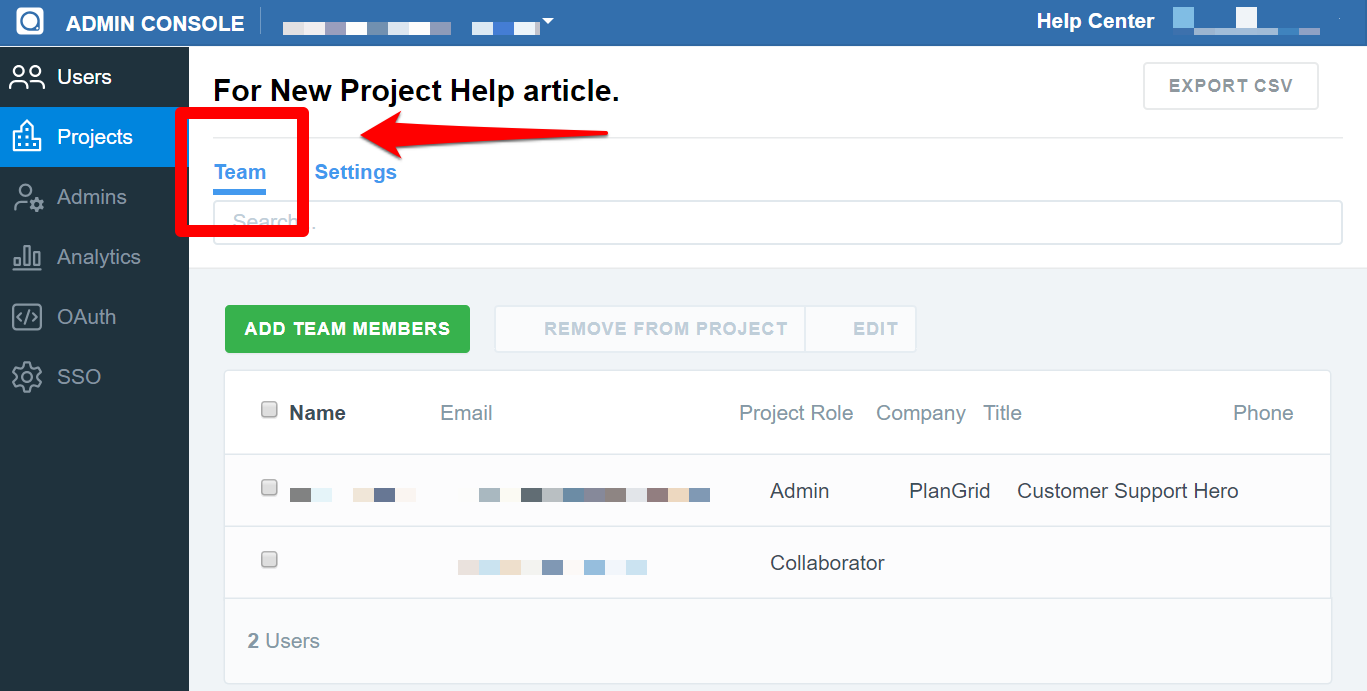
2. The team page will open by default. To add team members, click on "Add team members"
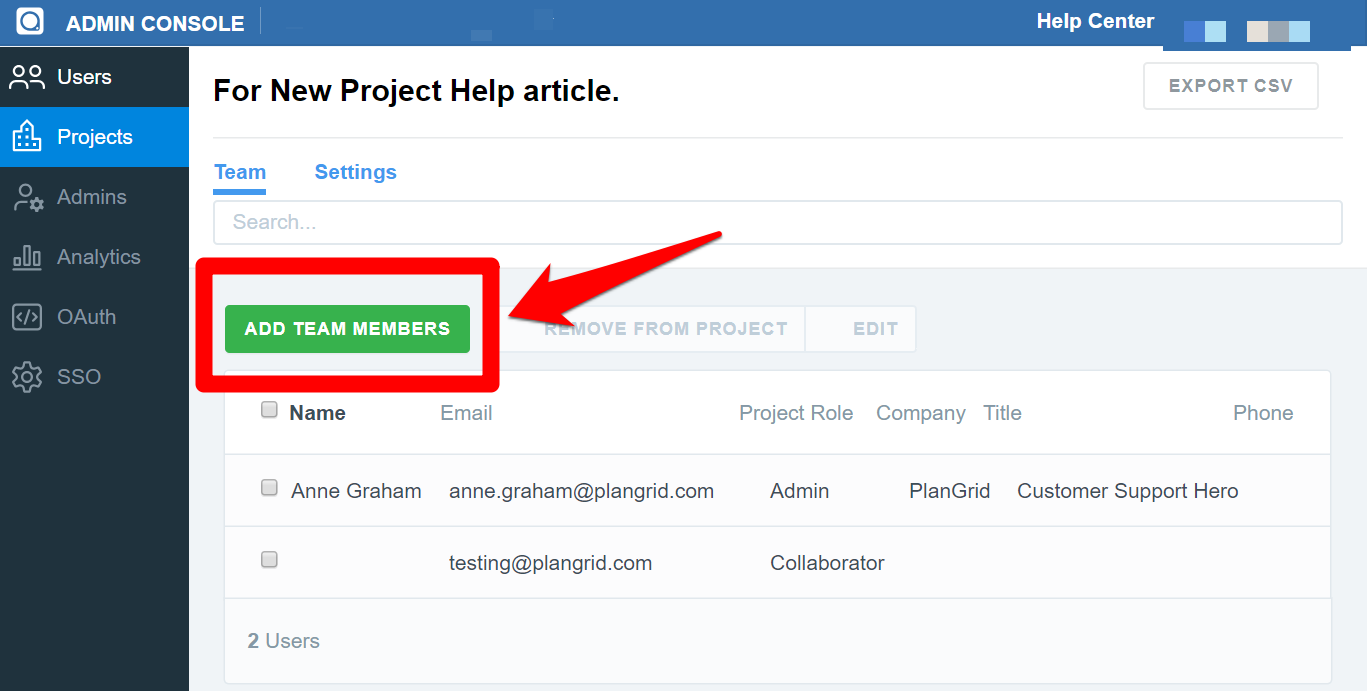
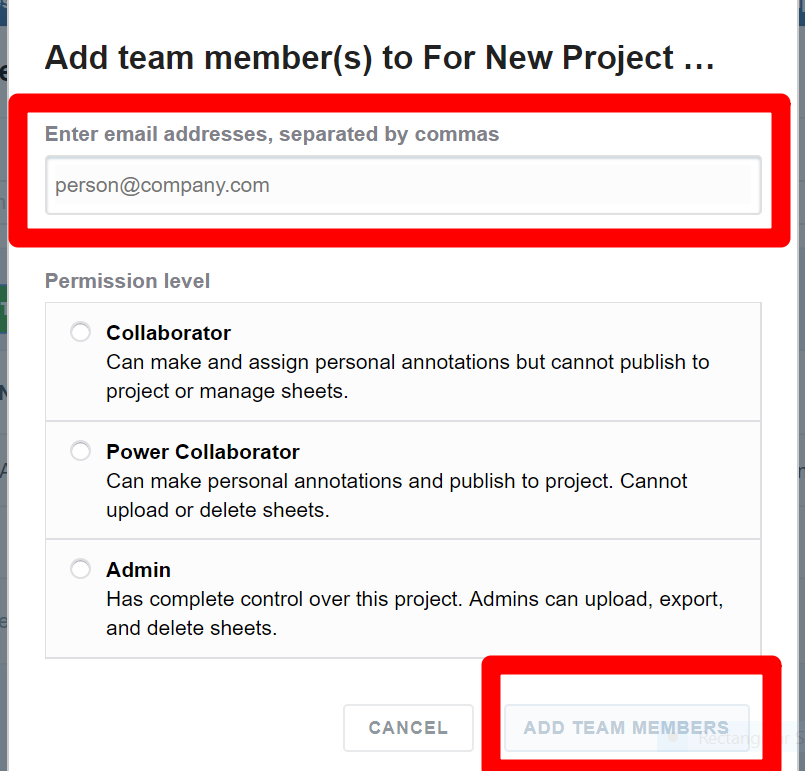
3. Enter the email addresses associated with your team member's PlanGrid accounts, separated by commas. Select their permission level, and click on "Add team members"
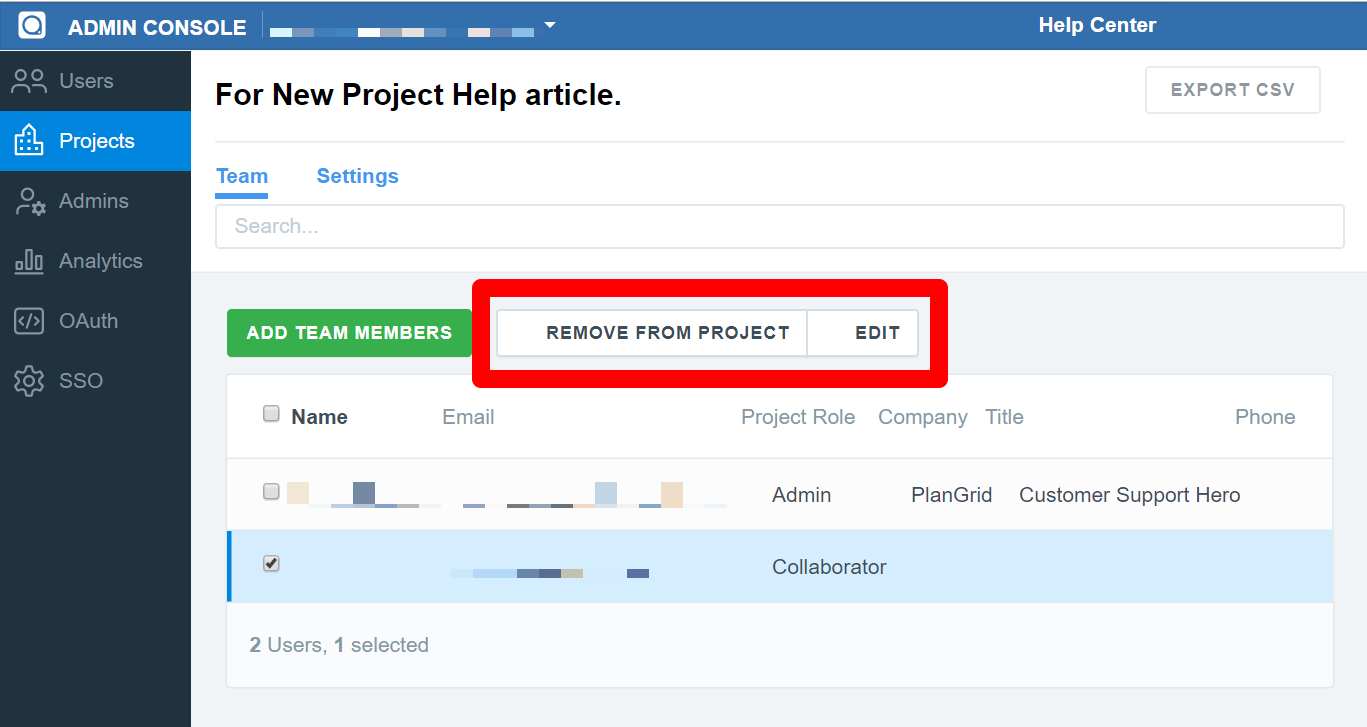
4. To remove or edit team members permissions, check the box next to their name, and click on "Remove from Project" or "Edit"
Creating Organization Linked Projects
If you are part of an Organization (i.e. your license is being paid for by an Organization) you can choose your new project to be Organization-linked or personal when creating your project.
The Organization that the project will be linked to will be the one that is paying for your license.
If you are also an Admin Console admin, you admin will be able to choose any of the Organizations for which you are an admin.

Related Articles: