For information on installing PlanGrid, please visit our Getting Started with Windows article.
Featured:
Markups on Windows
Creating Markups
Selecting and Editing Markups
Creating and Editing Text and Photo Markups
• Text
• Photos
Hyperlinks and Detail Callouts
• Automatic Hyperlinks
• Manual Hyperlinks
Multi-Select Tools
• Lasso Tool
• Rectangle Tool
Measurement Tool
Tasks Log
Documents Log
RFI Log
• Sorting
• RFI Detail View
Project Team
Markups on Windows
The PlanGrid for Windows app allows you the full control of your markups - just like you're used to on the web. You can publish markups to the project or remove them from the published set, add and view photos, change the color/shape/size of markups, edit photo titles, delete markups altogether - and more!
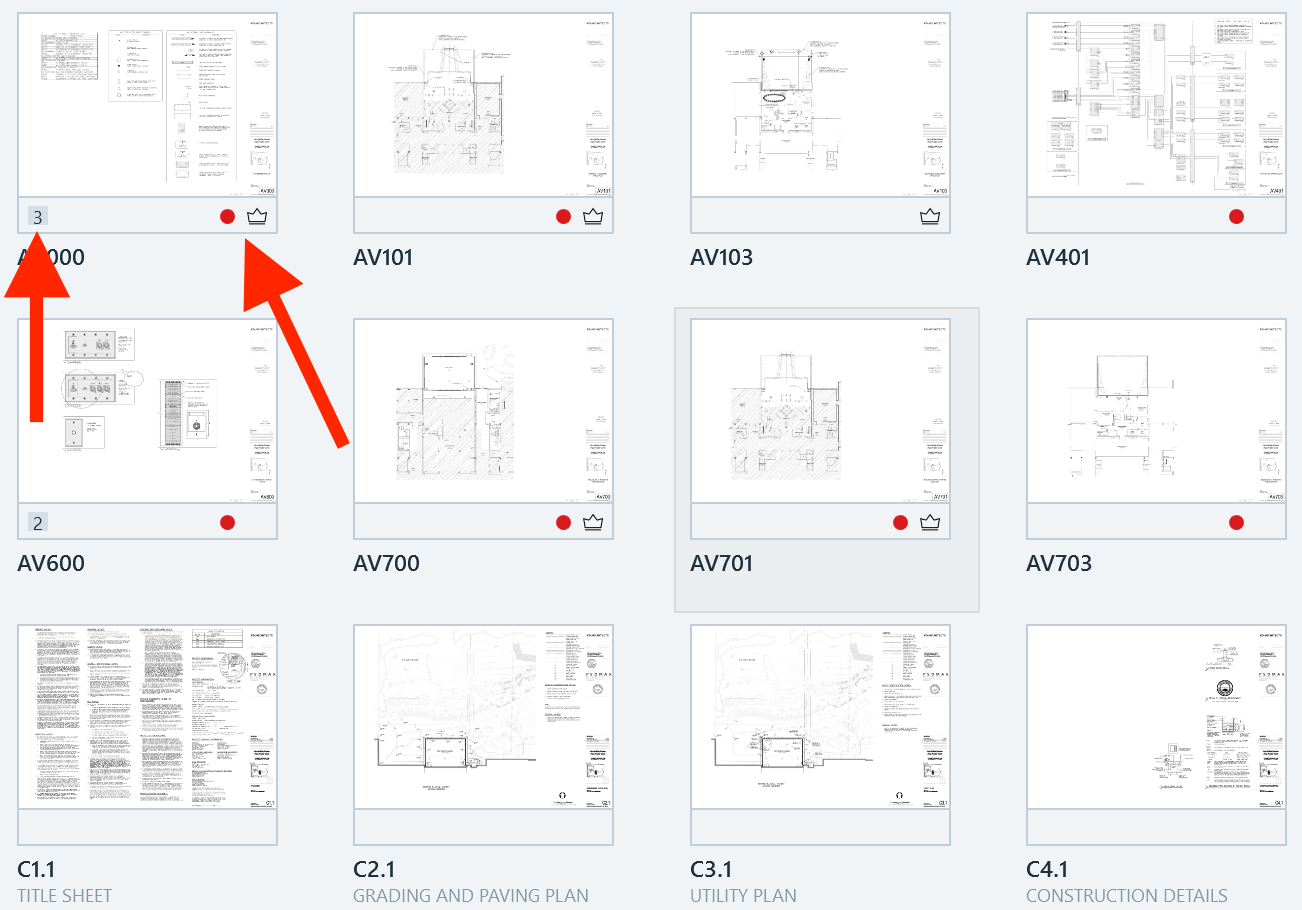
Markups on your sheets will be indicated in grid view by the following icons:
- Red Dot: Indicates personal markups are present on the sheet.
- Crown: Indicates there are published markups s present on a sheet.
- Grey number: Indicates the number of revisions of this sheet present in the project.
Creating Markups
To create markups, first open the sheet that you want to markup. When viewing a sheet you will see your markup tool bar along the right side of the screen. For full instructions on using PlanGrid's markup tools, go here.
To begin creating markups on your PlanGrid for Windows app, simply select the tool and place on the sheet.
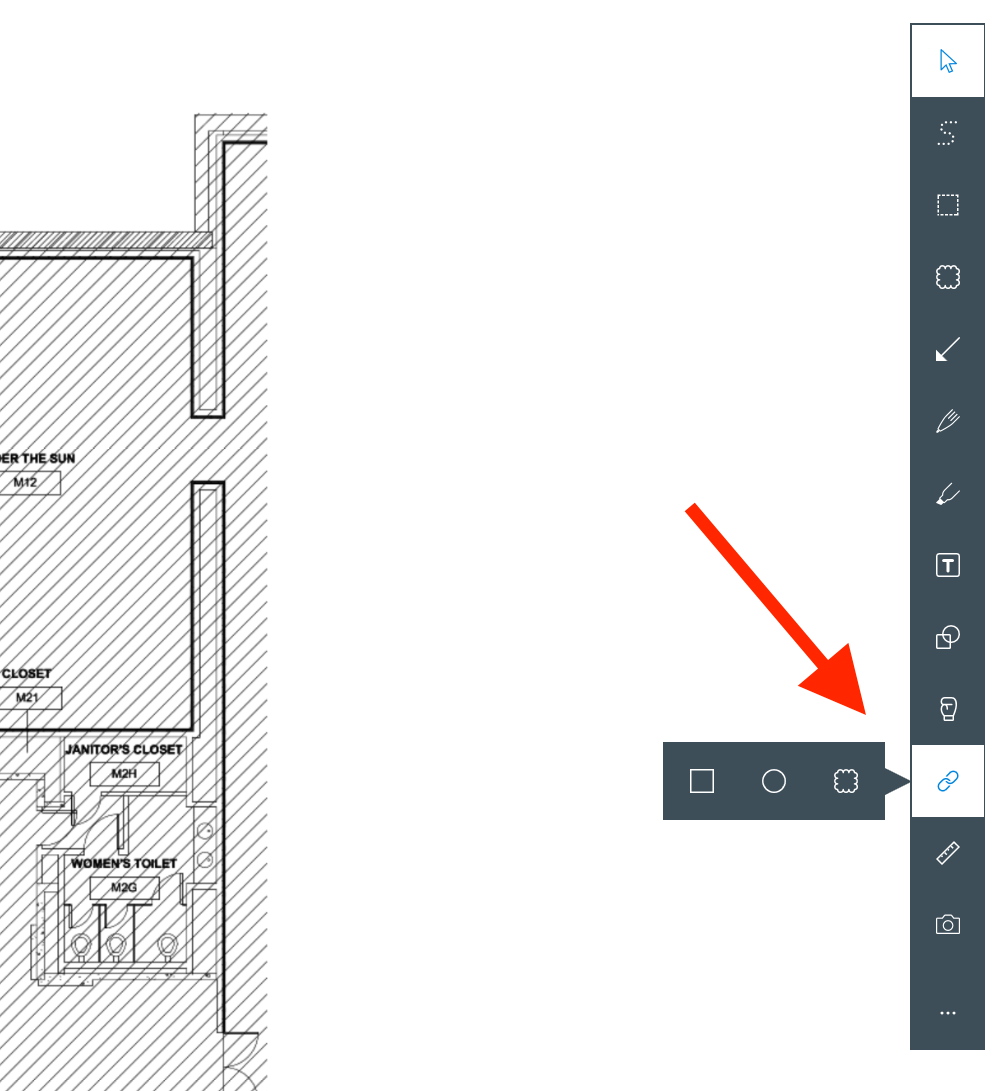
You can create all of the following markups:
- Clouds
- Arrows
- Pen Markups
- Highlighter Markups
- Text Markups
- Shapes
- Task stamps
- Manual Hyperlinks
- Measurements
- Photo Markups
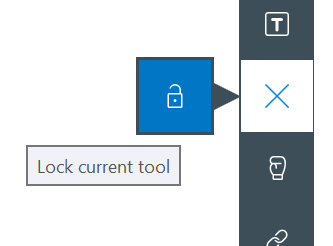
You can also select any tool in the markup toolbar and use the lock to keep using it. Once you’re done, click on the lock or on another markup tool to unlock it. This will allow you, for example, to place several task stamps in a row quickly.
Selecting and Editing Markups
1. To select an markup, open your sheet and click or tap on the markup. To select multiple markups, you can use the multi-selection tool (lasso and rectangle selection) or use the keyboard shortcut: hold down CTRL while selecting multiple markups.
2. Once selected, you can move the markup to another location on the sheet, or edit its size. To move the markup, click anywhere inside the dashed border to drag the markup to a new location. To edit the size, click and drag on the shape handles to expand or contract the markup.
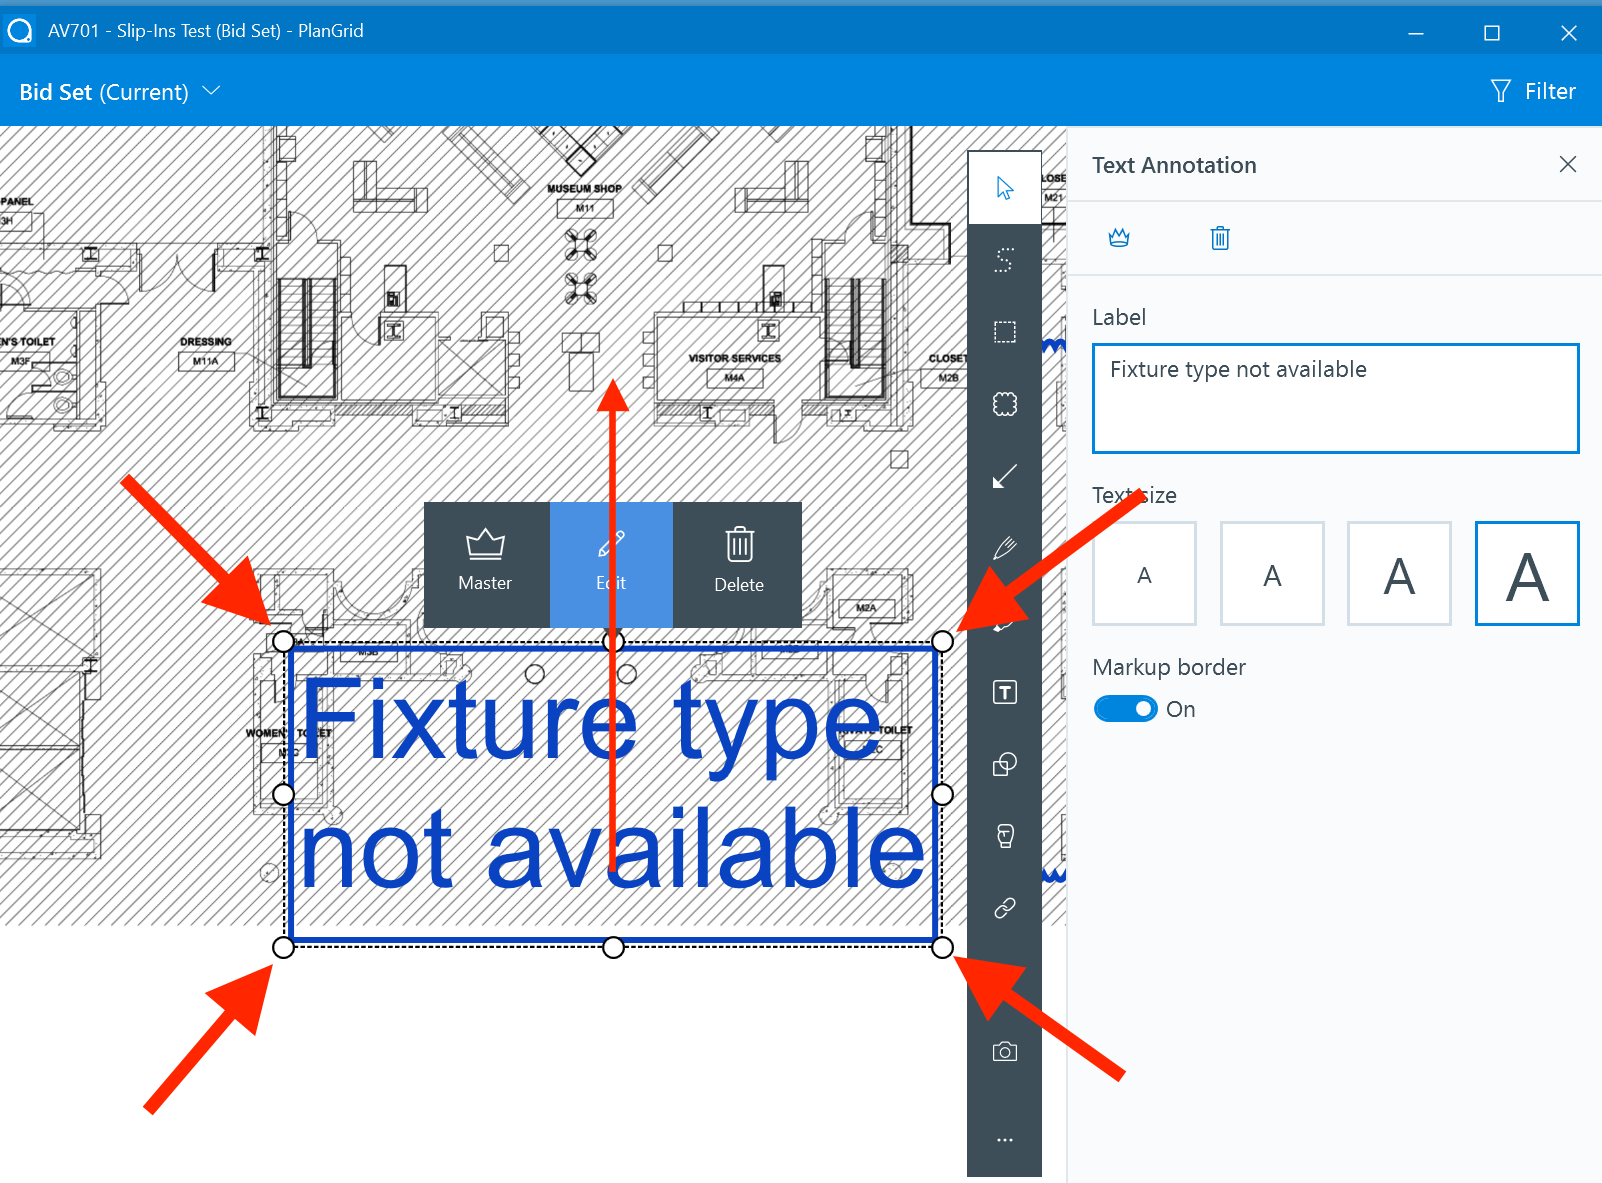
3. To view the markup details, such as who created it and when, attached photos, and more, simply click the markup to select it. The "Edit" button will select automatically and open a pane on the right-hand side where you will see the details about that specific markup.
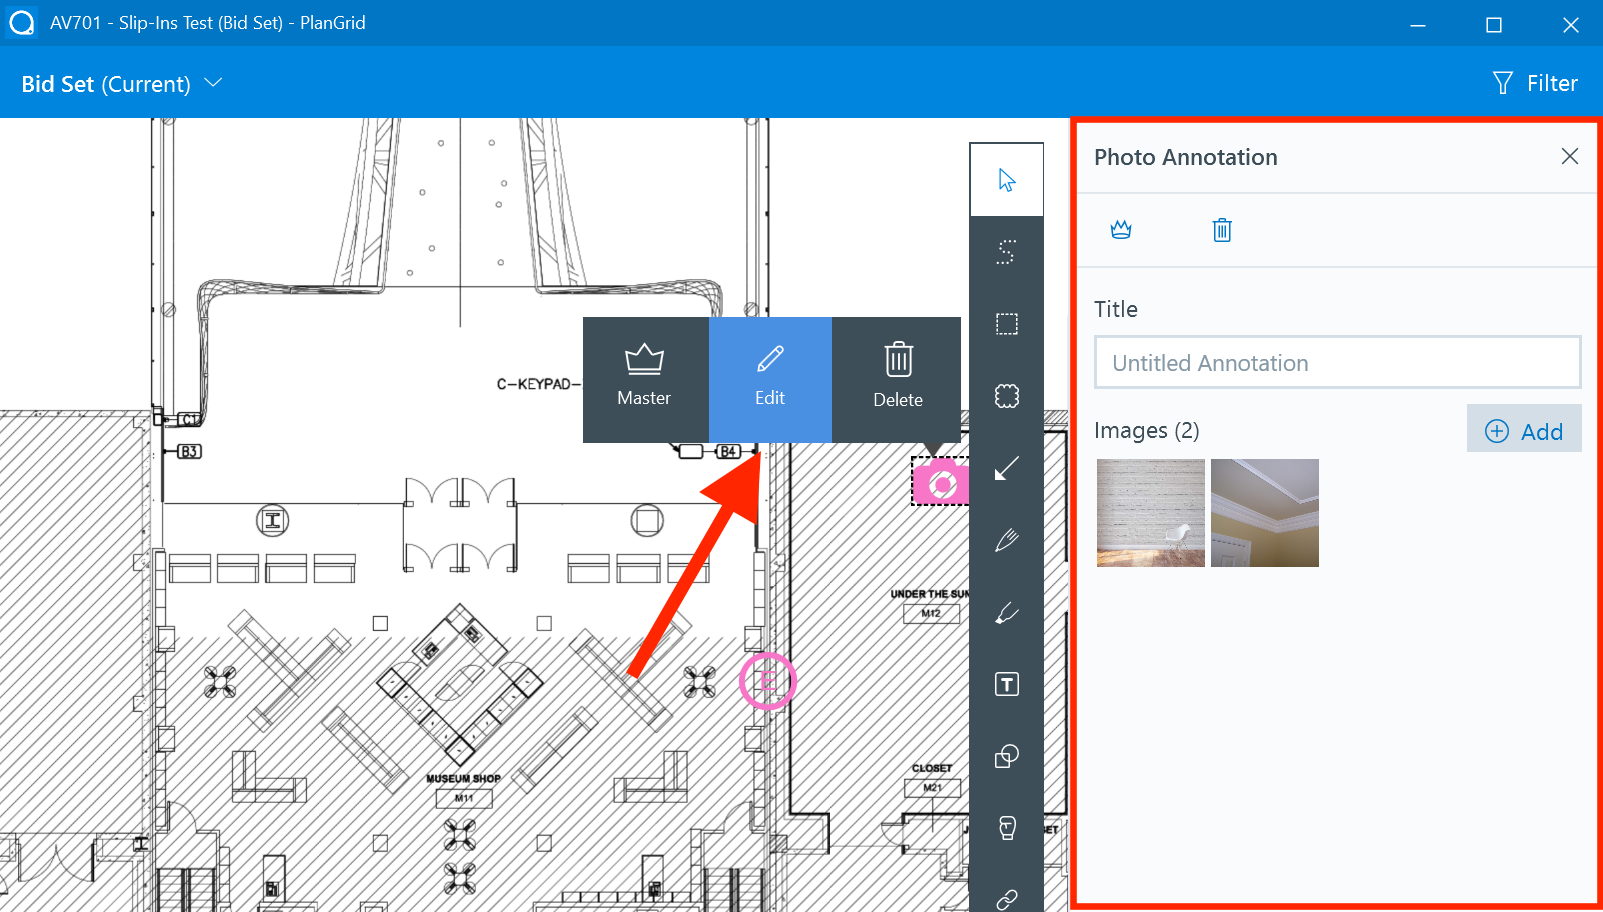
4. To share markups with the entire project team, select the markup, then choose "Publish to Project" from the action bar that appears. Once the mark up is published to the project, it will be visible to all users on the project team. If you would like to remove a markup from the published set, simply select the markup to open the action bar menu, and click the blue "Publish" button to unpublish.
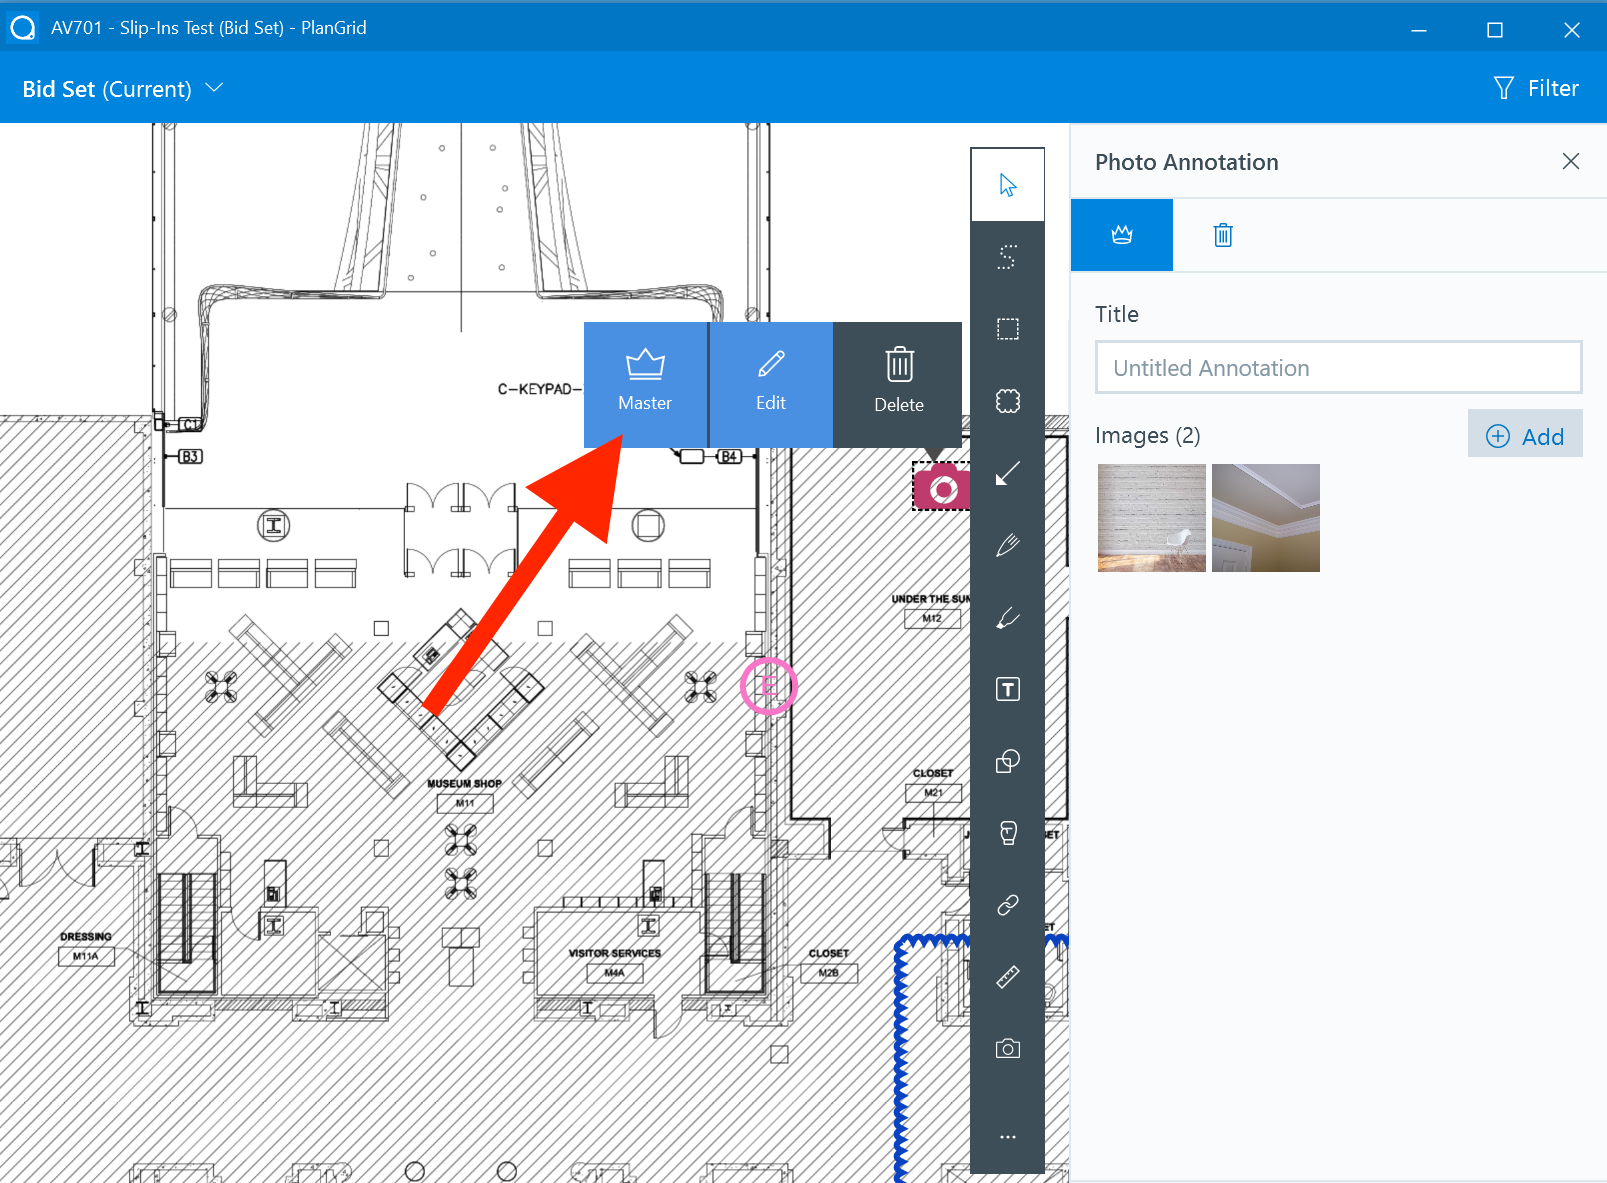
Please note: Only project admins and power collaborators can publish or unpublish markups from the project. For more information on PlanGrid's permission levels, go here.
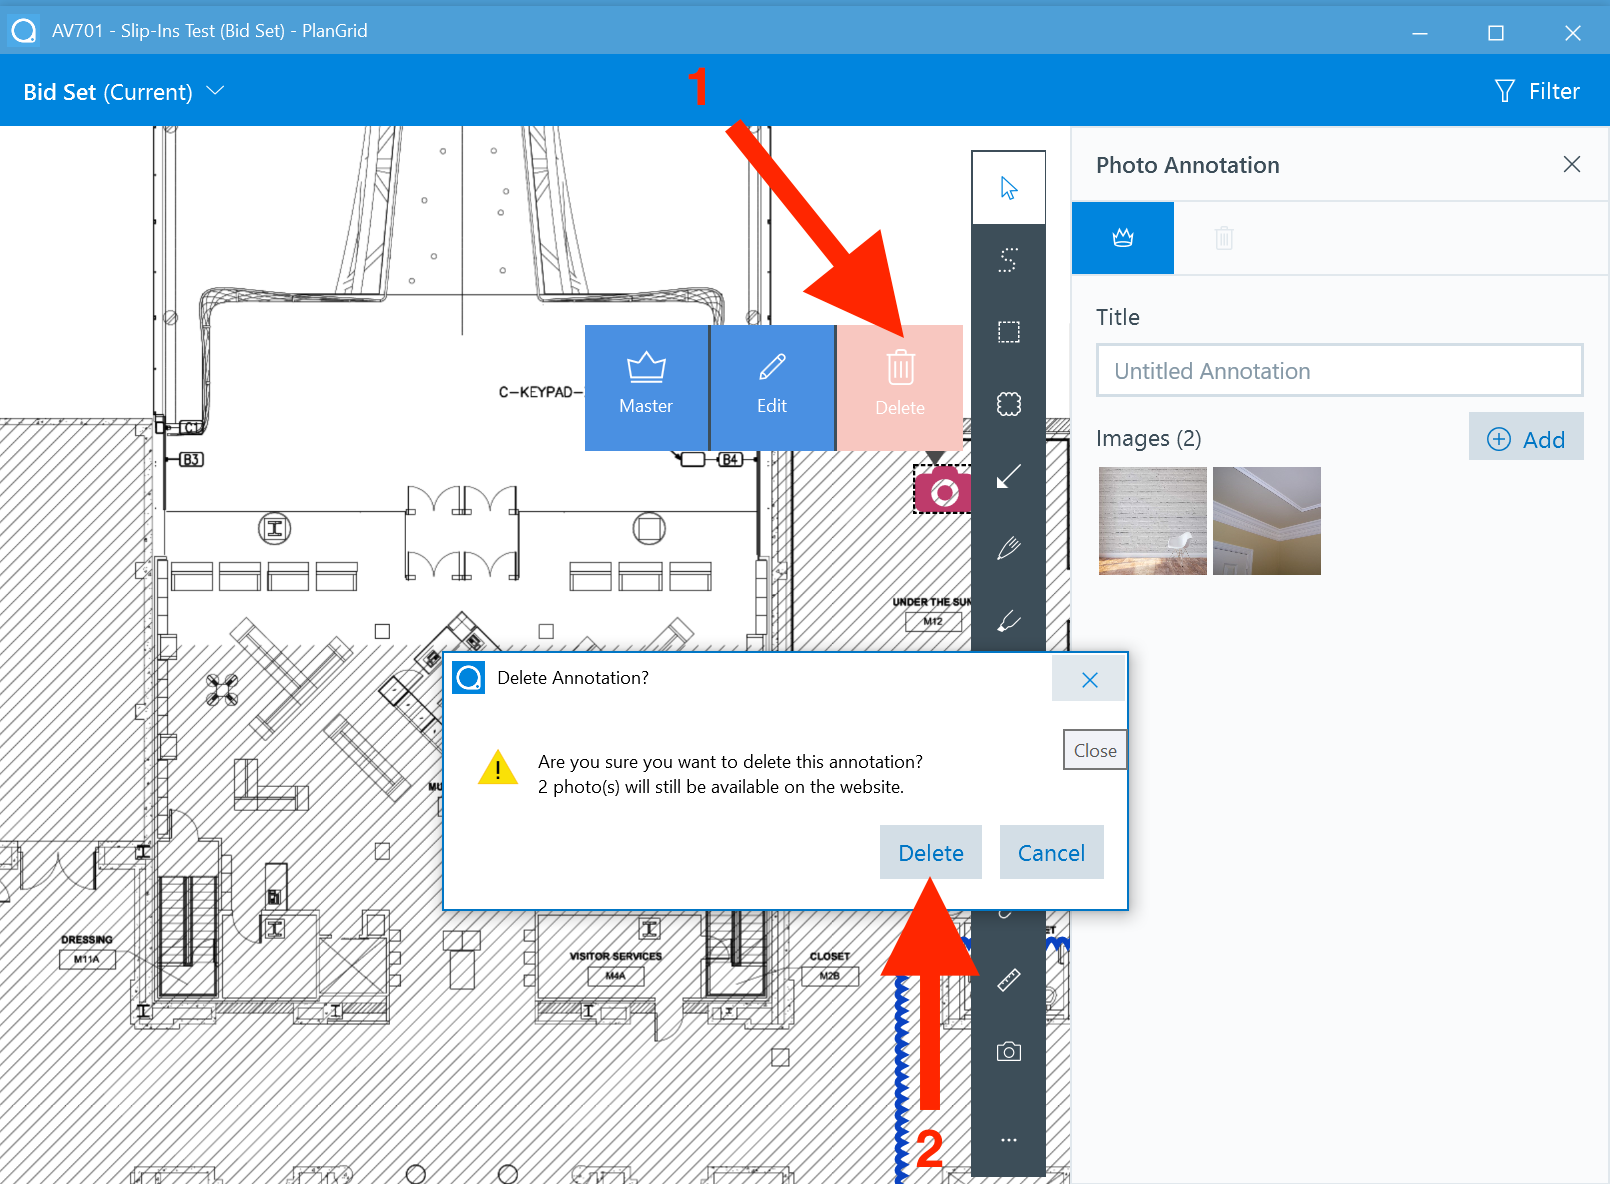
5. To delete markups, click on the mark up, and then click the trash can in the action bar. All users can delete their personal markups, but only admins and power collaborators can delete published markups.
Creating and Editing Text and Photo Markups
Text:
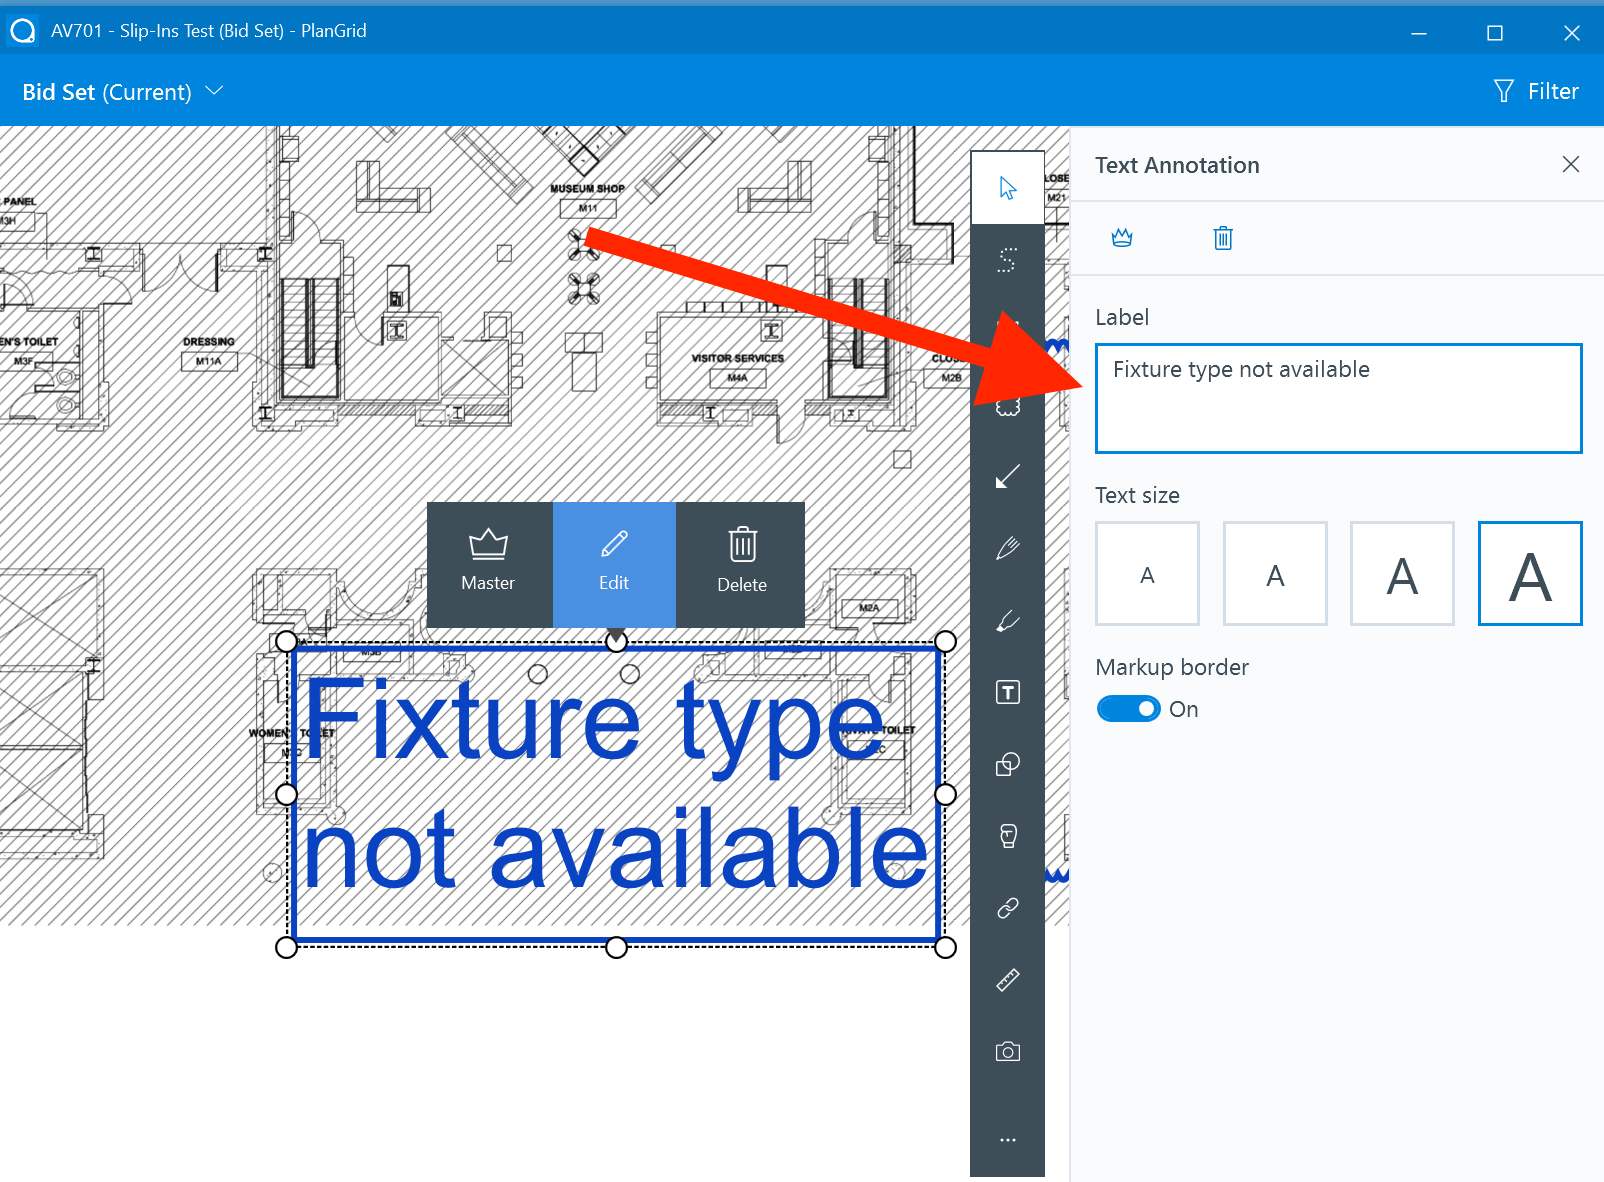
1. Select the Text tool from the toolbar.
2. Drag and drop the text box in the required location on the sheet.
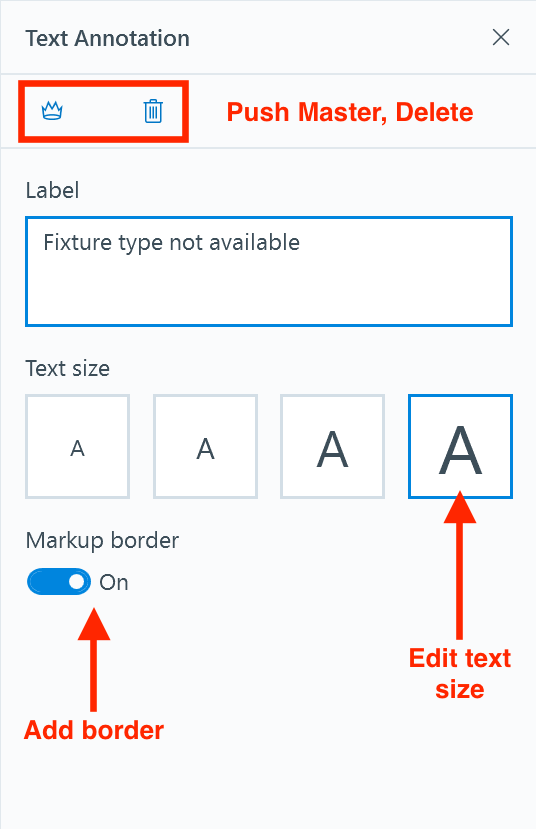
3. The side bar will appear, and will allow you to edit the Text and provide different Text Box Attributes.
4. Here you can edit the text itself, the text size, and add or remove a border:
5. To edit an existing text box, click the text markup to open the Action Bar. The "Edit" button will select automatically and open the markup's detail panel on the right-hand side. Edit the text markup as required.
Photos:
You can track all your projects’ progress with the PlanGrid photo tool. Click here to learn more about Progress Photos.
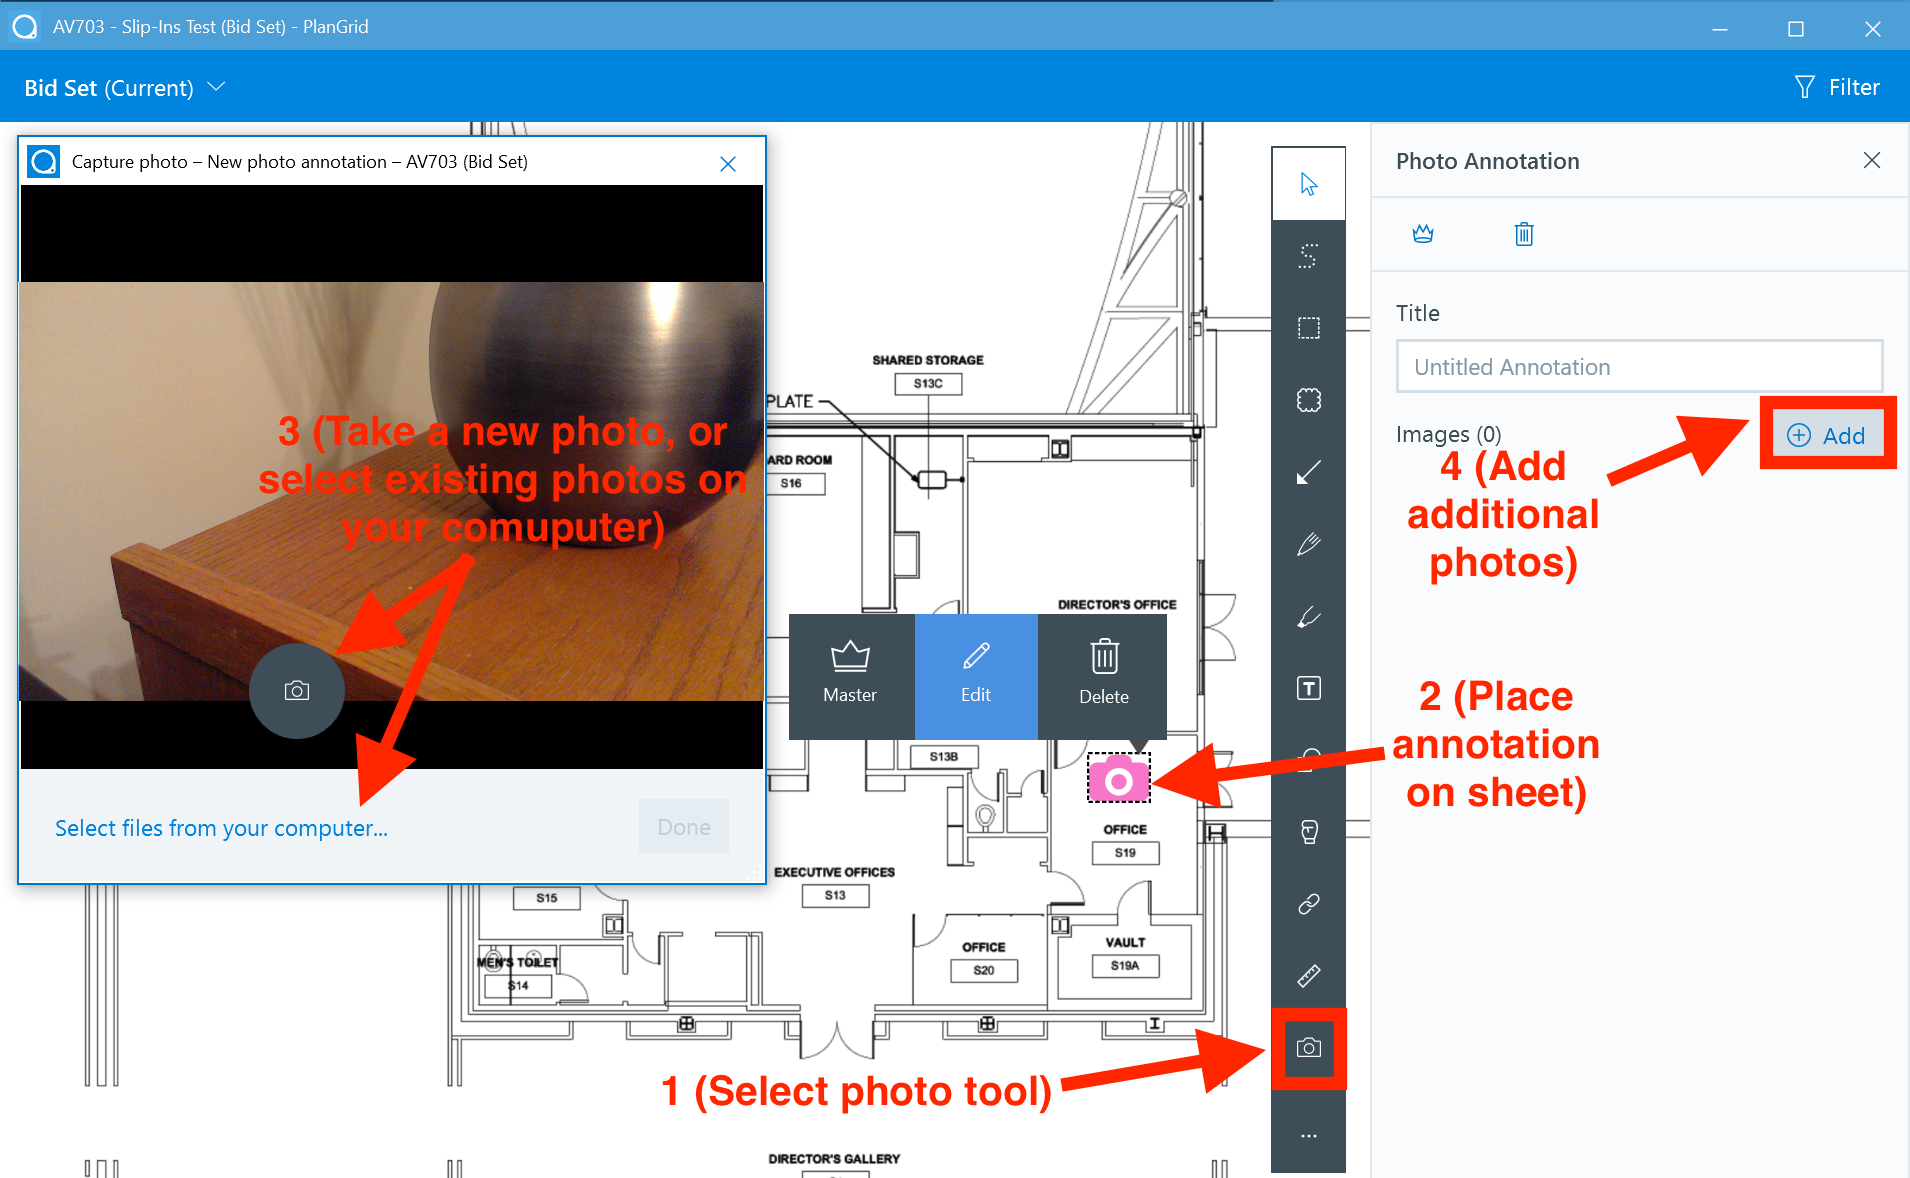
You can take photos with your Windows device camera, or use photos saved on your computer.
- Click on the photo markup tool (camera) and then place the markup by clicking on the sheet in the location where it belongs.
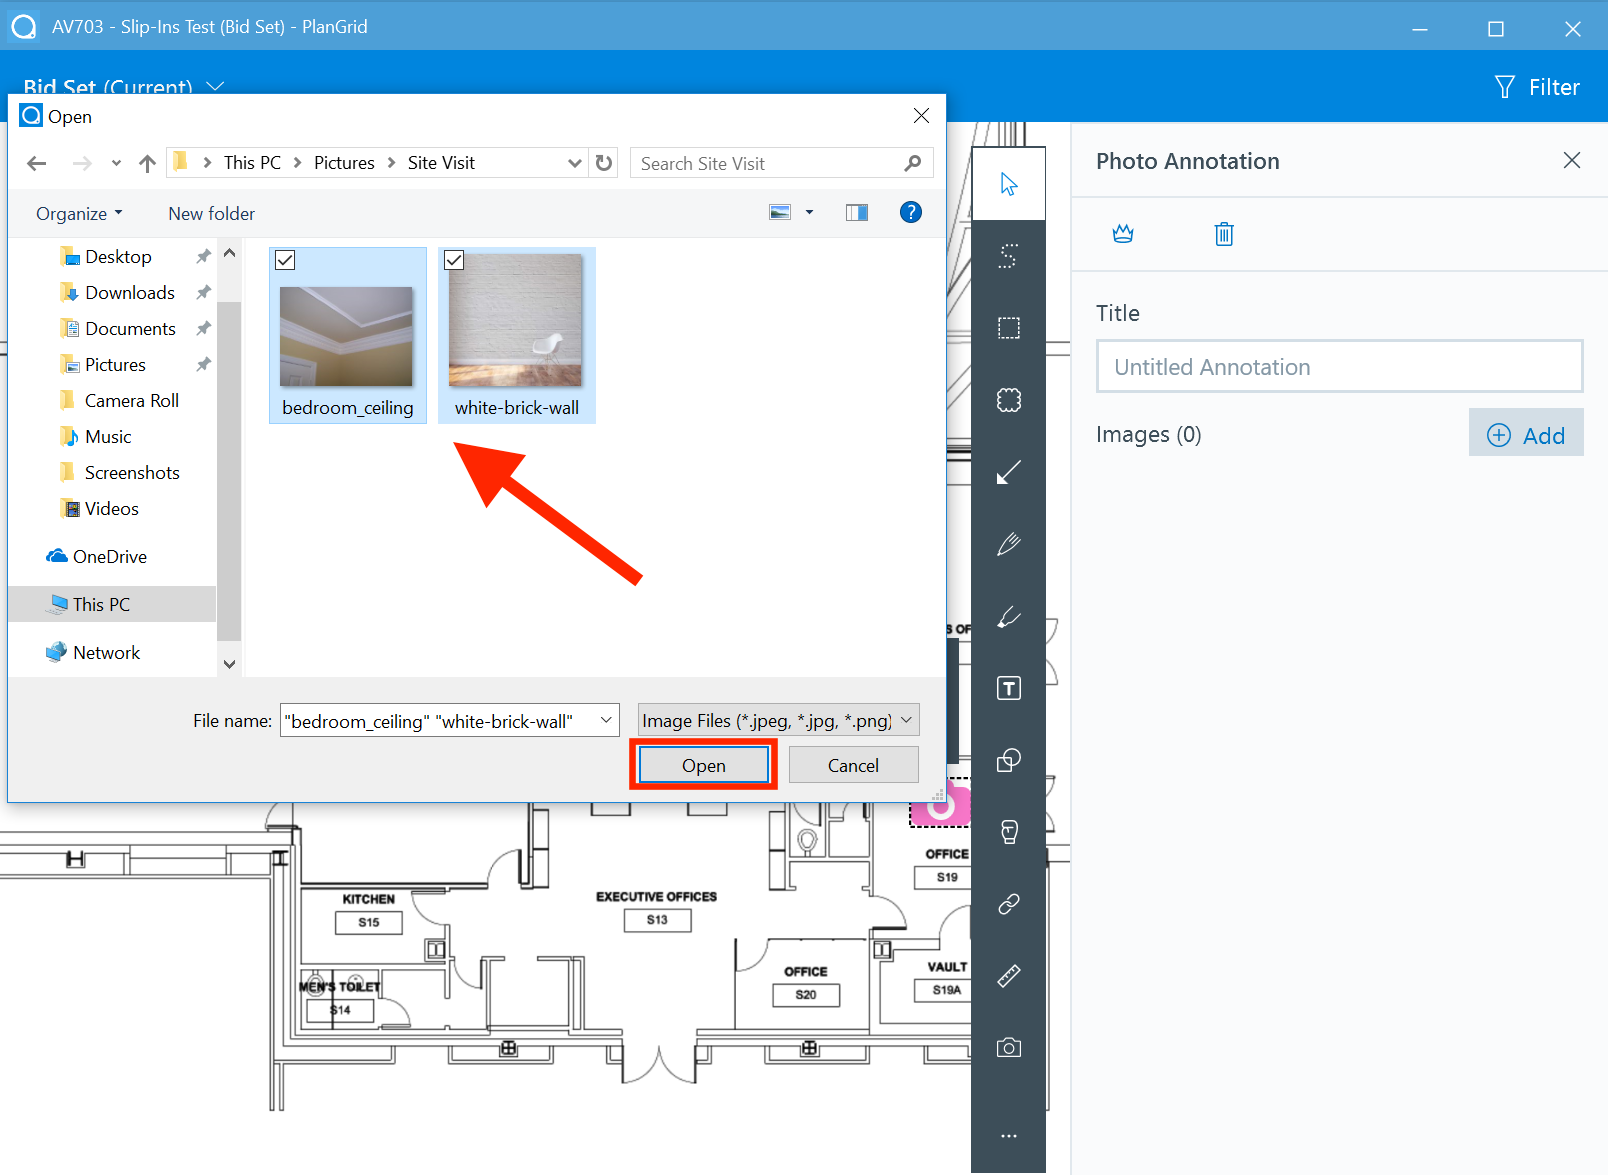
- For Surface users, the app will immediately open the rear camera view to take a new photo. In the viewfinder window, you can also click on “Select files from your Computer” to search through all .JPG, .JPEG, and .PNG files available on your computer’s hard drive.
- You can select one or several photos to add at one time. They will appear in the side drawer as they are uploaded.
NOTE: The app will always use the rear camera on the Surface, we are still working on allowing to switch cameras. Also, manual focus (e.g. tap to focus) is not supported yet.
Steps:
1. To edit a photo markup or add photos, click the camera icon markup to open the side bar to view the attached photos.

2. To edit the photo group title, simply click the title to begin editing. To delete the photo group, click the trashcan.
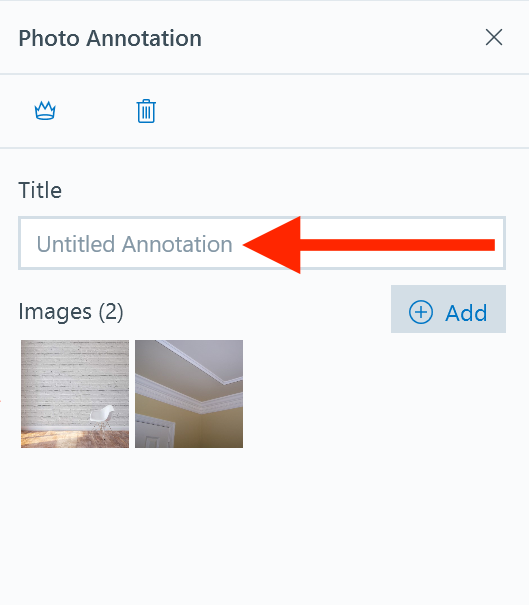
3. To edit the individual photo title, click the photo thumbnail to enlarge that photo. To delete an individual photo, click the trashcan icon at the top right of the photo detail. Use the navigation arrows to scroll through the photo gallery.

4. To return to your sheet view, click the Back arrow at the top left of the window.
Please note: With the ability to edit markups comes the possibility of issues with syncing changes to the PlanGrid cloud. If you experience any issues with syncing while using PlanGrid for Windows, please check out our troubleshooting section here.
Hyperlinks and Detail Callouts
With PlanGrid for Windows, you are able to see and access both the automatic hyperlinks that PlanGrid has added to your detail callouts, as well as any manually created hyperlinks to other sheets, documents, or RFIs.
Automatic hyperlinks:
1. To open the referenced sheet, click the hyperlink to open the action bar and view a preview of the hyperlinked sheet.
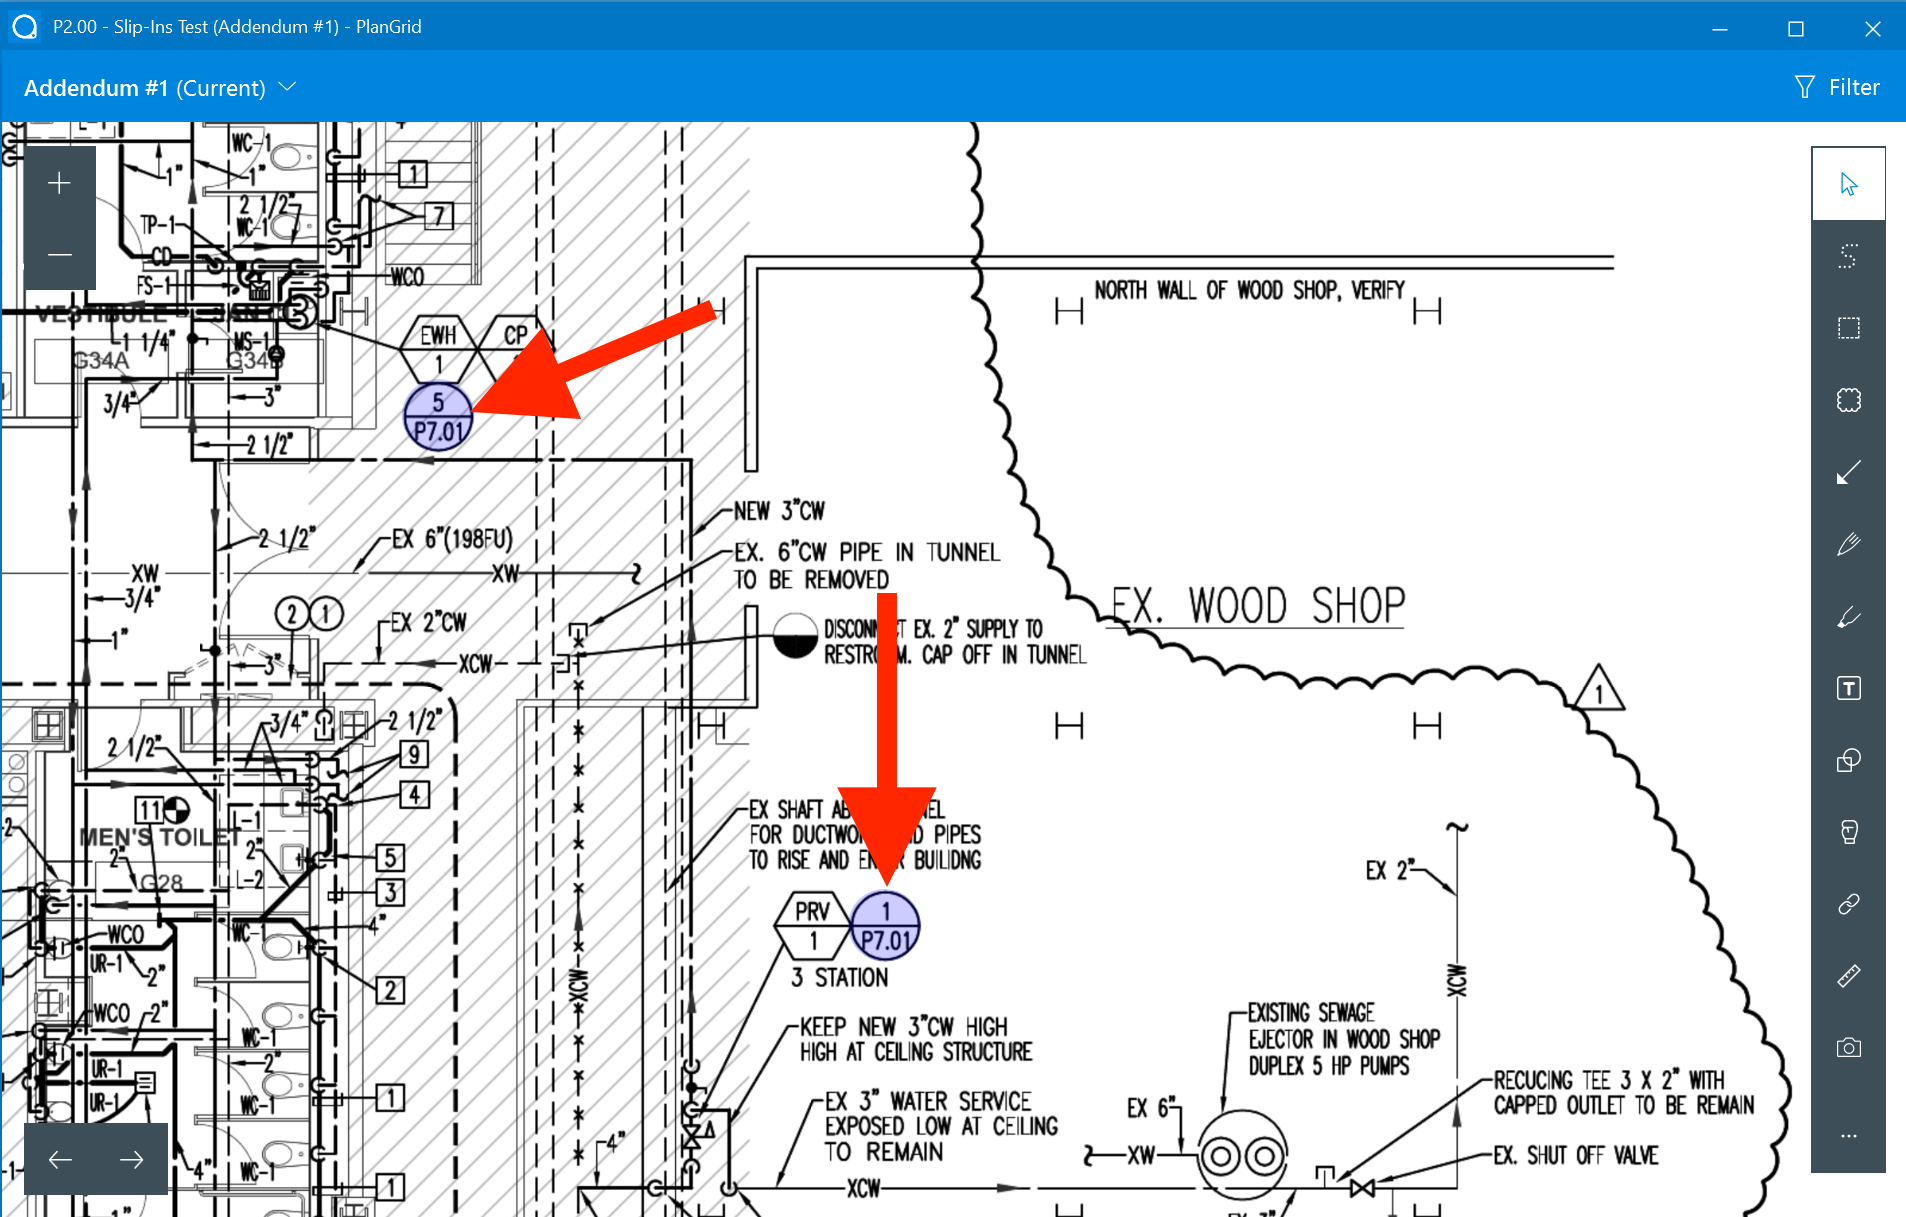
2. To jump to that referenced sheet, simply click the thumbnail or select "View Sheet".
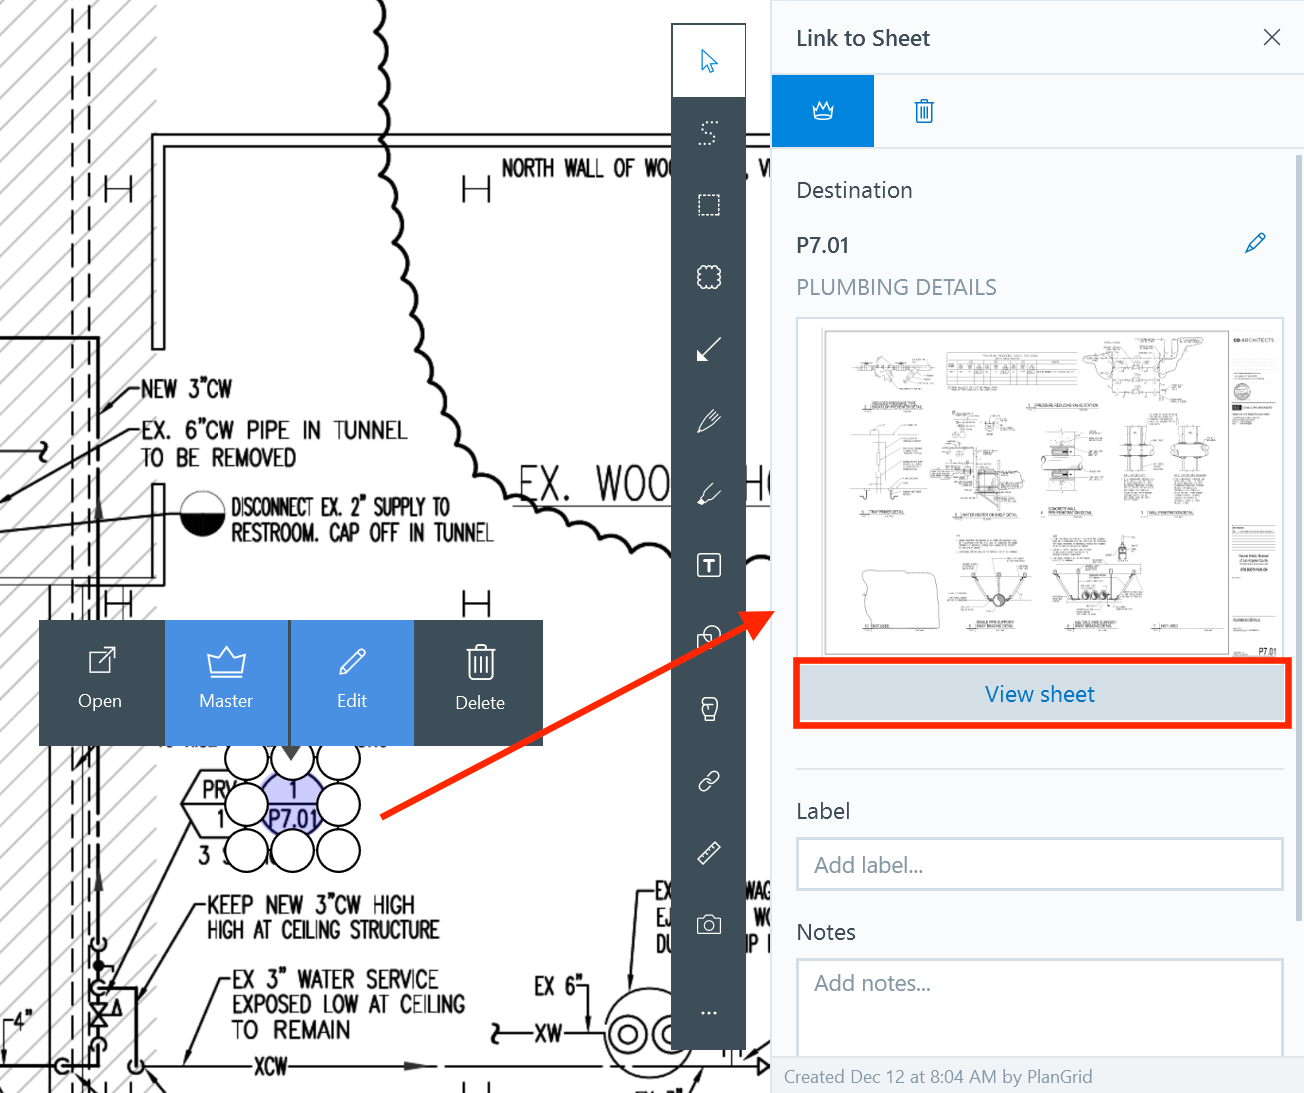
3. To modify the border of the hyperlink, scroll to the bottom of the preview pane and turn "Markup border" On.
For more information on how PlanGrid's automatic hyperlinks work, go here.
Manual hyperlinks:
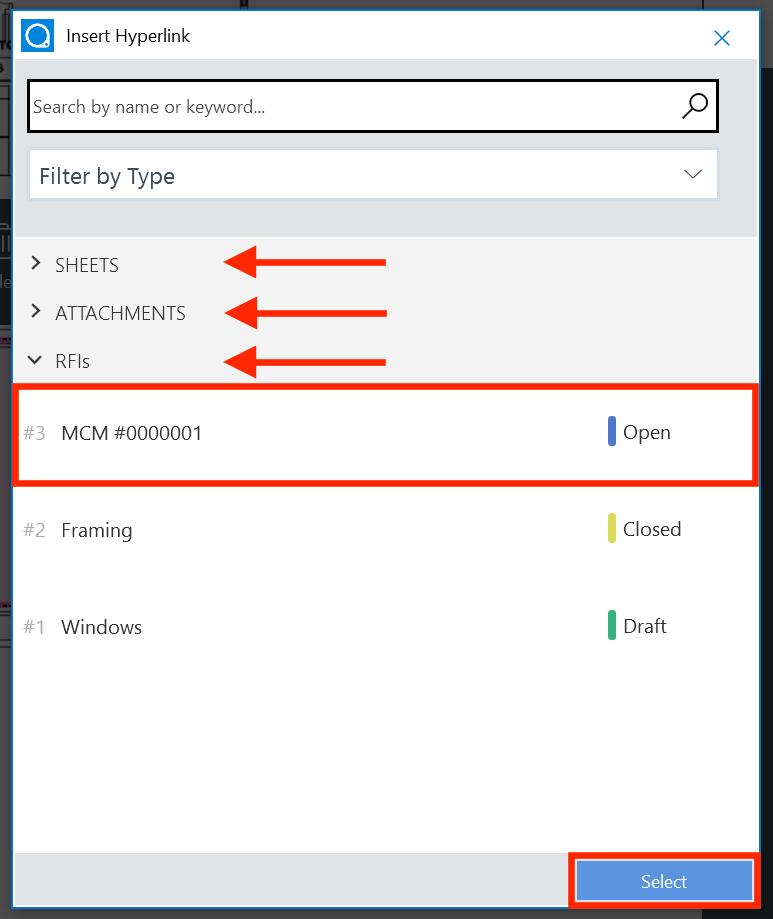
In PlanGrid for Windows, you can access and/or create information linked as an document (in PDF format), a sheet or an RFI.
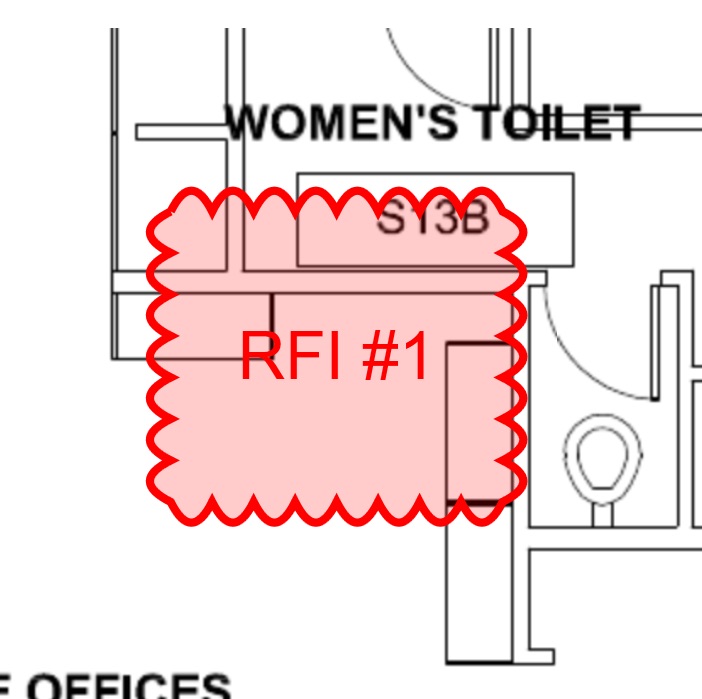
1. To create a hyperlink, click on the Link icon in the Navigation menu, select the shape, and place it on the sheet.

2. Select the file to link to, and click "Select" to finish linking.
3. The side panel will open with all the hyperlink information. Notice the hyperlink label. It's auto-populated, but you can edit or delete it anytime.
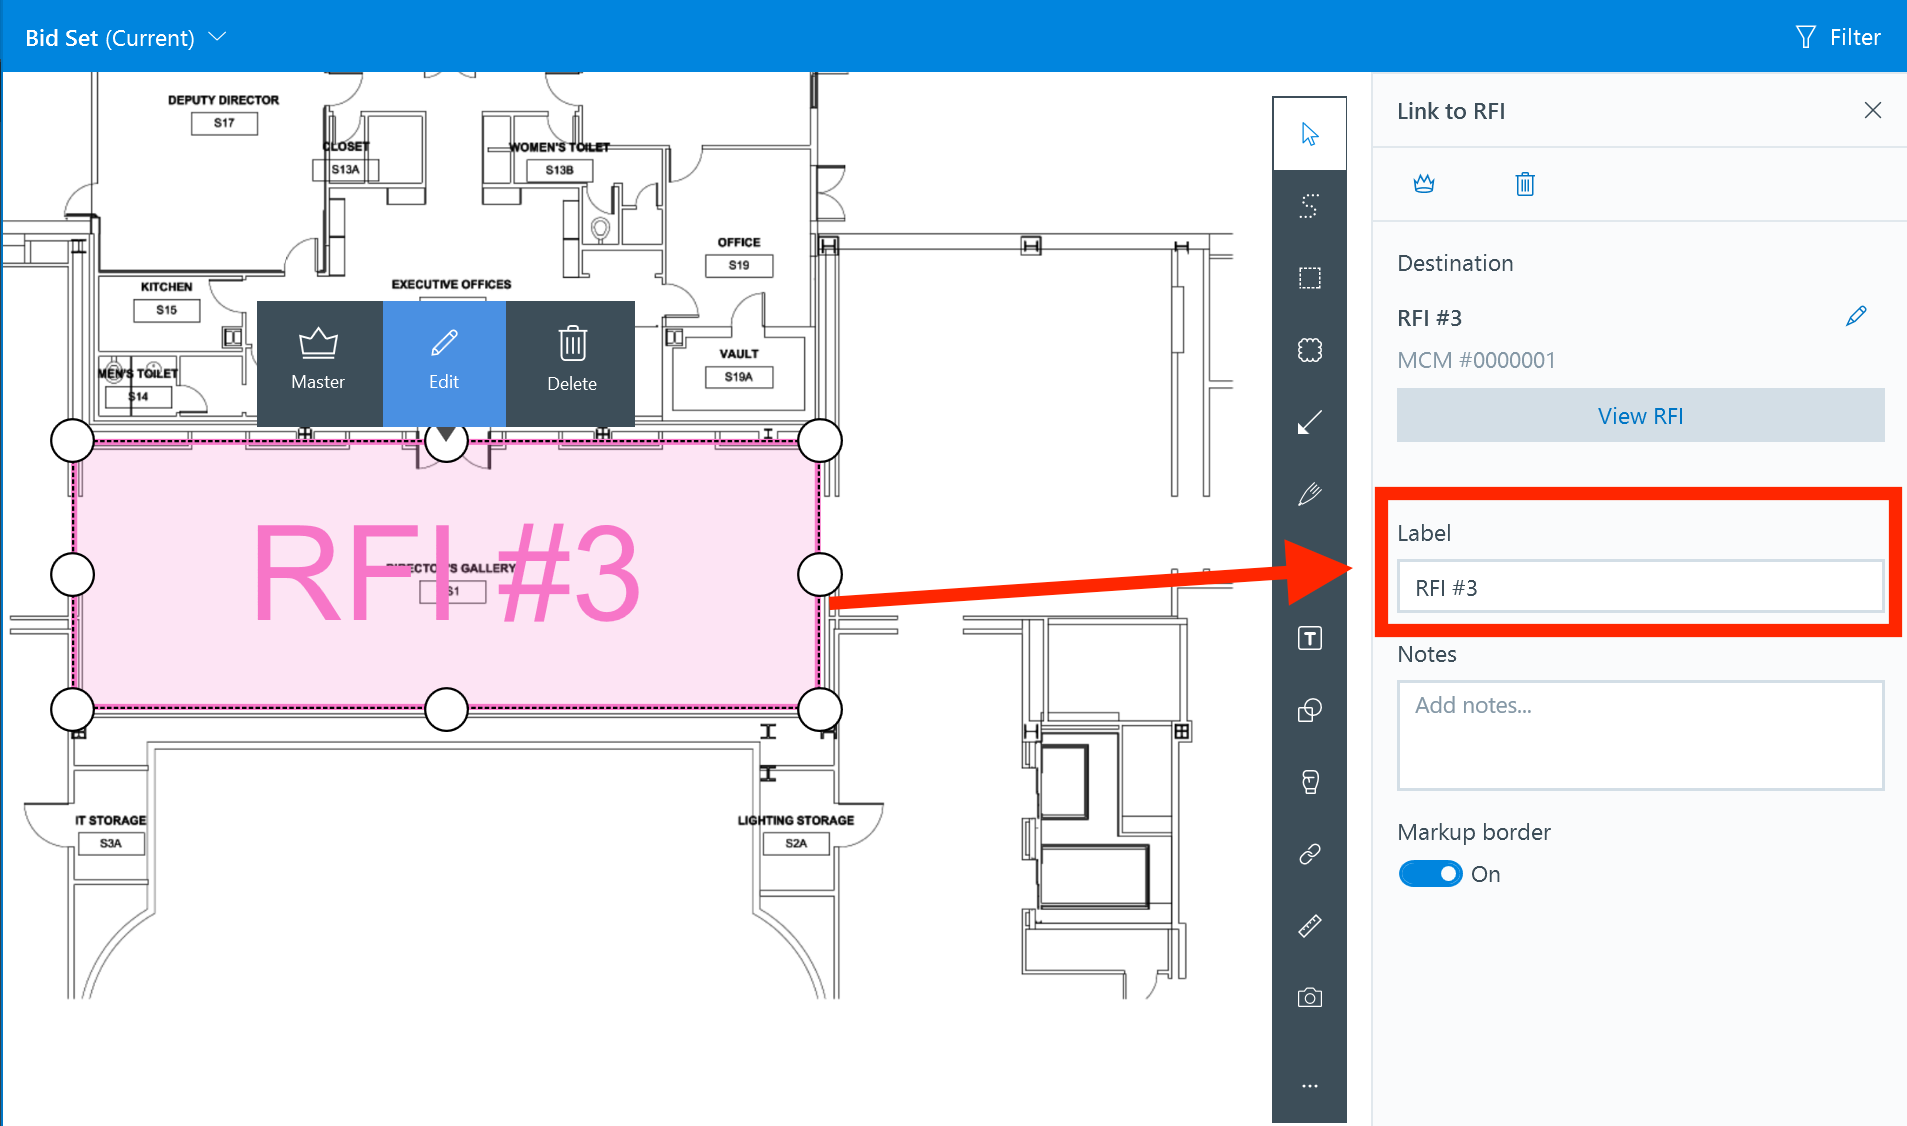
4. To view a linked document , click "View Sheet/RFI/Document".
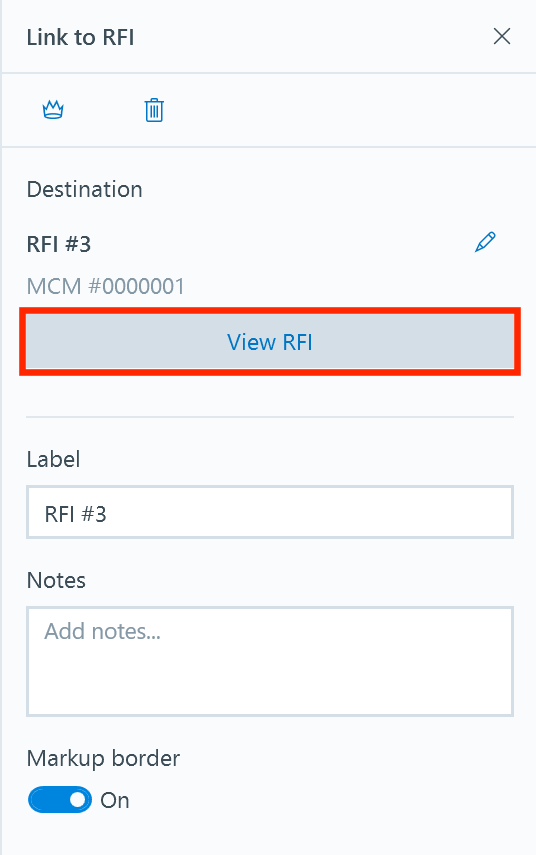
- For documents, the system will search for a program in which to open a PDF and, if necessary, provide you with the option to select from those available.
- Select one and click open/ok.
Note: You do NOT have to be connected to the internet to access linked documents.
- Because Windows doesn’t currently have a PlanGrid RFI details tool, when you select to jump to the RFI, the system will take you to the PlanGrid website. However, you can see an overview of your RFIs in the RFI tab.
- The link will take you first to the log-in screen on PlanGrid.com. Once you log in, you will be taken directly to the RFI page.
To view an RFI, you DO have to be connected to the internet.
Multi-Select Tools
There are two multi-select tools available on PlanGrid for Windows:
- Lasso Selection Tool
- Rectangle Selection Tool
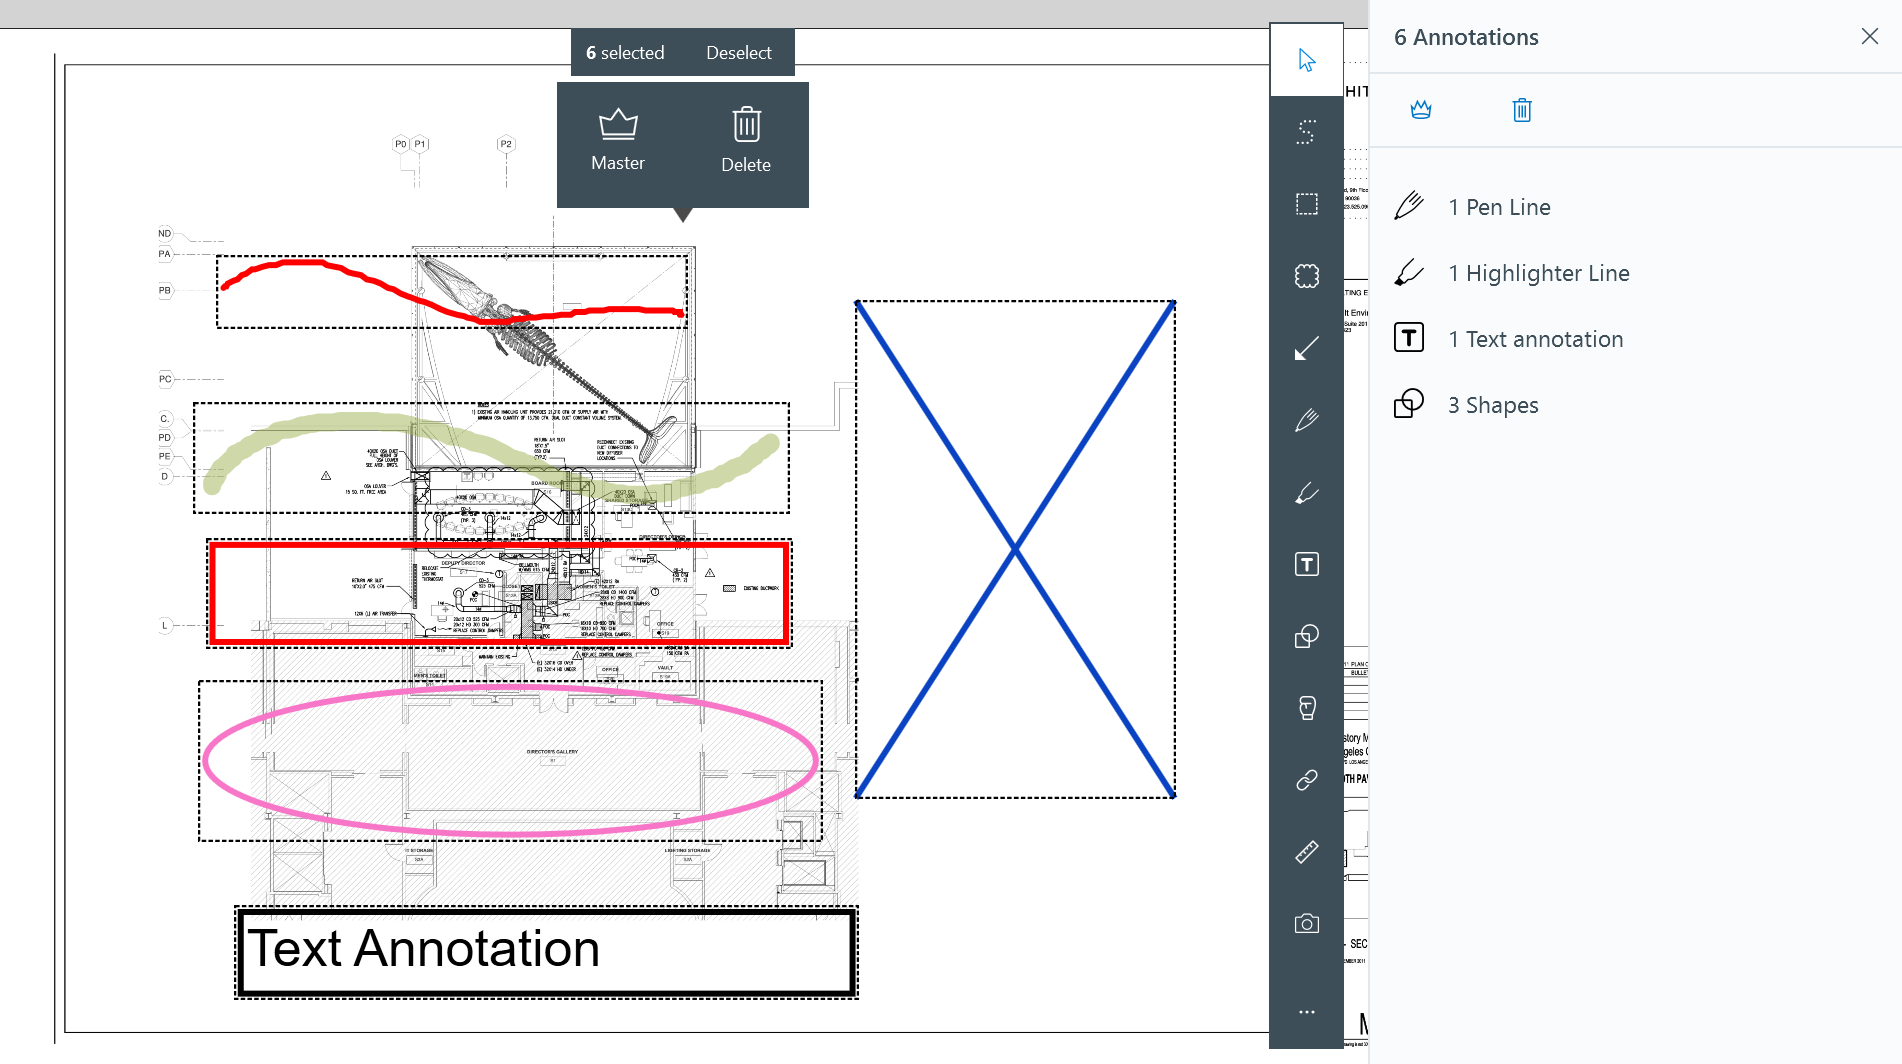
These tools allow you to select multiple tasks and markups on a sheet at once.
Lasso Selection Tool
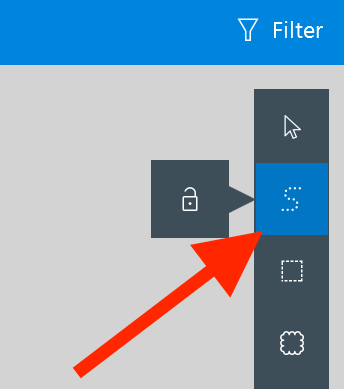
- When you use the Lasso tool, you need to run your mouse OVER the markups that you want to select.
- The lasso tool allows you to continue adding markups to the selection until you select the “cursor” tool (the arrow icon at the top of the toolbar).
- Note - the selected markup counter will track the number of markup added to your selection.
- Once the cursor tool has been selected, you can edit the selected markups - Move, Publish/Un-publish, Delete, and change the color.
Rectangle Tool
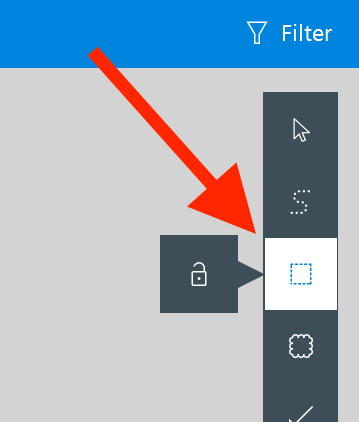
- The rectangle selection tool is only available on Windows
- When using the rectangle selection tool, all markups either partially or entirely inside the rectangle are selected.
- If another rectangle is created, however, the new selection is not added to the previous one.
- The selection counter will always display the user-created markups that have been selected.
Please note: automatic hyperlinks (created by PlanGrid for detail, section and elevation call-outs) cannot be selected by either of the multi-select tools.
Measurement Tool
Straight and freeform measurements are now available on the Windows app.
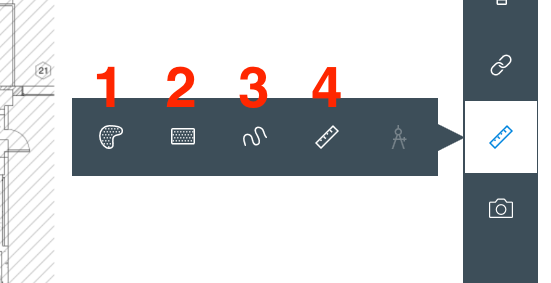
- Free-form area: Use this to draw an irregular shape on the sheet
- Rectangular area: Use this like the box or shape tool, to measure a rectangular area.
- Free-form line: Use this like the pen or highlighter tool to measure a curved or irregular line segment.
- Ruler: Use this to set down a straight line.
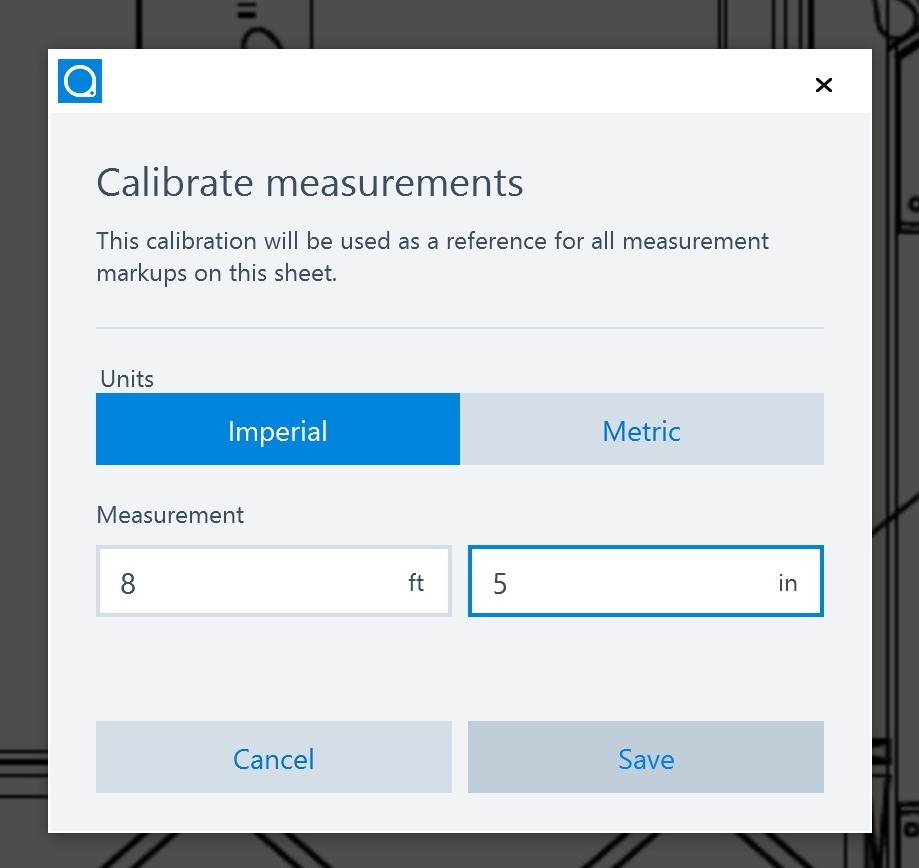
1.You will need to first calibrate the tool before any measurements can be made. To calibrate the measurement tool, click on the ruler icon on the toolbar, then click on the calipers and take a known measurement.
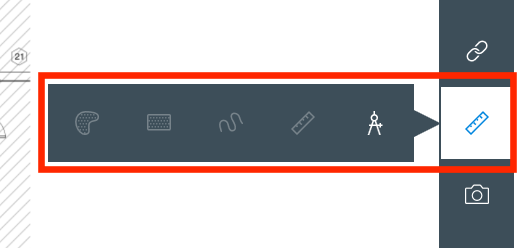
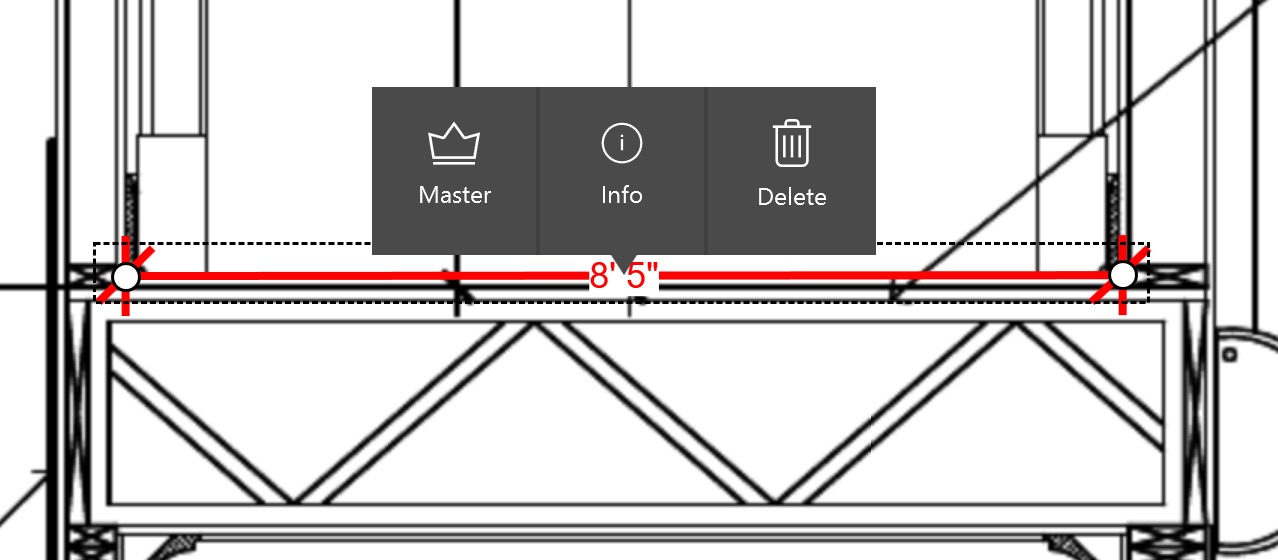
2. Select the measurement units in which you would like to calibrate, and add your measurement. Click “Save” to finish calibrating.
3. Use the ruler icon to measure your straight lines, and the freeform line icon to measure any freeform lines.
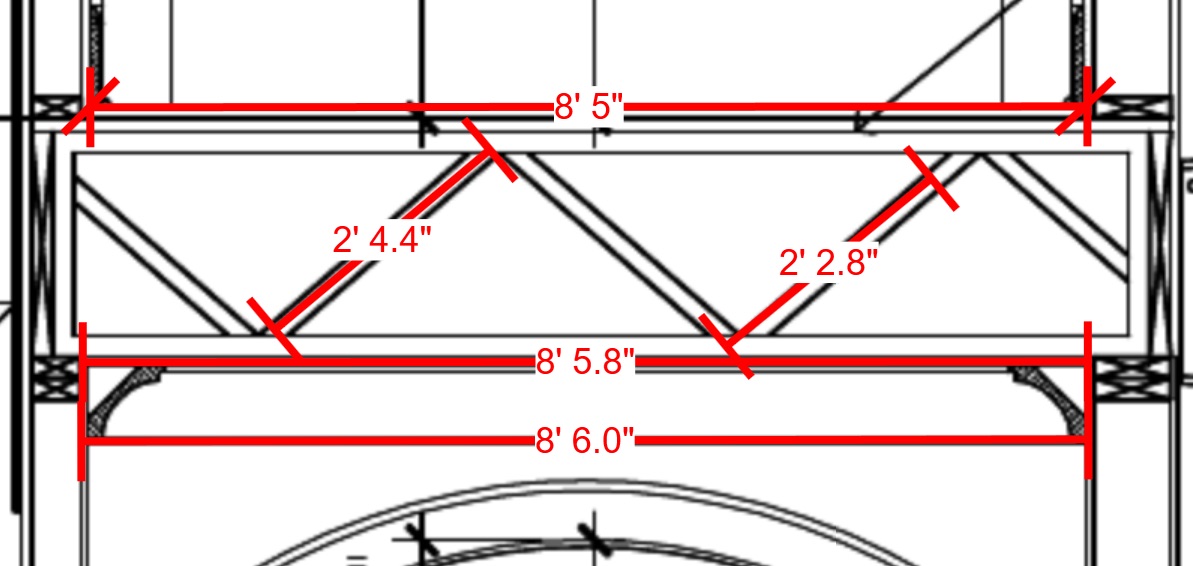
NOTE: The measurement tool has snap-to angles: 0, 45 and 90 deg.
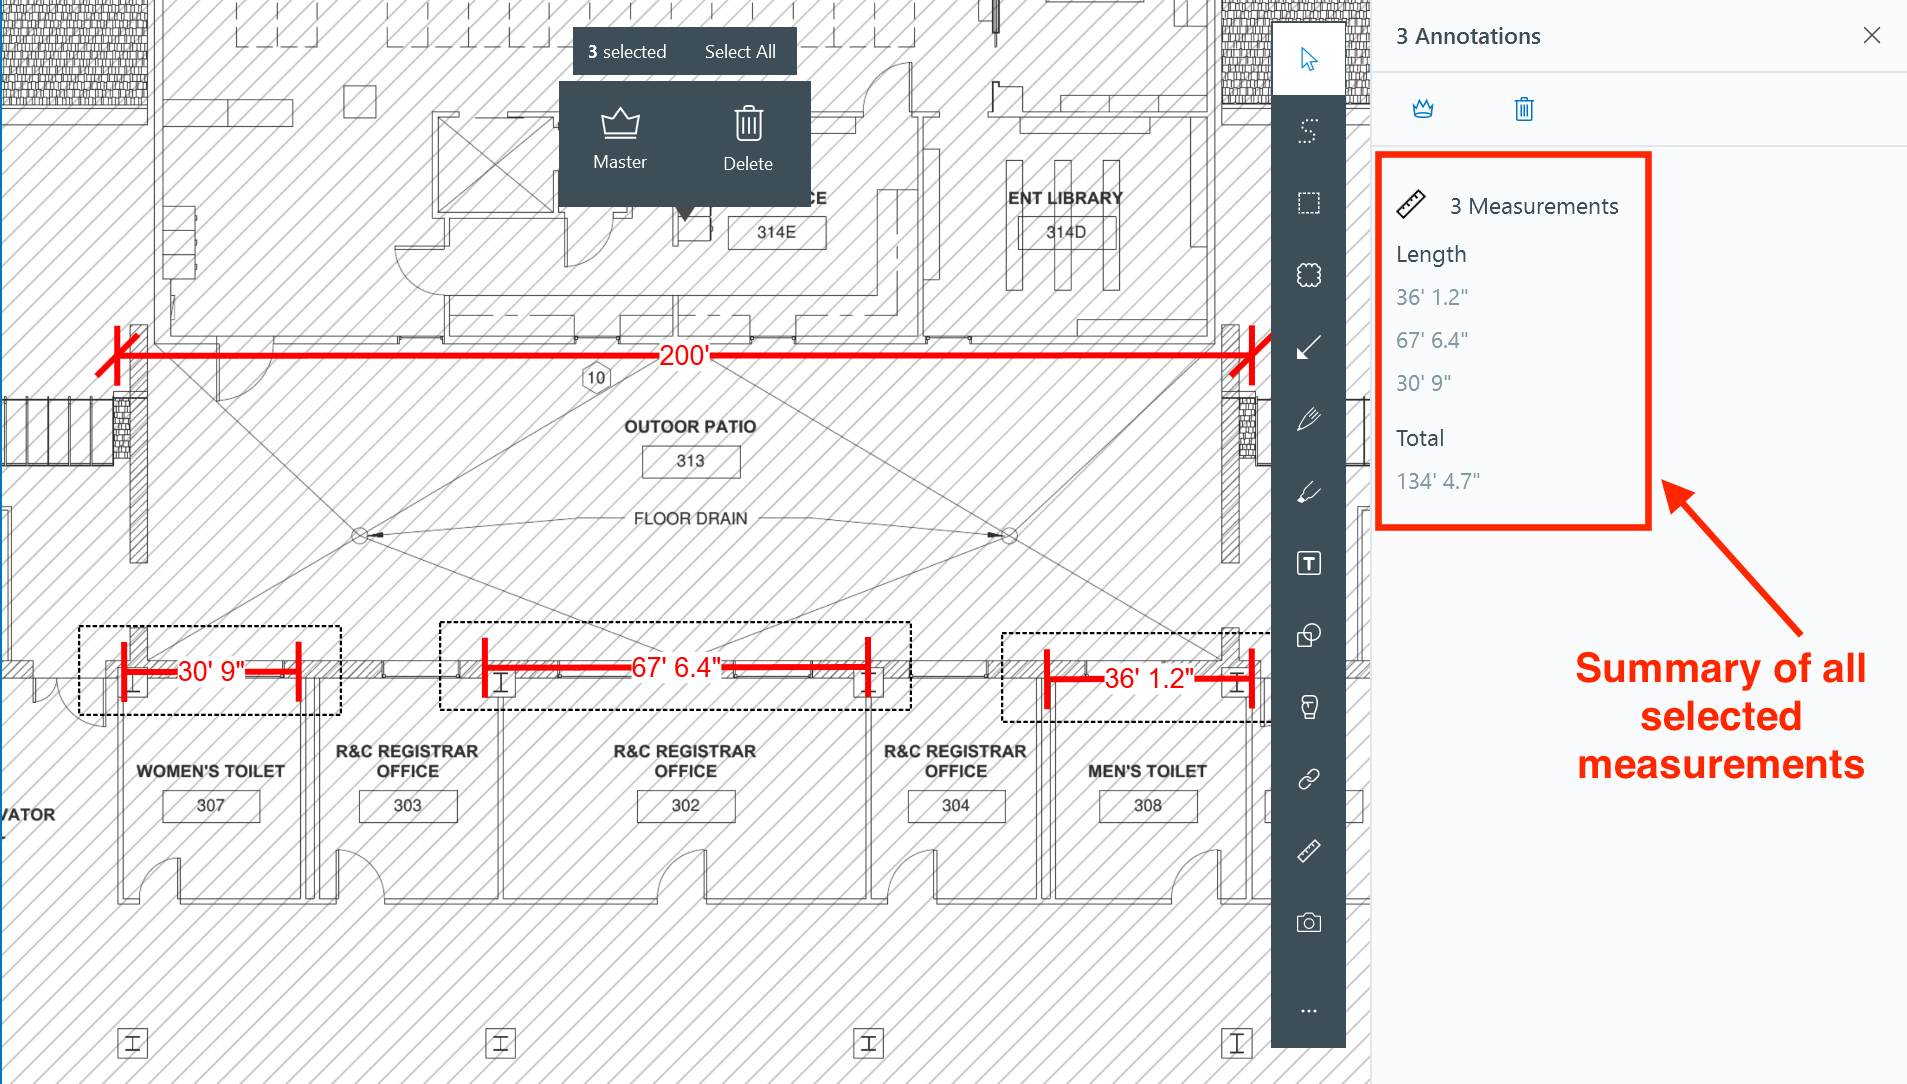
If multiple measurement markups are selected using the multi-select or rectangular selection tools, the detail view will provide a sum of all the measurements selected. Those measurements can then get copied/pasted to any document, like an excel worksheet, to be used for creating material, labor or cost estimates.
Tasks Log
You can access your tasks log and now run task reports on the Windows app.
1. The Tasks Log is available by clicking on the tasks icon in the navigation menu on the left:

The list, by default, is sorted by Task ID number in descending order. You will see a list of tasks that have been published, created by you, or assigned to you.
2. You can quickly search for a task by entering a keyword search of the title and description of an task on the search bar:

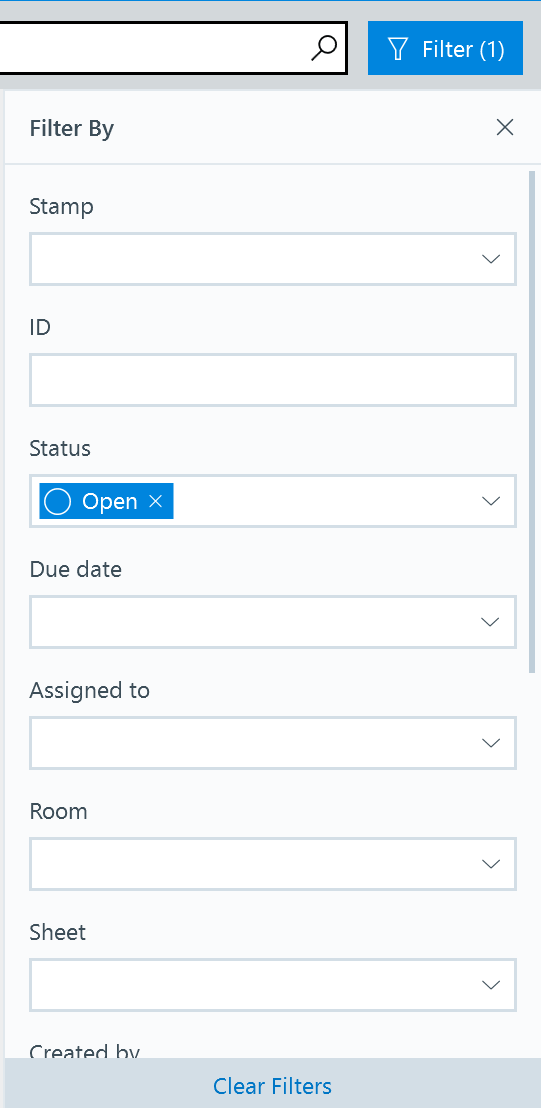
Filters allow you to narrow down the list of tasks to focus on a specific set. To open the filter options, click on the “Filters” button next to the search bar. You can use the available filter options to narrow the list down to specific results. Choose from Stamp type, Status, Location, Sheet, Due date, Assigned to, or Created by.
3. You can also combine multiple filters, such as Sheet, stamp type, and created by to bring up specific results. For filters such as stamp type and status, you can select multiple of each. (E.g.: Open + In Review).
You can clear your filters by clicking on "X” button next to each attribute:
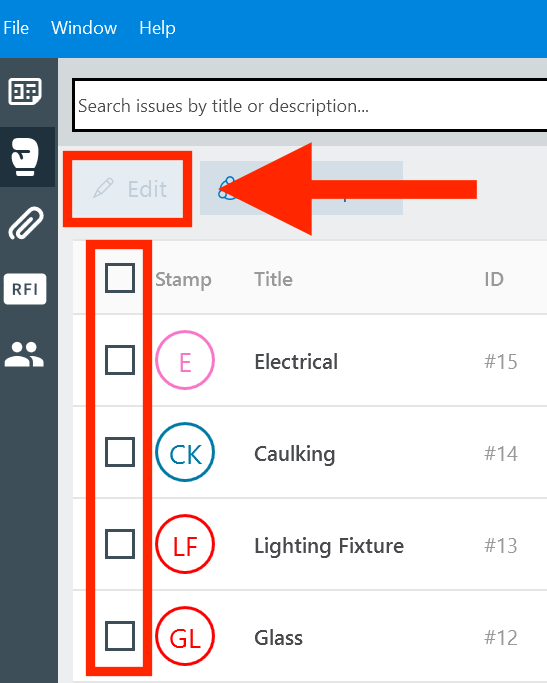
4. Once you have narrowed down your list, you can view or edit the details of any task one by one by selecting it, or batch edit multiple tasks by checking the box next to them (to select all the tasks you are viewing, check the box on top of the list.) To edit the selected tasks, click on "Edit".
For even easier browsing of the task list, you can use all the columns (except the “Stamp” column) to sort the list. Do this by clicking on the title of the column and then clicking on the small arrow to decide on ascending or descending order.

5. The side drawer will open to show the task details, and each field can then be edited as required. Click on the "Save" button after you finish editing your task or tasks. If you need to see the task stamp in context, you can jump to the sheet by clicking on the sheet name in that row.
Exporting the Task Log
You can easily run a task report from the Windows app by exporting to a CSV or XLS file (PDF exports are currently only available on the website).
1. Filter the list to the items that are most important, and export it to CSV or XLS file using the “Generate Report” button.
2. Select one of the available formats.
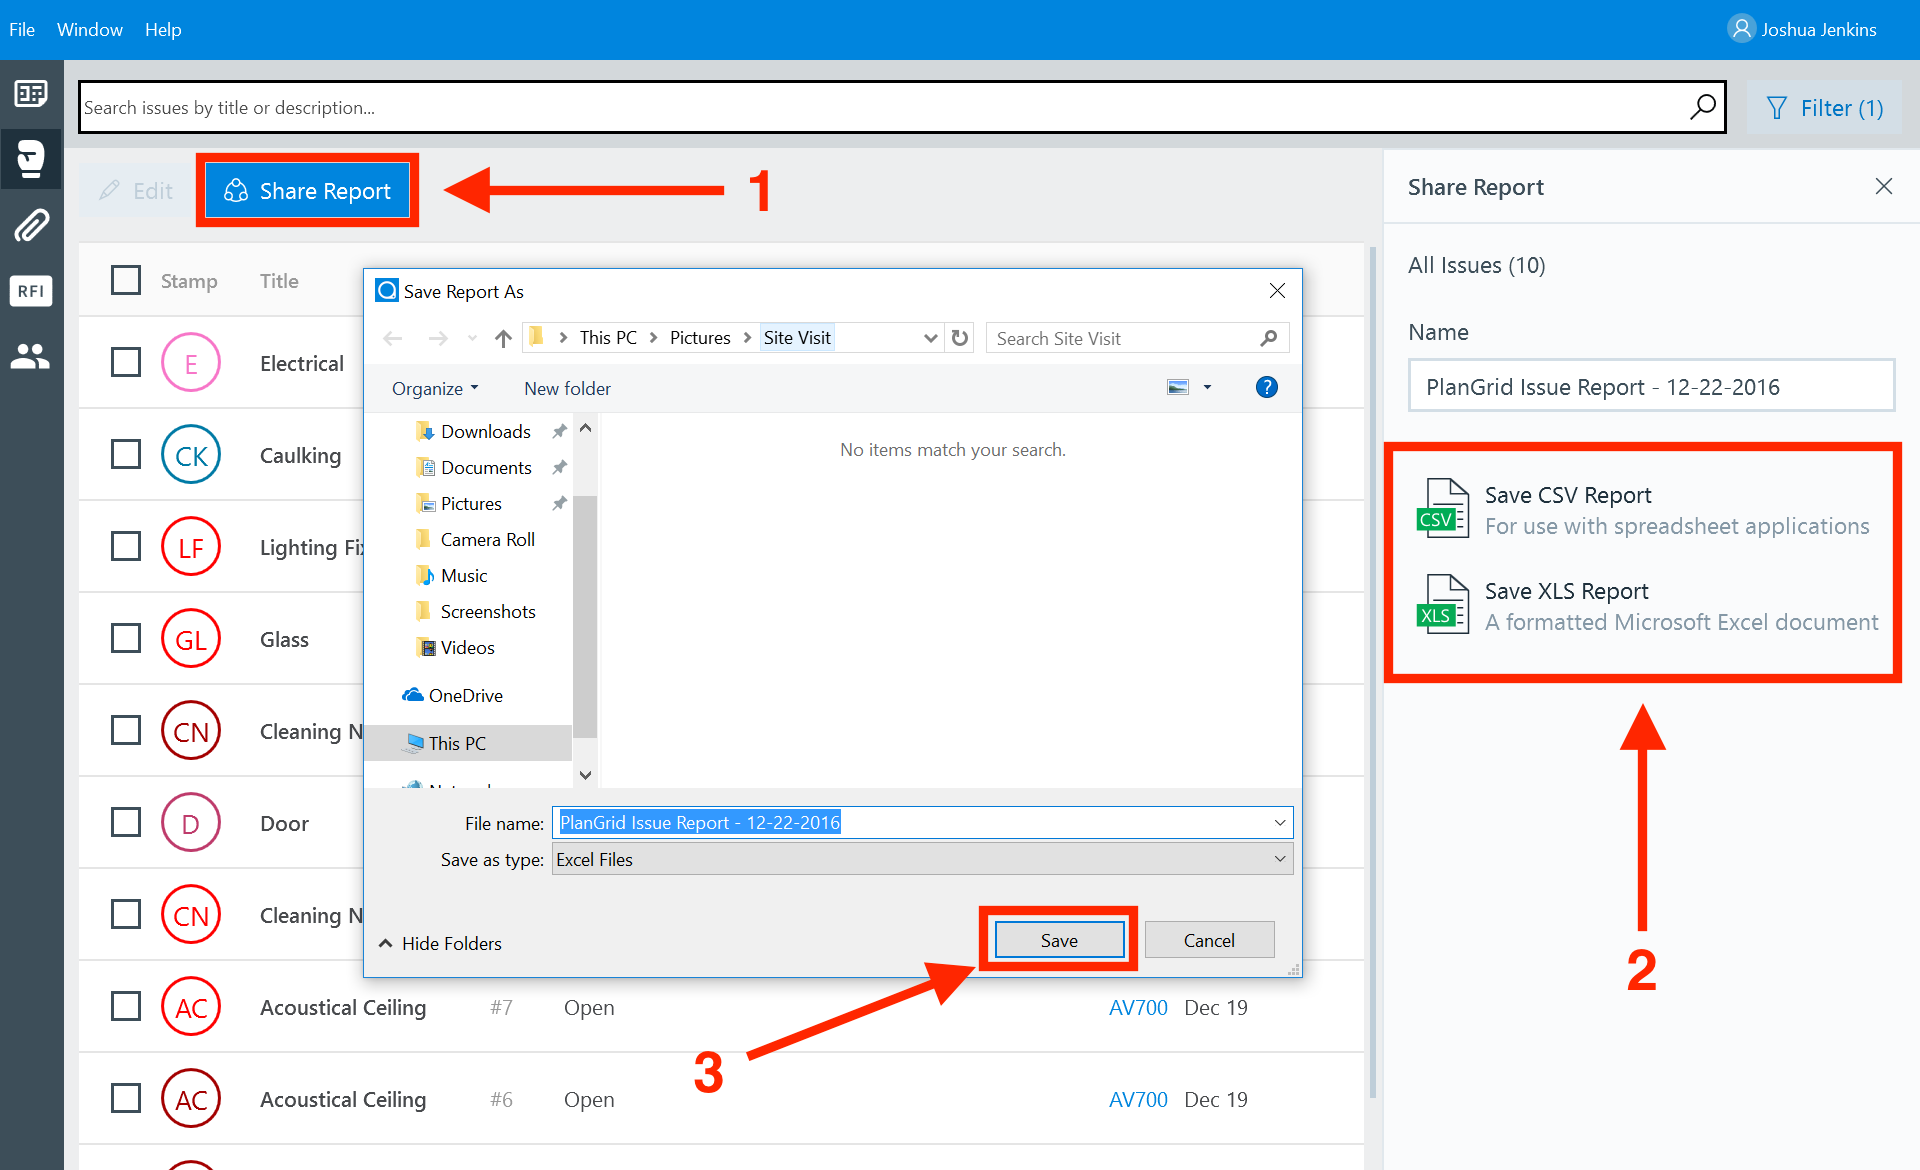
3. You'll be prompted to save the file on your device or computer.The list of items with all your data will be exported so that you can share or store a snapshot in time of project’s tasks.
NOTE: Exporting to an XLS file is recommended as it gives the report a better format and allows for quick filtering within Excel and ability to print in a very nice format.
Documents Log
Your project’s documents log can be reached by clicking on the paperclip icon on the navigation bar.

When you enter the Documents log, you will see all of your project’s documents listed by folder. All the folders are listed in descending alphabetical order by default, with unfiled documents at the top.
To find a specific document, you can use a keyword search in the search bar at the top of the document log view. (The search will go through the filename ONLY - it will not search the body of the PDF file.)

The folders in the Documents log are all expanded by default. For a quicker search through the list of documents, you can collapse any folder to allow quicker scrolling through the list.
Once you’ve found the document you’re looking for, you can double-click on the row of the document or you can click on the file name. The PDF document will open in the default PDF browser on your computer.
RFI Log
To access your project's RFI Log, click on the RFI icon on the menu:

Sorting
You can sort the RFI Log by any of the columns by clicking (or tapping) on the column titles. Clicking on them a second time will change the sort order.

RFI Detail View
When you click on one of the RFI rows in the RFI Log, the RFI Detail Drawer opens on the right of the screen.
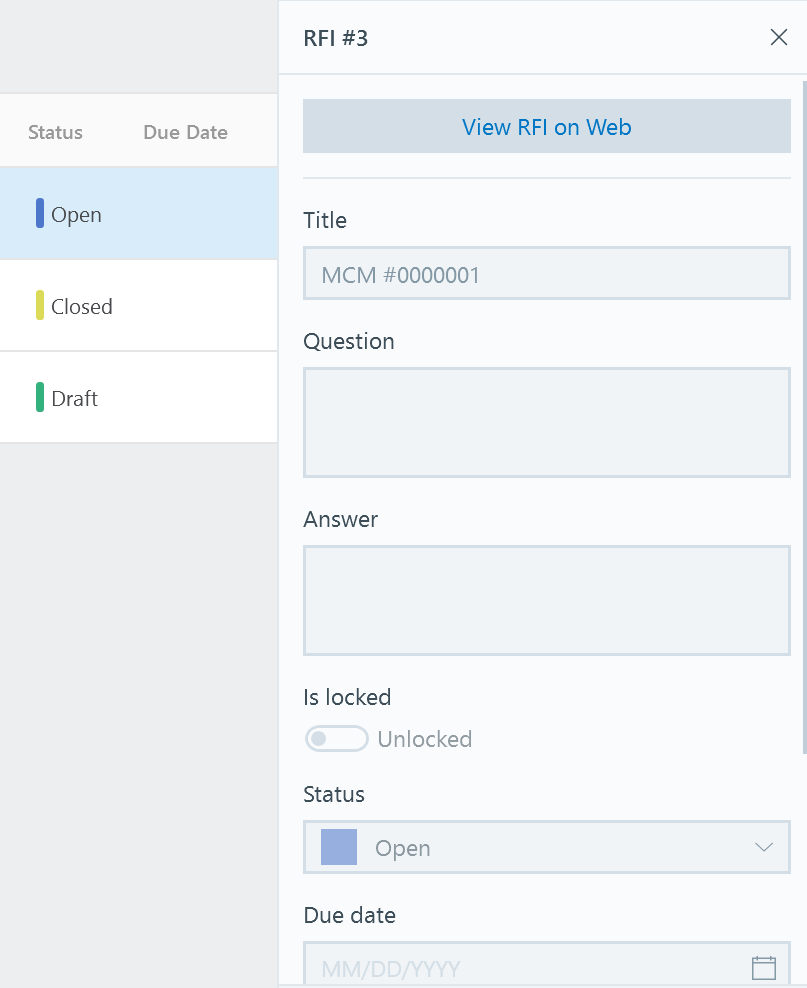
Photo references are not currently supported on Windows, but can be viewed from the website.
RFI editing is not currently available on the Windows App.
Project Team
You can view the list of team members on a project and Administrators are able to invite one or multiple people to the project through the Windows app.
To access your project's team list, click on the Team icon in the Project Navigation bar:

The team list will have the name, email address and role (Administrator, Power Collaborator, Collaborator) of each team member:

Administrators can invite other users by clicking on the “Invite” button at the top. You will be prompted to insert one or multiple email addresses, using “,” or “;” as a separator. Please note all added team members will be added as Collaborators by default. You can change their permission level to Admin or Power Collaborator on our website.

Team members that do not yet have a PlanGrid account will be shown as “Invited” until they create one. Clicking on the Team member will open the detail drawer with all the information available about them.

Related Articles: