Setting Up PlanGrid Single Sign-On (SSO) in OneLogin
Setting Up PlanGrid
Setting Up PlanGrid Single Sign-On (SSO) in OneLogin
i. Select "Apps" and then "Add Apps"
ii. Search for "SAML Test Connector (IdP w/attr)" and select the result

iii. Use a descriptive name you will remember, such as "PlanGrid"

iv. Click on the app you just created
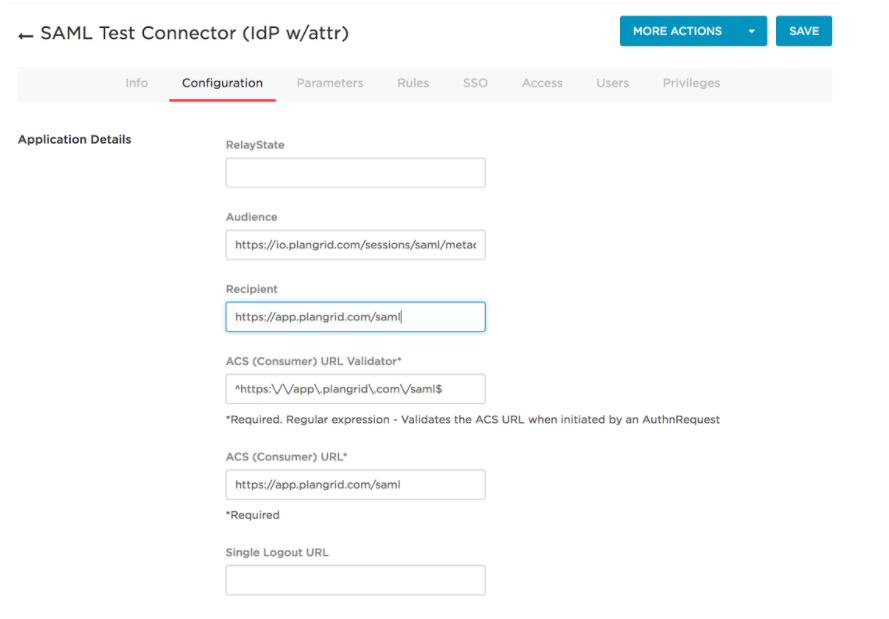
v. Go to the "Configuration" tab and set:
1. "Audience" to "https://io.plangrid.com/sessions/saml/metadata"
2. "Recipient" to "https://app.plangrid.com/saml"
3. "ACS (Consumer) URL Validator to "^https:\/\/app\.plangrid\.com\/saml$"
4. "ACS (Consumer) URL" to "https://app.plangrid.com/saml"
5. Click "Save"

vi. Navigate to the "Parameters" tab
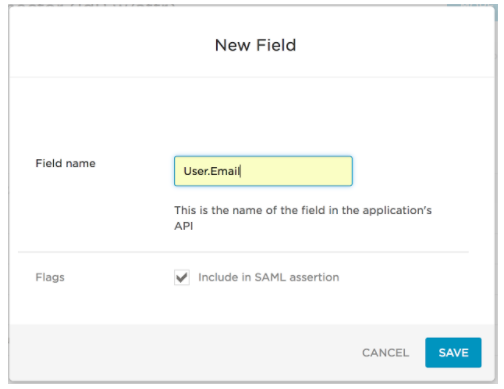
1. Click "Add Parameter"
a. Name it "User.Email"
b. Select "Include in SAML Assertion"
c. Click "Save"

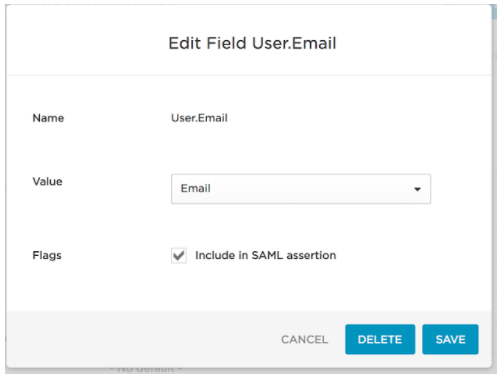
2. Click on the "User.Email" Parameter
a. For "Value" select "Email"
b. Click "Save"

3. Click "Save"
vii. Navigate to the "SSO" tab to get information for the next section
Setting Up PlanGrid
i. Sign in to Admin Console
ii. Select the organization you’re setting SSO up for
iii. Go to the SSO Configuration Tab
iv. Click "Add Provider"
1. Select OneLogin
v. Fill in the fields with:
1. Enter your "SAML 2.0 endpoint (HTTP)" into "SSAML 2.0 endpoint (HTTP)"
2. Copy your "Issuer URL" value into "Issuer URL"
3. Copy your "Issuer URL" value into "Read from URL" under Metadata
4. Click "Save"
vi. Go to the organization user’s tab
vii. Select your account and hit "Enable SSO"
1. Click "Done"