From The Website
From The Mobile Apps
Editing or Deleting Stamps from Android
Importing Custom Stamps to Your Project
Customizing Task stamps allow you to tailor your punch list to your project's specific needs.
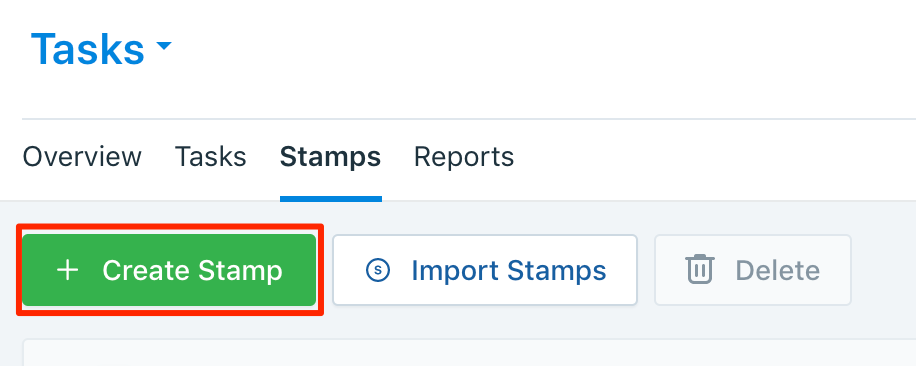
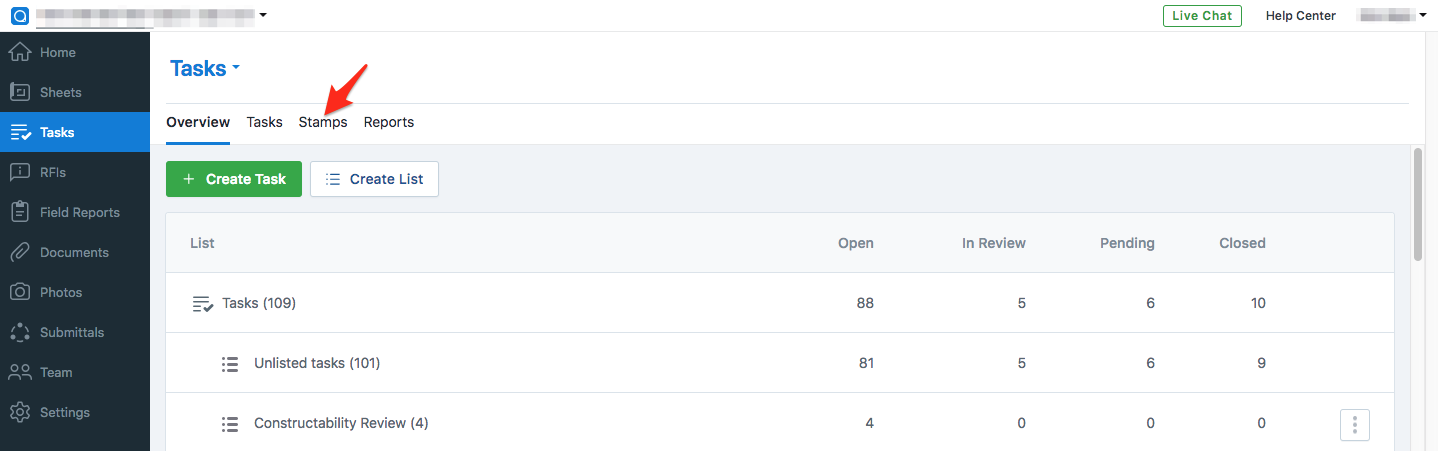
1. In your project, click on the Tasks icon to access the Tasks Log, and then click "Stamps." Please note Collaborators cannot create Custom Stamps, and so "Stamps" will not be available for them.

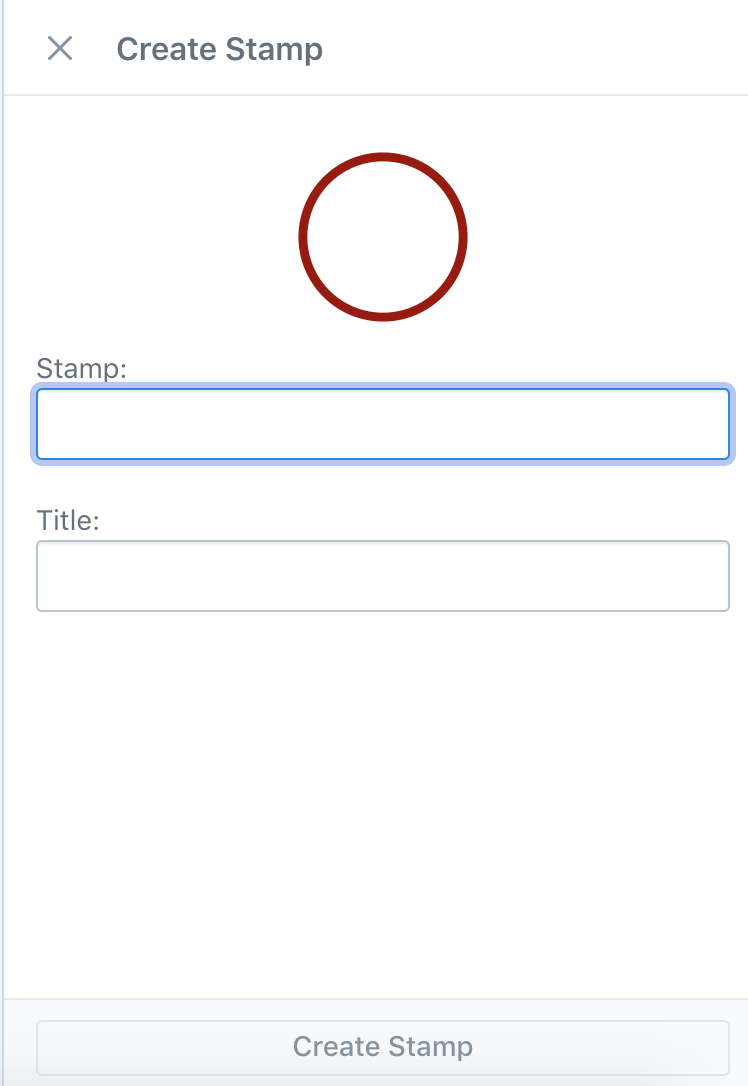
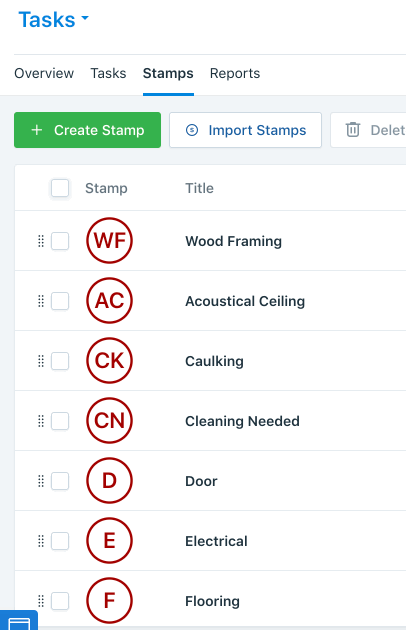
2. Click 'Create New Stamp' and give your stamp a two-letter symbol and a title. Then click Add Stamp.
3. To rearrange your stamps, just click on the dots (on the left) and drag into place.
Here's how to create your own project-specific stamps from the field.
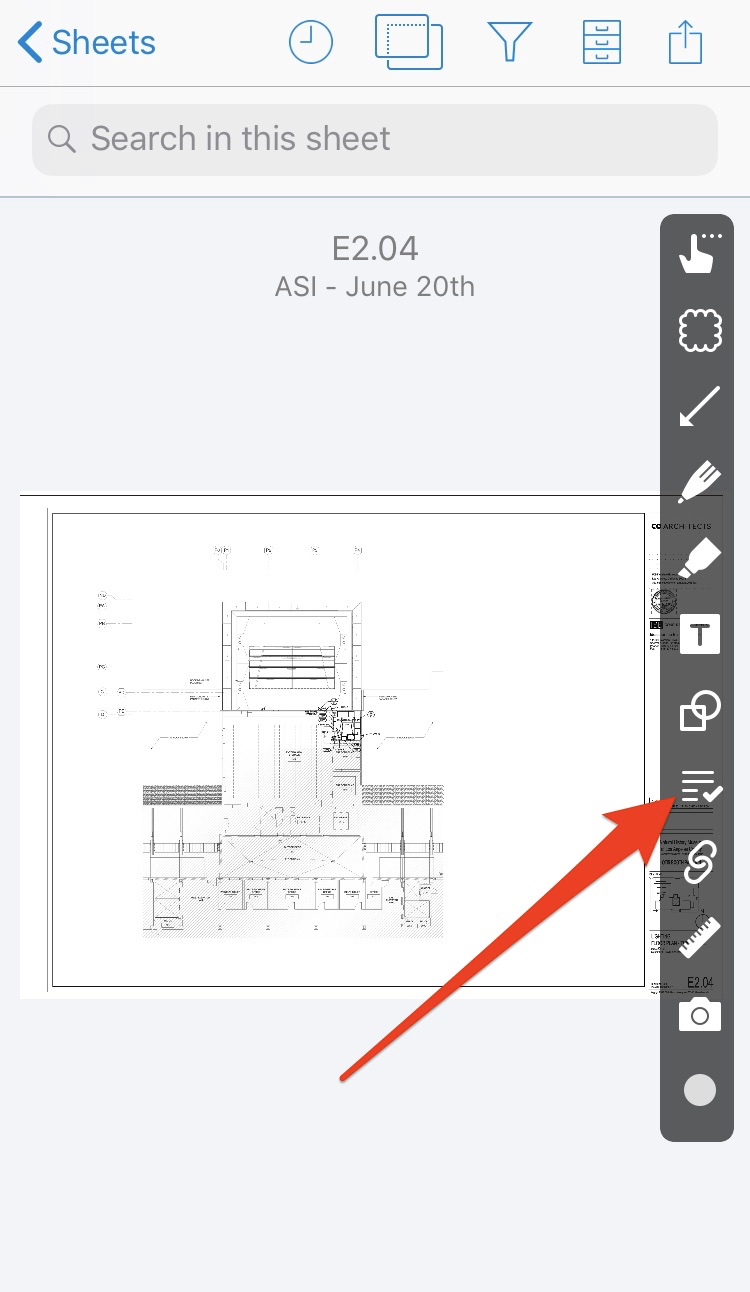
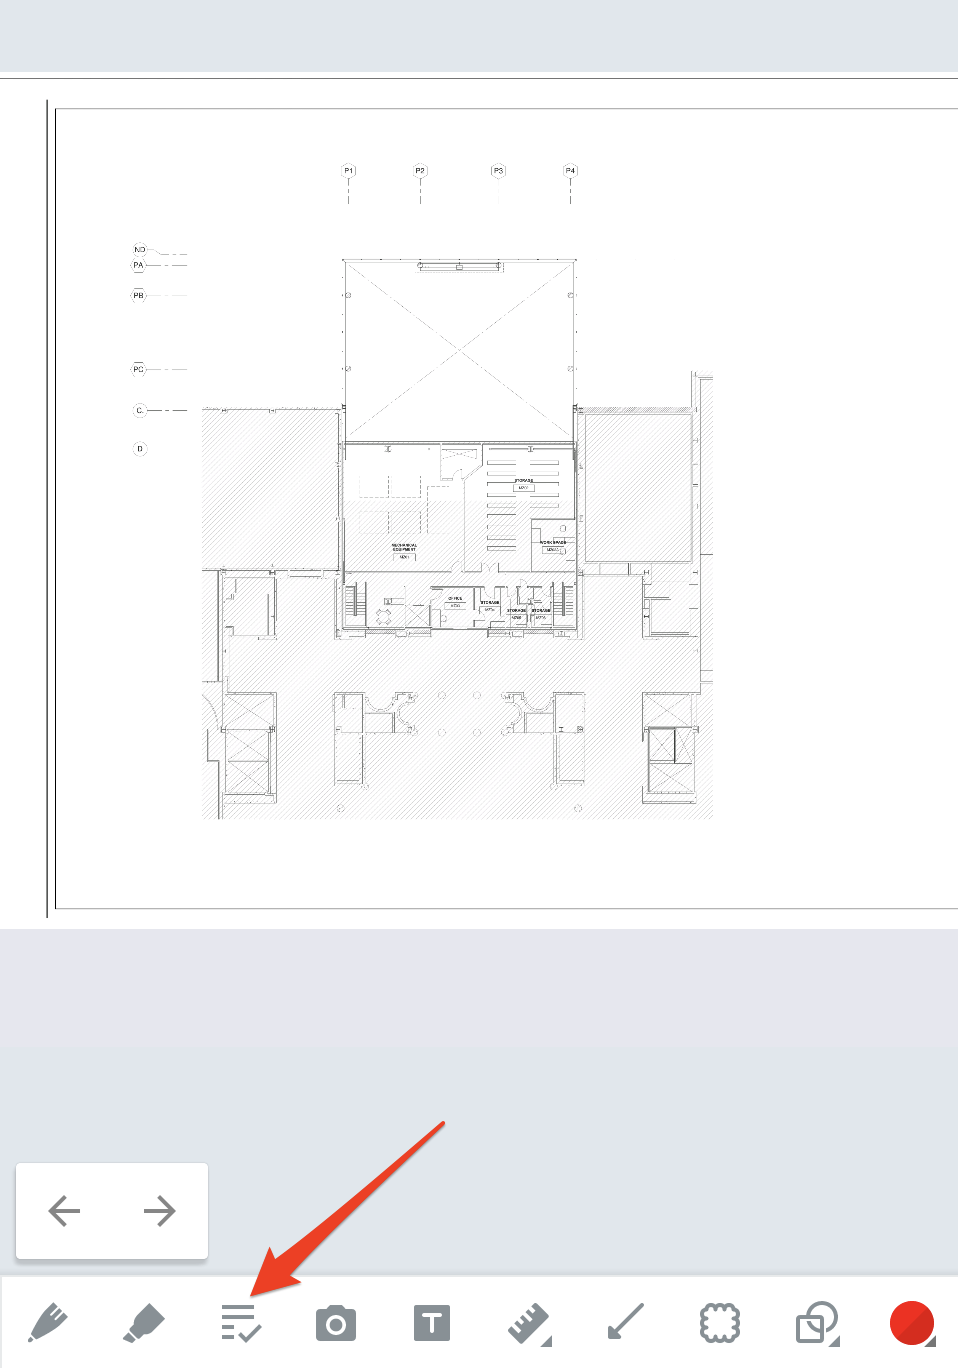
1. Open a sheet, and tap on the Tasks icon in the markup toolbar.
iOS
Android
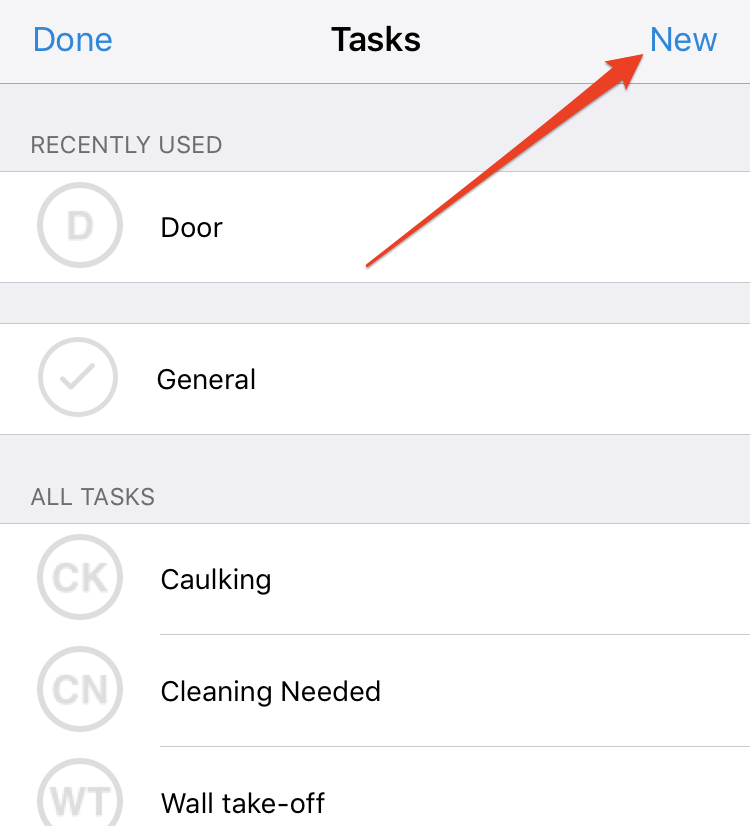
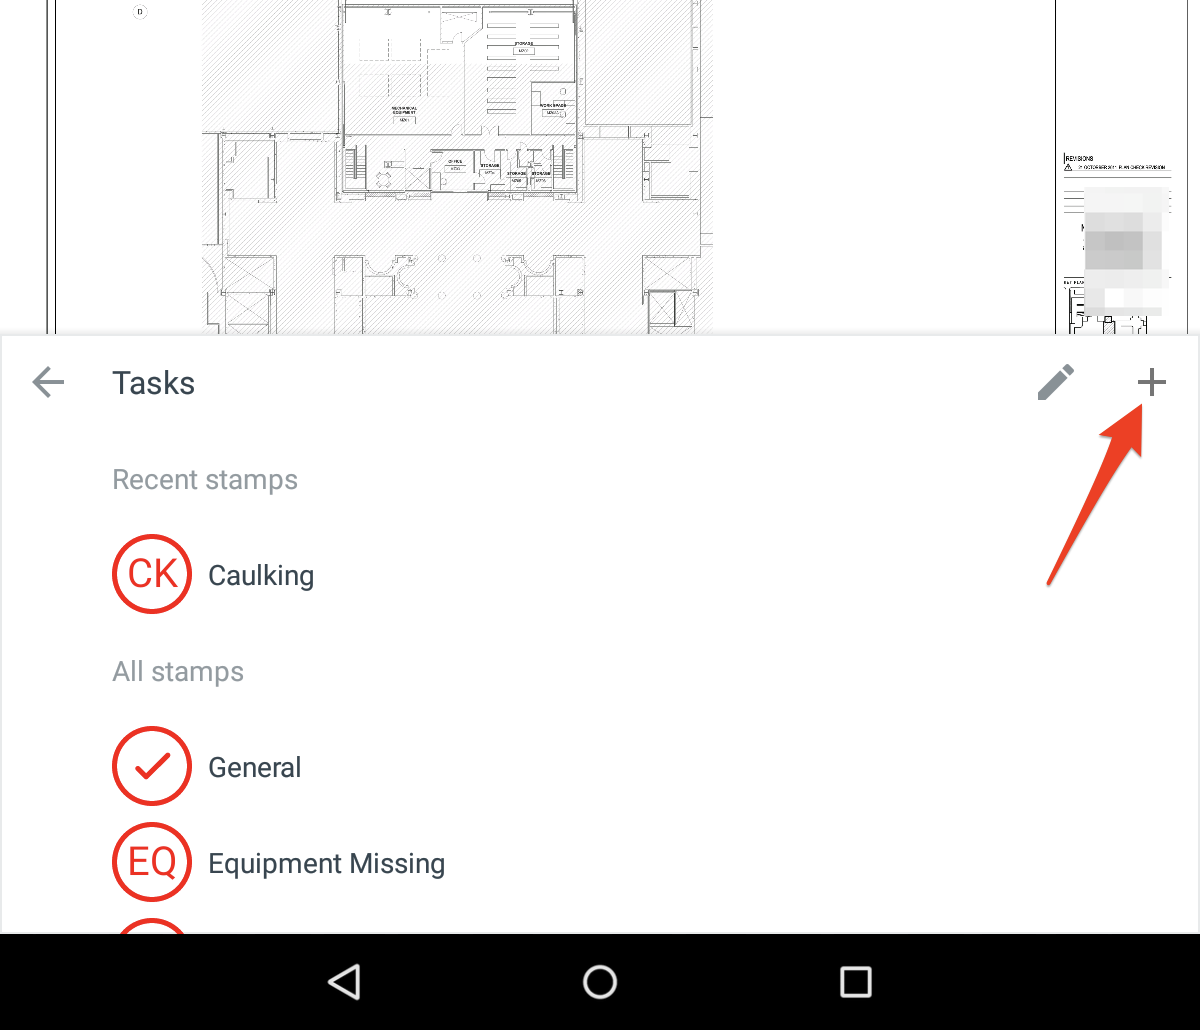
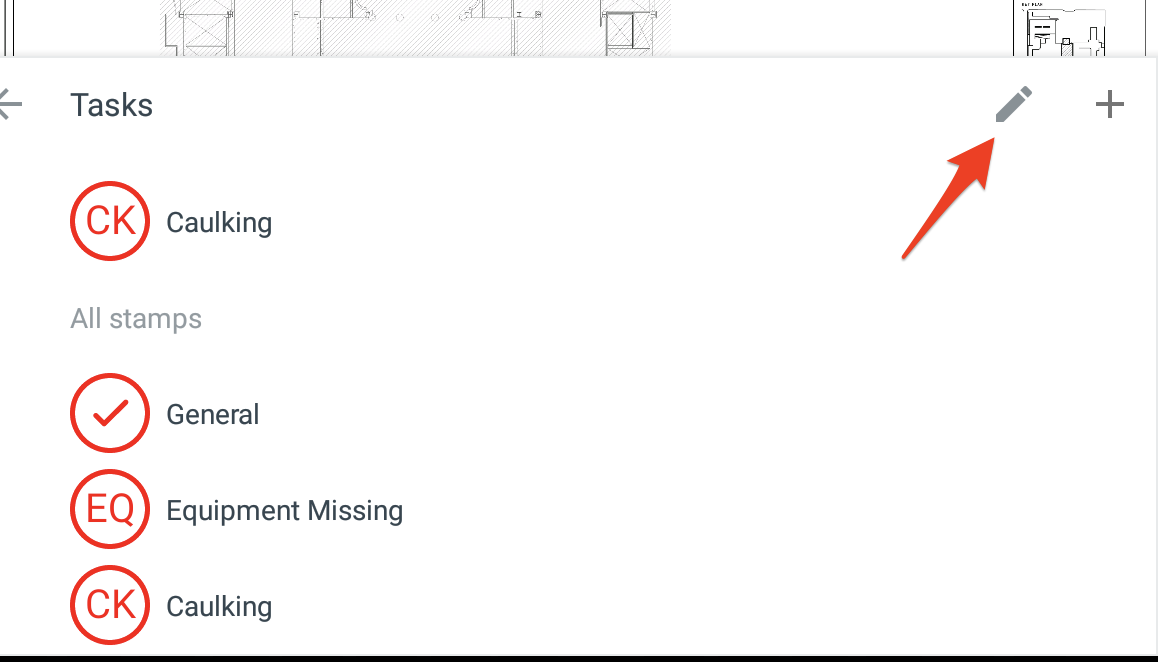
2. Tap on ‘New’, to add on iOS, and the + sign on Android.
iOS Android
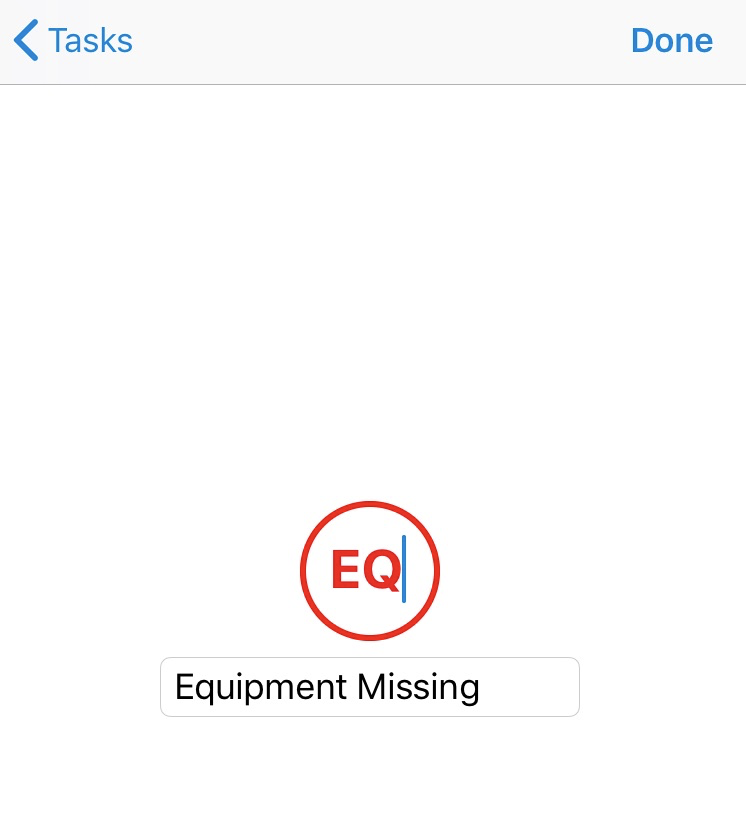
3. Type a two-character code for your stamp, and a title in the field provided. Then, tap Done on iOS or Save on Android to set the stamp.
iOS

Android
Editing or Deleting Stamps on Android:
1. Tap on the Tasks icon at the bottom menu bar.
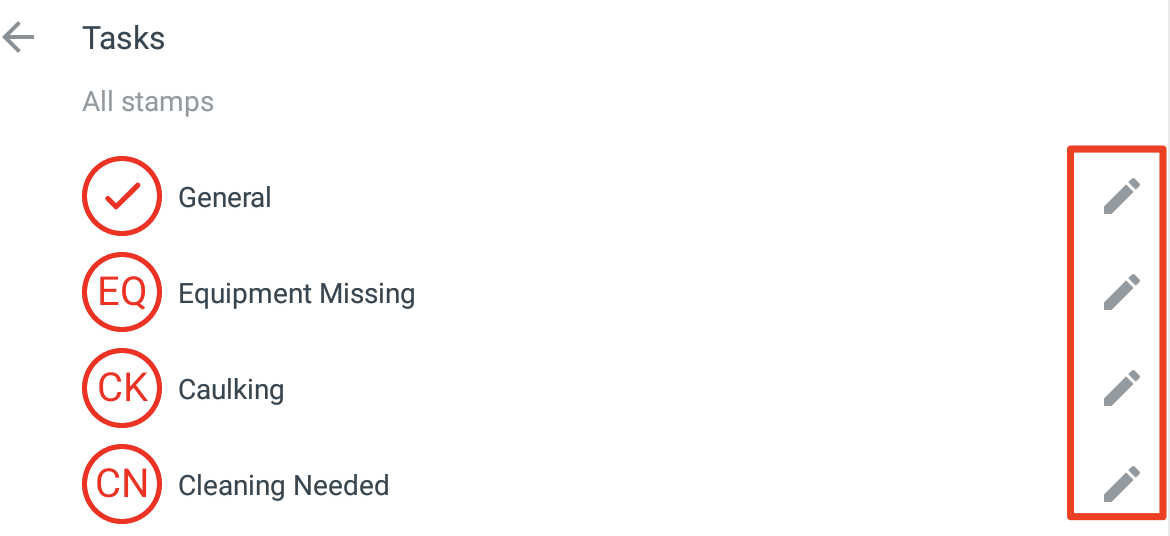
2. Tap on the pencil button.
3. To edit or delete a stamp, tap on the pencil button again next to the intended Task Stamp.
Importing Custom Stamps to Your Project
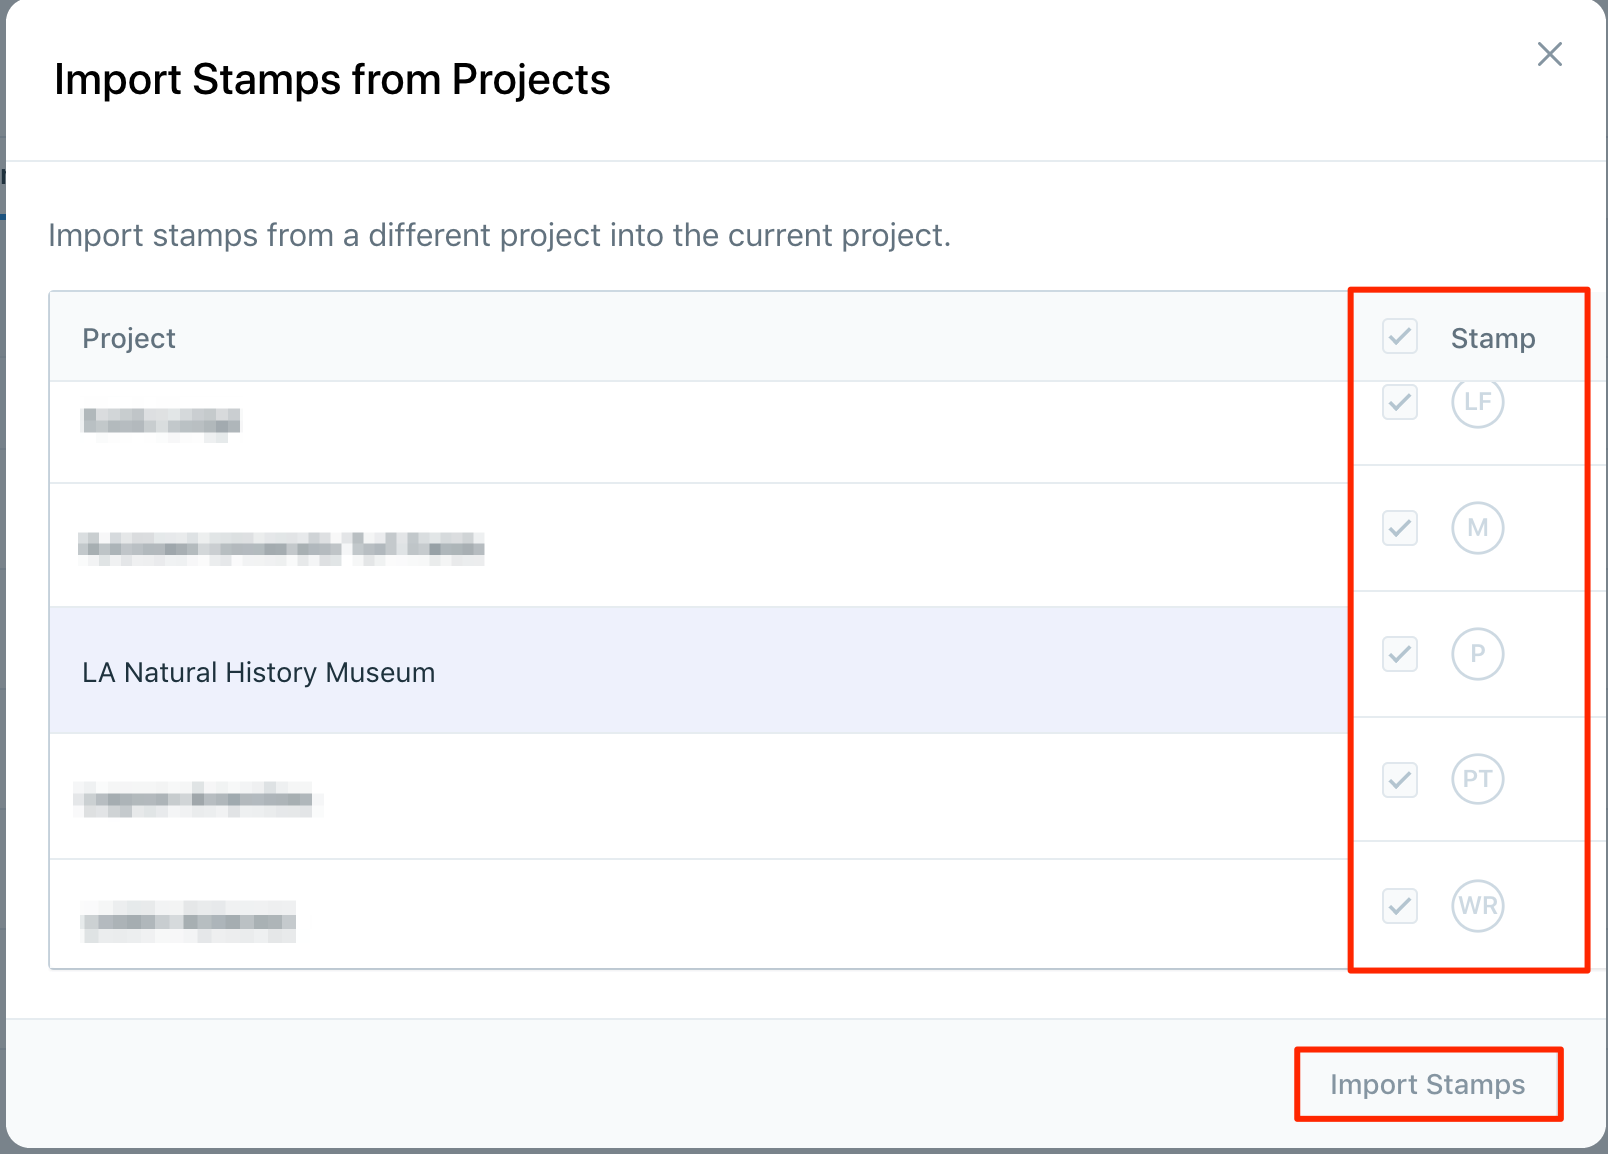
If you have a set of Task stamps you want to use for multiple projects, there's no need to manually create custom stamps, one by one, for each project. You can manually create custom stamps once, and then import them into multiple projects.
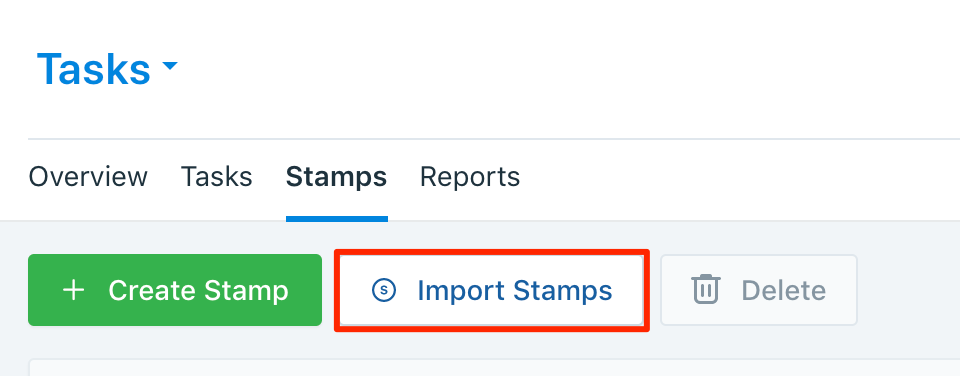
1. Click the Tasks icon, and click Stamps.
2. Click 'Import Stamps’
3. Select the project or project that you would like to import from, and then select the stamps you want to import. Stamps that are already in the project will be grayed out, as each stamp needs to be unique, and have a different two character symbol.