What is BIM for the field?
With the PlanGrid BIM viewer, workers will no longer miss out on key details about their project because of a lack of data. The BIM viewer allows you to see rich design information, organized by property, directly on your drawings in both 2D and 3D modes.
In 2D mode, users can navigate their drawings as usual, but with the addition of BIM-enabled data. In 3D mode, users can navigate a 3D rendering of their drawings, see object properties, and take measurements.
To enable BIM in PlanGrid, you need to use the Revit plugin for Autodesk and be able to upload BIM-enabled sheets directly to PlanGrid, where you can then view them. The plugin supports Revit versions 2017-2020 at this time. If you are using a different version of Revit that is not supported, this plugin will not work for you.
Currently, Revit is available for Autodesk on Windows, and the BIM viewer is available on PlanGrid for the Web, iOS, and Windows.
For 3D viewing, please make sure your iOS device or PC has 4GB or more of RAM.
Windows requires that you have version 1.72 or higher.
Three steps for using BIM on PlanGrid
Using the Revit plugin
The PlanGrid Revit plugin is needed to enable BIM viewing in PlanGrid and can be set up in just two minutes. It’s available inside of Autodesk Revit.
To activate the plugin, follow these steps:
- Download the plugin here
- Install the plugin following directions on the website
- Navigate to the “Add ins” tab and click “Export to PlanGrid”

- Enter your PlanGrid username and password

Now you’re able to publish projects and their model data directly to PlanGrid. To upload sheets through Revit, click “Export to PlanGrid” and then select the project you’d like to publish. You should then be able to select the version set to export.
Note: Currently, you must upload the whole version set to include the BIM Data & Model. Exporting only certain sheets (which requires the “Include BIM Data/Model” to be unchecked), will result in a 2D export at this time.

Click “Publish” to publish the sheets directly to PlanGrid. All data automatically pulled from Revit, along with automatic callout detection—there’s no need to go through manual upload flow in PlanGrid.
It will take approximately 40 seconds per sheet to process, and you won’t be able to use Revit while exporting to PlanGrid.
BIM 2D viewer
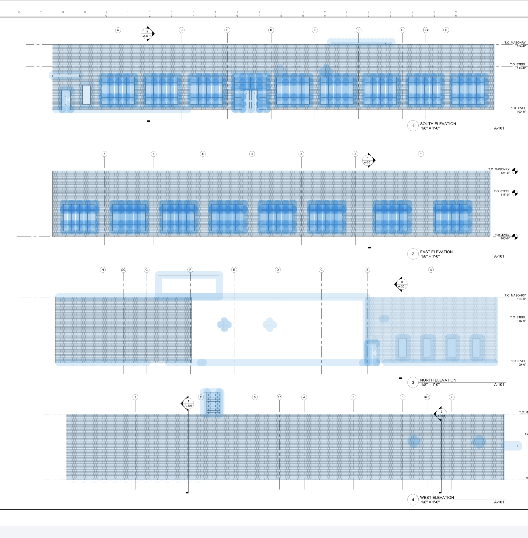
The 2D BIM viewer is available on Web, iOS, and Windows; this acts just like the regular PlanGrid sheet viewer. The difference is that with BIM-enabled sheets, you have the option to view BIM-data directly on the sheets. The BIM viewing mode can be toggled on and off, and when the viewing mode is on, BIM objects will be highlighted in blue.
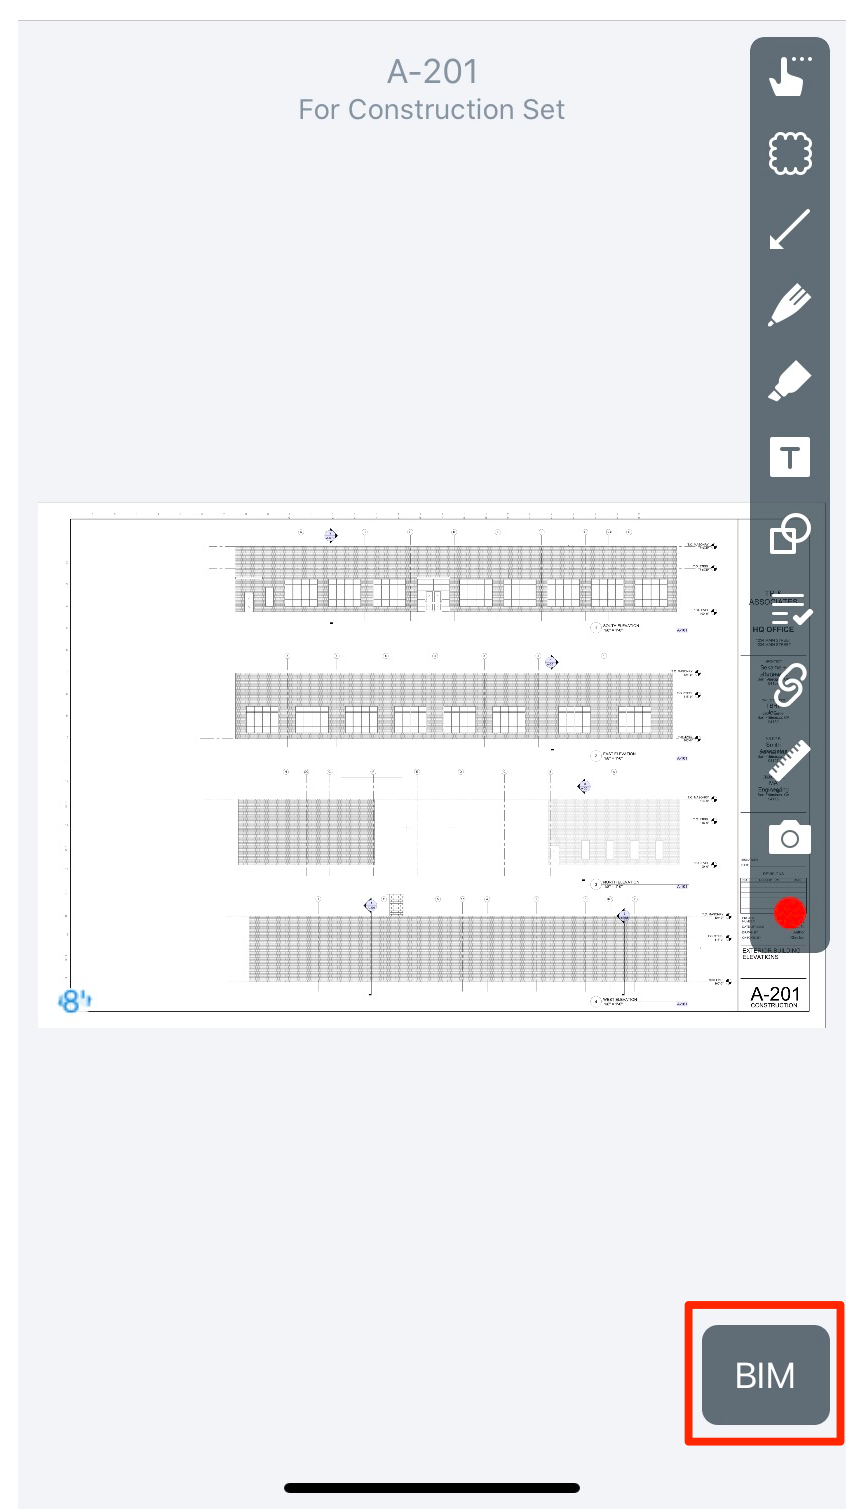
To active BIM viewing mode on iOS:
- Open a BIM-enabled sheet
- Tap the button in the bottom right-hand corner of the screen.

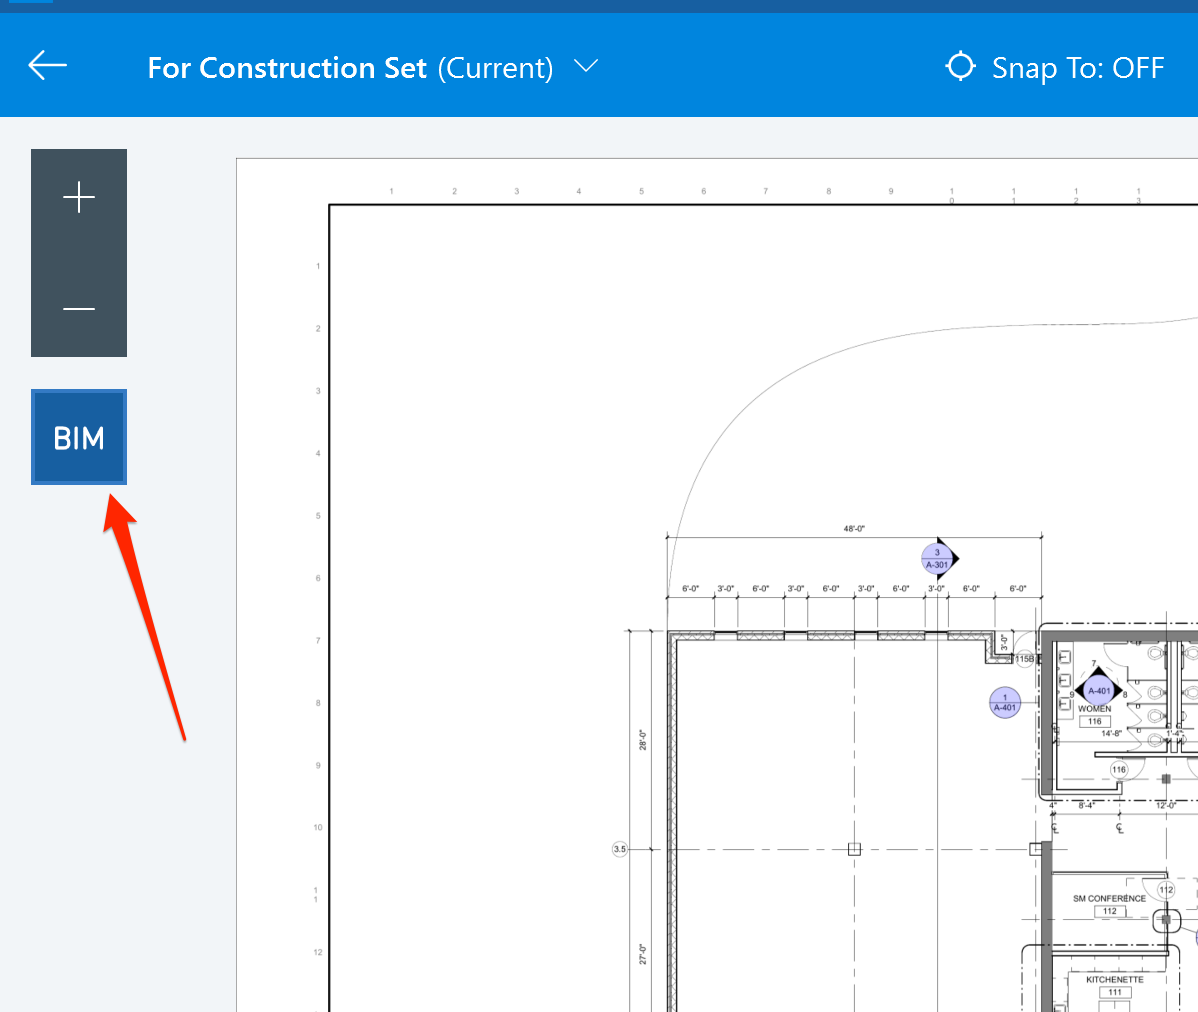
To activate BIM viewing mode on Windows:
Open a BIM-enabled sheet and click the button below the zoom-in and zoom-out buttons.

Once BIM mode is activated, you’ll see all BIM-enabled objects highlighted in blue.

To view properties of BIM-enabled objects, simply click or tap on any object to see properties about it.

Properties are grouped together based on categories. Click into any category to see exact data properties.

To turn off BIM mode, simply tap the button in the lower right-hand corner (iOS) or below the zoom in and zoom out buttons (web).
BIM 3D viewer
The 3D BIM viewer is available on Web, iOS, and Windows allows you to navigate your drawings in full 3D. BIM data for objects is viewable in 3D as well, and you’re able to take measurements directly on objects in 3D mode.
To enable 3D viewing:
- Select an object in 2D mode
- From the 2D properties pop-up, you’ll see an option to “View in 3D.” Select this option to enter 3D mode

Once you’re in 3D mode, navigating your model is easy. Pinch in or pinch out to move forwards and backwards throughout the model. Pan using a single finger to move where you’re looking.

You can still view object data when you’re in 3D mode as well. When you click on an object, you’ll see the same object properties that you would see when in 2D mode.

To measure in 3D, tap the “ruler” icon at the bottom of the screen. Then, tap on two separate places in the 3D space and a measurement will be taken between those points—no calibration necessary.
