Easily Export your sheets right from your Mobile Device using our export options below, or use the shareable link feature on the website. You can also save project As-Builts via the website anytime.
Featured:
Exporting and Saving Your Sheets
Printing Sheets
• Multiple Sheets
• Individual Sheets
• From the Computer
• From iOS
• From Android
• From Windows
Generating Project As-Builts
Exporting Sheets & Markups (Web and Mobile)
• Exporting Sheets & Markups from the Web
• Exporting Sheets & Markups from the Field
• Exporting on iOS
• Exporting on Android
• Exporting on Windows
Exporting and Saving Your Sheets
PlanGrid gives you the ability to export sheets via a shareable link feature.
1. Click the Sheets icon to access the Sheets page. You can only create shareable and downloadable links for your sheets from List View (shown by default). Click the filters to the right to filter your sheets by tag or version. You can also use the search box on the right to filter by name or description.
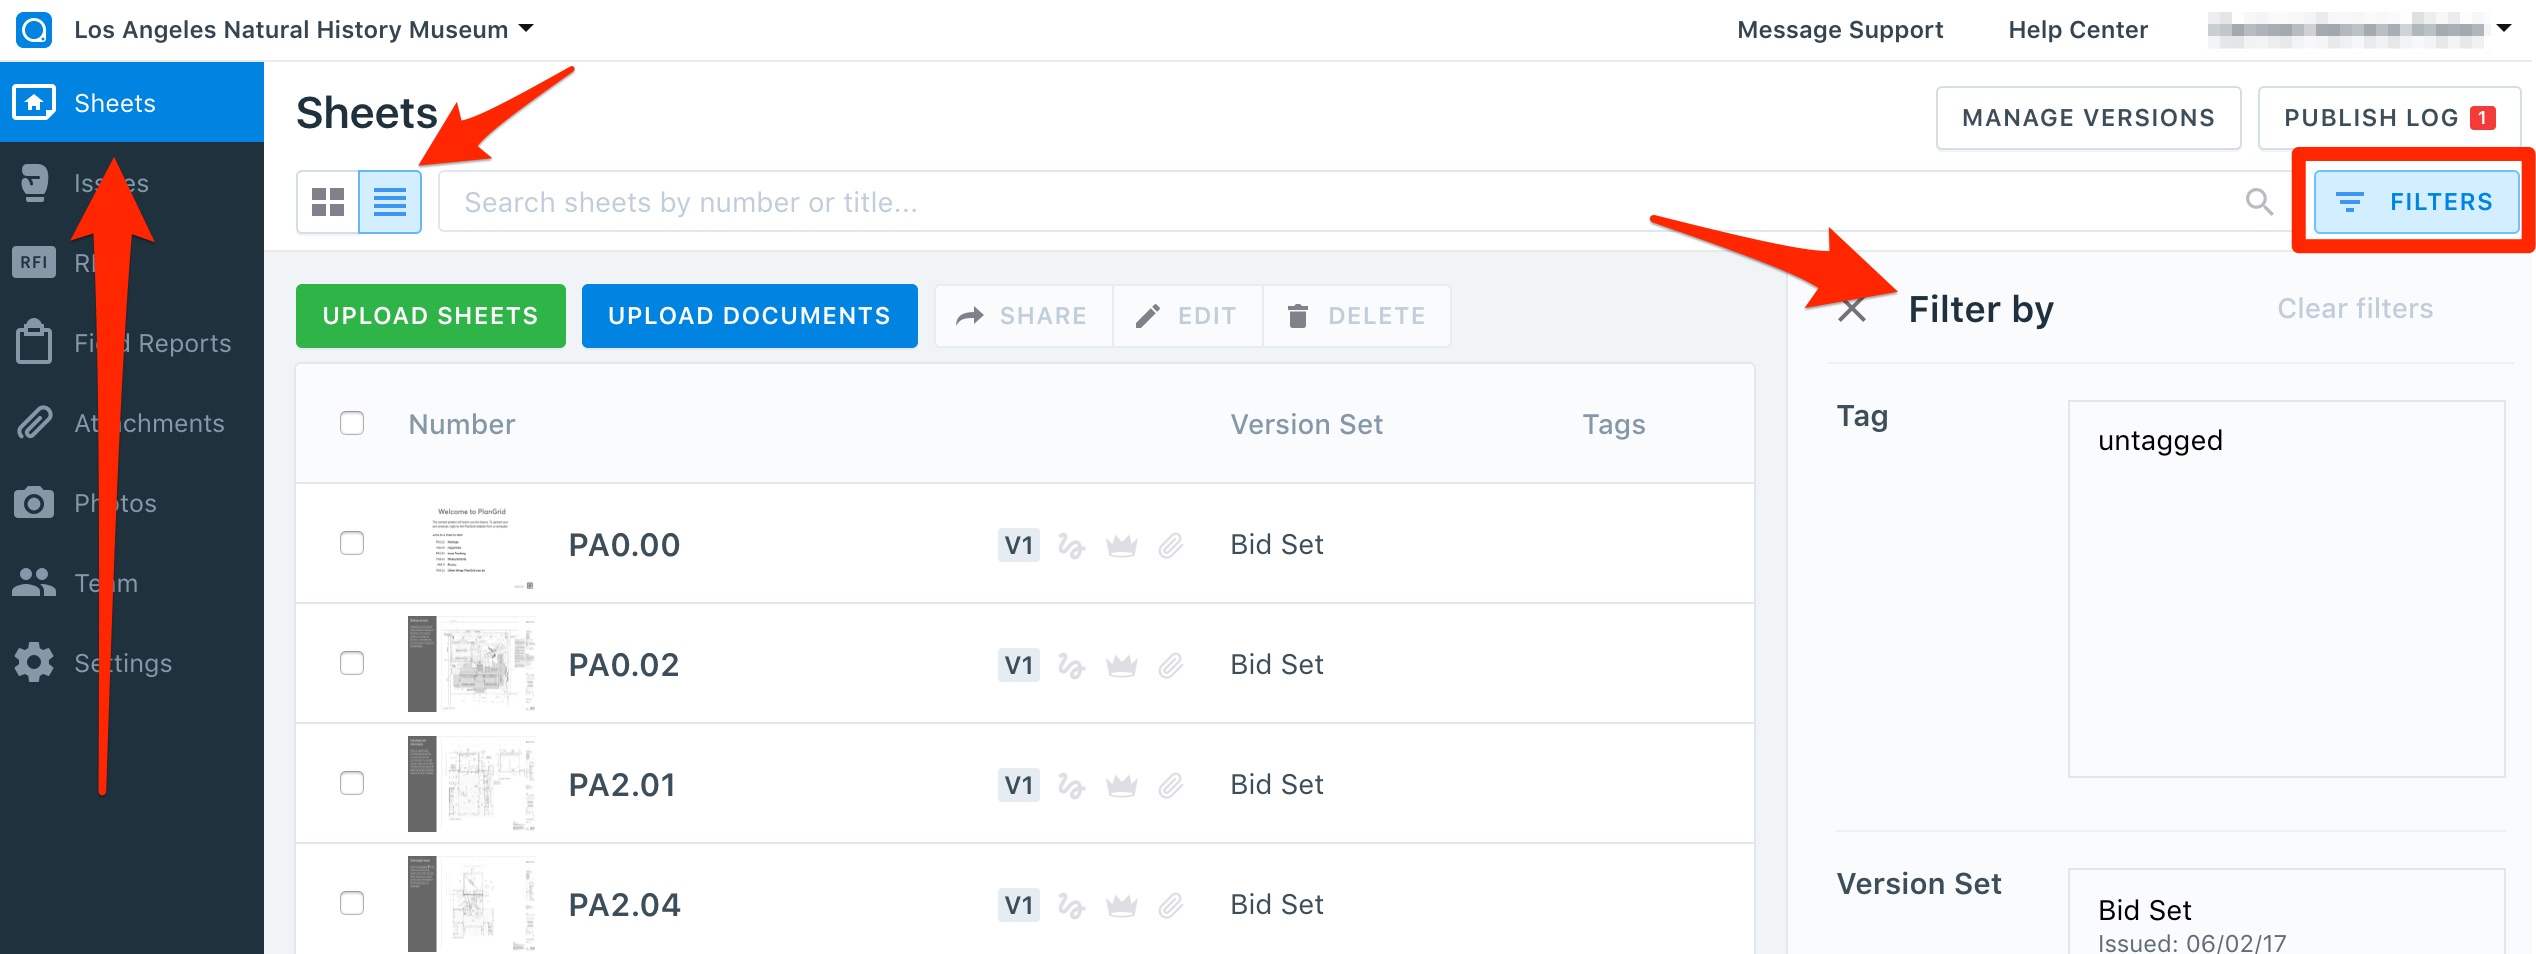
2. To select sheets to export you can filter by tag and/or version in the filter section at the right and click the checkbox to the left of each sheet, or click the top most checkbox to select all the sheets at once. The rows of selected sheets will appear highlighted in blue.

3. When your sheets are selected, click the 'Export' option which appears in the bar above the list. These options only appear once at least one sheet has been selected.

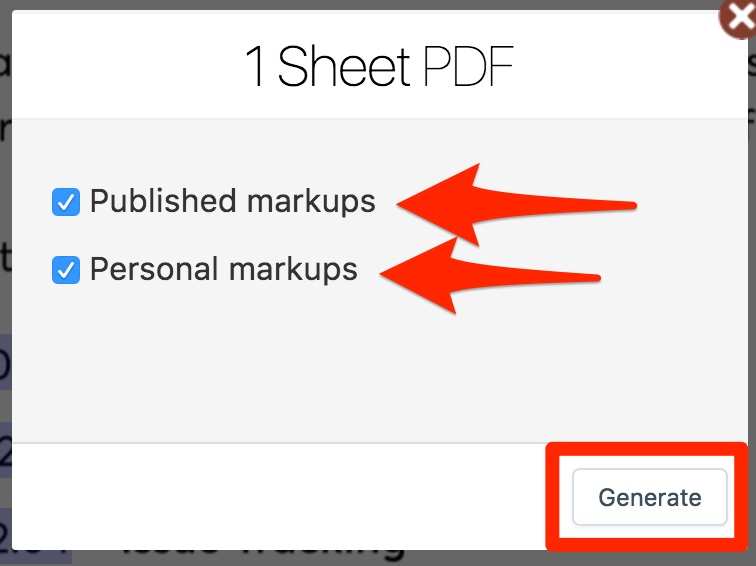
4. Next, you can choose to include both Published and Personal markups. Simply check the box next to the Markup type you want to include (both options are selected by default). Then, click on Generate Shareable Link at the bottom.

5. You will be provided with a link that can be shared with anyone, even someone who does not have a PlanGrid account.

6. Choose "Download" to download the packet to your own computer, or copy the link to share with others.
Note: PDF staple packs (if they have more than a few dozen sheets) can often be more than the allowed file size for email documents. By simply copying and sharing the generated link in an email you can easily give access to the sheets of a project, without requiring the recipient to set up a PlanGrid account.
1. Use the Above Instructions to download and save the sheets to your computer.
2. Once saved to your computer, you can open the file to print the entire set of sheets.
Please Note: Exporting and printing multiple sheets at once is only possible from the website.
Printing Individual Sheets
Printing from Computer
1. From Sheet View, click the Download button on the upper right.

2. Select which markups to include, if any, and click "Generate". The file will download to your computer.
Printing from iOS
1. While viewing a sheet, tap the "Export" button in the upper right corner of the screen.

2. In the menu that appears, select how you would like to share your sheets. You can select to export a Snapshot, which is a PNG image of the exact area you are viewing on the screen, great for sharing detail, or export a Photo Report of the current sheet which includes a scaled down snapshot of the full sheet and attached progress photos. If you want to simply email the export, tap "Email." For all other export and print options, tap "Open In."
Please note: It is not possible to print Full Size PDFs from within the app. In app printing can only be done with Snapshots and PDF Packets.
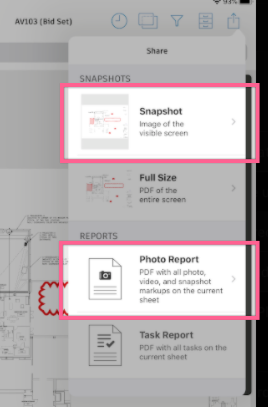
3. If you choose the “Open In” option within Snapshots or PDF Packet, a new window will pop up with your export view. Make sure everything looks how you need it, and then tap the export button in the upper righthand corner.The option to print will appear in this menu. The options available to export to other programs will depend on the programs that are installed on your particular iPad.

Printing from Android
Please Note: Printing full size PDFs and generating PDF packets (which includes photo markups) is not supported on Android at this time, but you can email screenshots, described below.
1. First, tap the export icon in the upper right corner.

2. Then, choose your export option. You can send a Full Size PDF as a shareable link that the recipient can open and download on their own device to print. You can also send a Snapshot embedded in an email, choose to save it to the project gallery, or open in another app.

Printing from Windows
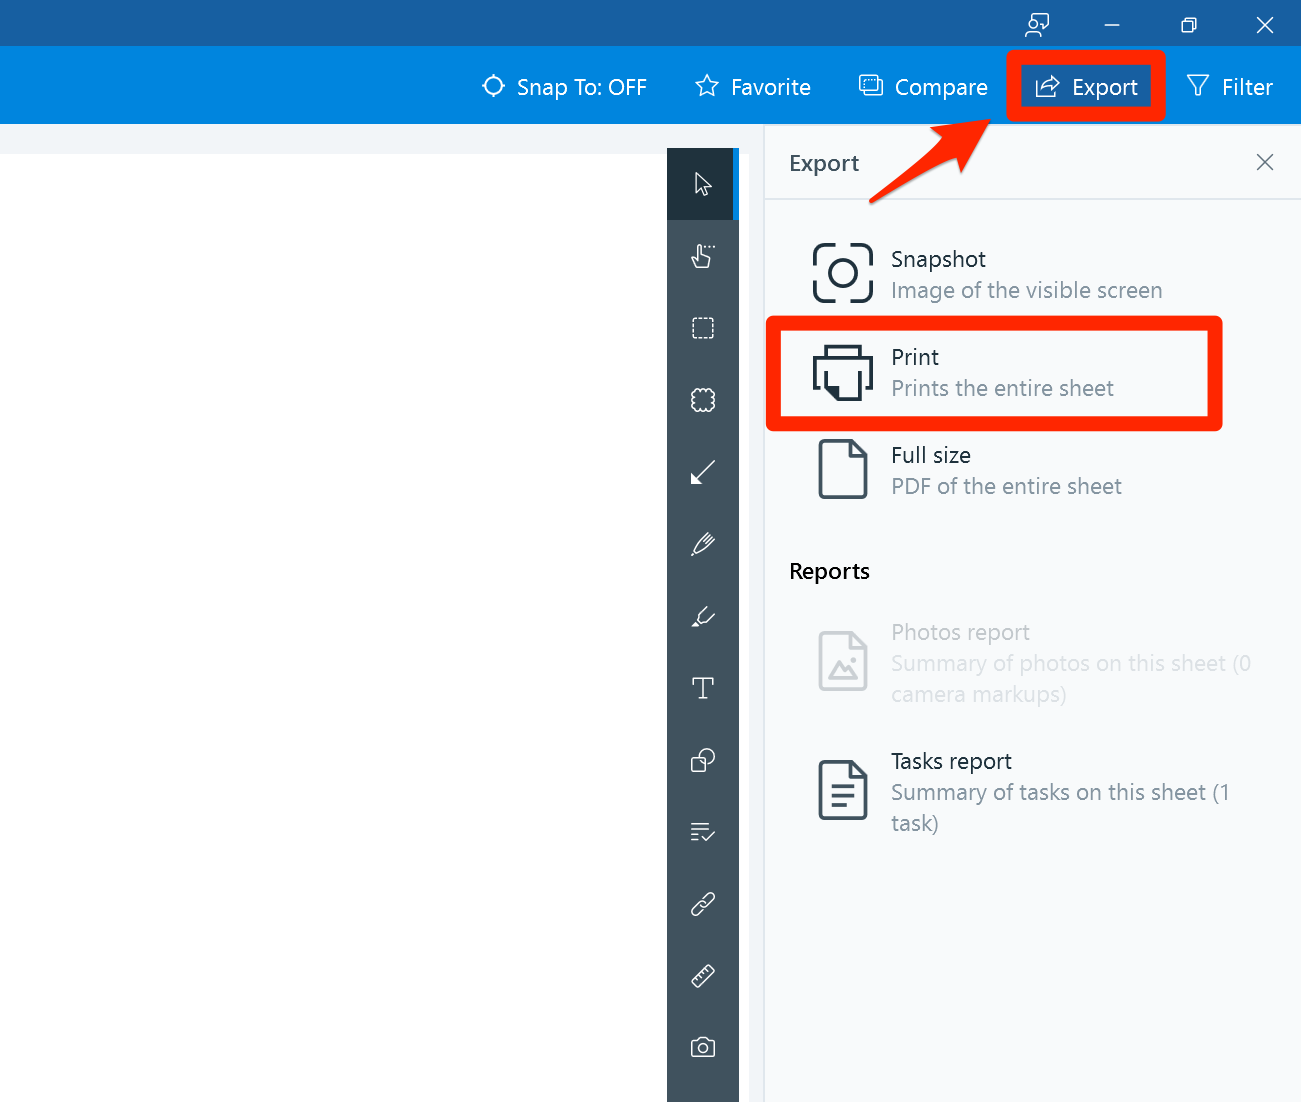
1. While viewing your sheet, click on "Export" on the upper right, and then click on Print.
Generating Project As-builts
To generate and export large groups of sheets, all sheets in the project, or all project documents, use our convenient as-built feature.
1. To generate an as-built, go to the Settings tab of your project at plangrid.com, and click "Download and Export As-builts".

2. If as-builts have already been generated in your project, you will see them here. To generate a new as-built, click "Generate New As-built".

3. On the New As-built screen, choose the information you wish to include, filter by a date range if necessary, and choose your deliver method.
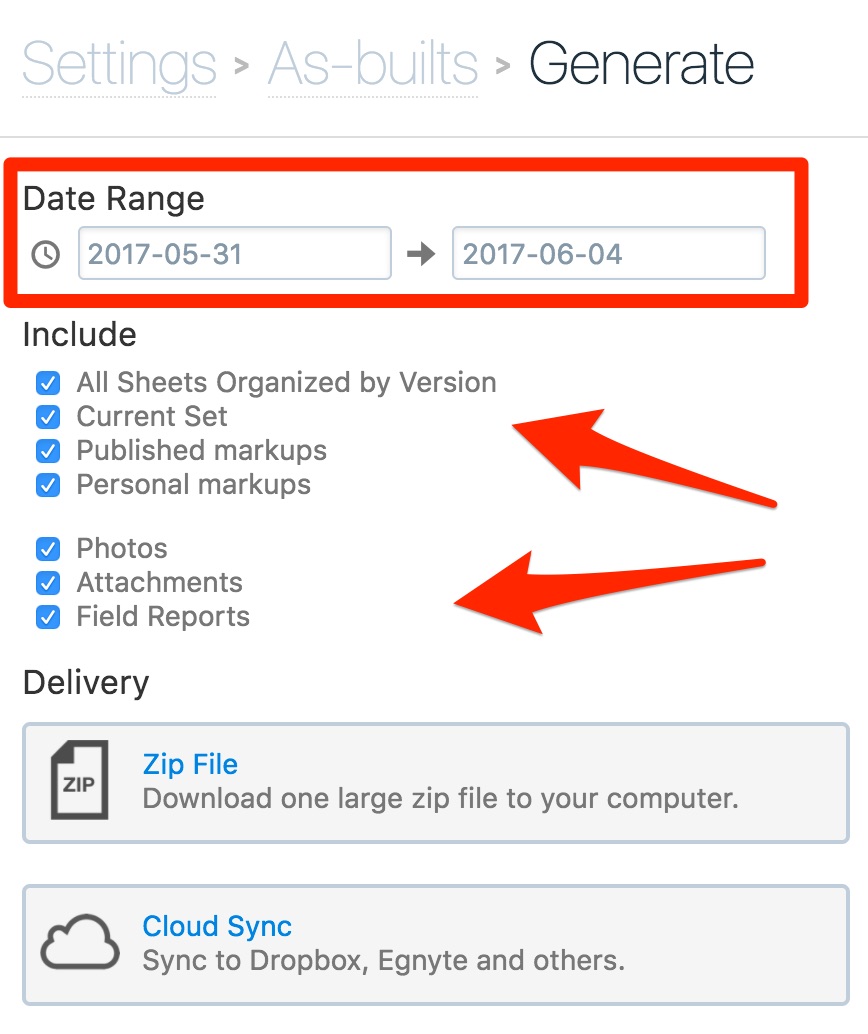
Once the as-built is downloaded, you can unzip the file, or open the file in your cloud storage system, and print your project documents. For more information on downloading and using PlanGrid As-builts, go here.
Exporting Mark-ups
Exporting Mark-ups from the Web
You can quickly and easily export your individual sheets and mark ups from the website, even if the recipient doesn't use PlanGrid.
There are three different options for exporting your sheet from the sheet view (shown below). To access those options, click on the "Export" button in the upper right corner of your sheet and click the option you prefer to select.
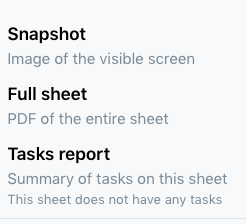
Snapshots, Full Sized Sheets and Task Reports can all be exported in a few short steps:
1. Snapshots:
Snapshots export a view of what you’re looking at embedded into the email (not to scale). It can be emailed immediately, or saved to the projects Snapshot gallery. Please note that if the snapshot is email out directly, it will not be saved to the projects Snapshot gallery. Fore more information on Snapshots please go here.
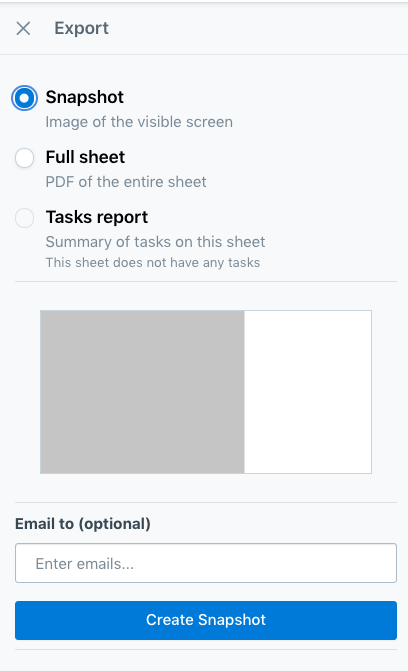
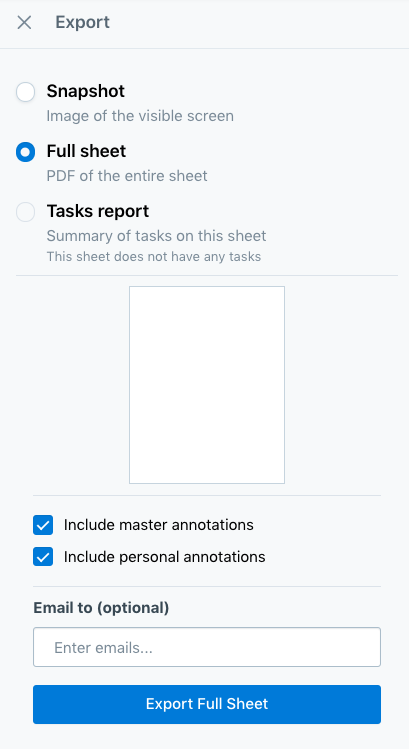
2. Full Size PDF:
The Full Sheet PDF will be exported using a shareable link to the sheet, which can include published and personal markups. If you choose "Export", the link will be generated, and can then be copied into the body of an email, or messaged out. You can include a recipients email in the space provided, if need be. When choosing to email the link out, the sender of the email will appear as us, not your personal email address.
3. Task Report:
The Task Report export allows you to run a report of all the Tasks stamped on a sheet and quickly email or generate a shareable link to the report. The report is in PDF format, and includes all photos added to those stamps. To learn to run a more detailed report, click here.
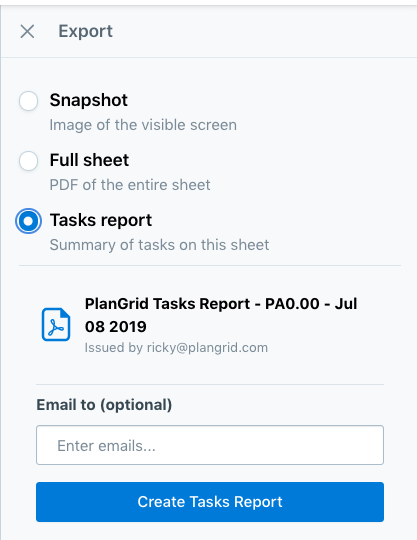
Just like emailing the Full Size PDF, the Task Report sends as a shareable link directly from PlanGrid. You can edit the recipient and subject, and add a personal message before sending.
Exporting Mark-Ups from the Field
How to export a screenshot, a full-size sheet, an Task Report, or a photo packet right from the field using PlanGrid.
Exporting on iOS:
There are four options for exporting your drawings and markups from the field on your iOS device:
Snapshot - a view of what you're looking at embedded into the email (not to scale)
Full-size PDF- sends as a shareable link to the sheet in your email
Photo Report - PDF with all photo, video, and snapshot markups on the current sheet
Task Report- sends a shareable link to a PDF report of all Tasks stamped on the sheet, including photos added to those stamps. To learn to run a more detailed report, click here.
The export Full Size will allow you to email one sheet at a time, with both personal and published markups. The export Task Report option will allow you to generate a PDF or XLSX formatted file that you can email from the app.
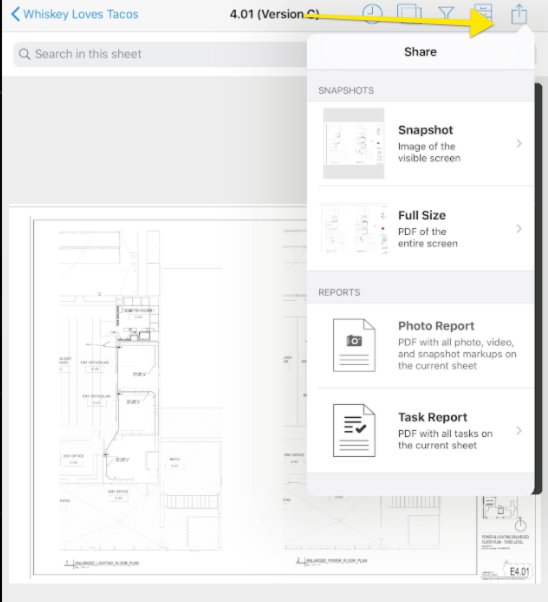
To print the Photo Report or Snapshot, tap on the export icon, tap the Snapshot or Photo Report, then tap "Open With". When the export opens, tap the export icon again to print or open in another application.
Exporting on Android:
For Android, tap the export icon to quickly access the three different export options:
Snapshot - a view of what you're looking at embedded into the email (not to scale)
Full-size PDF- sends as a shareable link to the sheet in your email
Task Report - sends a shareable link to a PDF report of all Tasks stamped on the sheet, including photos added to those stamps
Tap the export option you prefer, then tap "email" to send. Your email client will open and you will be able to modify the subject and add text to the body of the email before sending.


Exporting on Windows:
Please note: At this time, snapshots are the only exporting option on the Windows app.
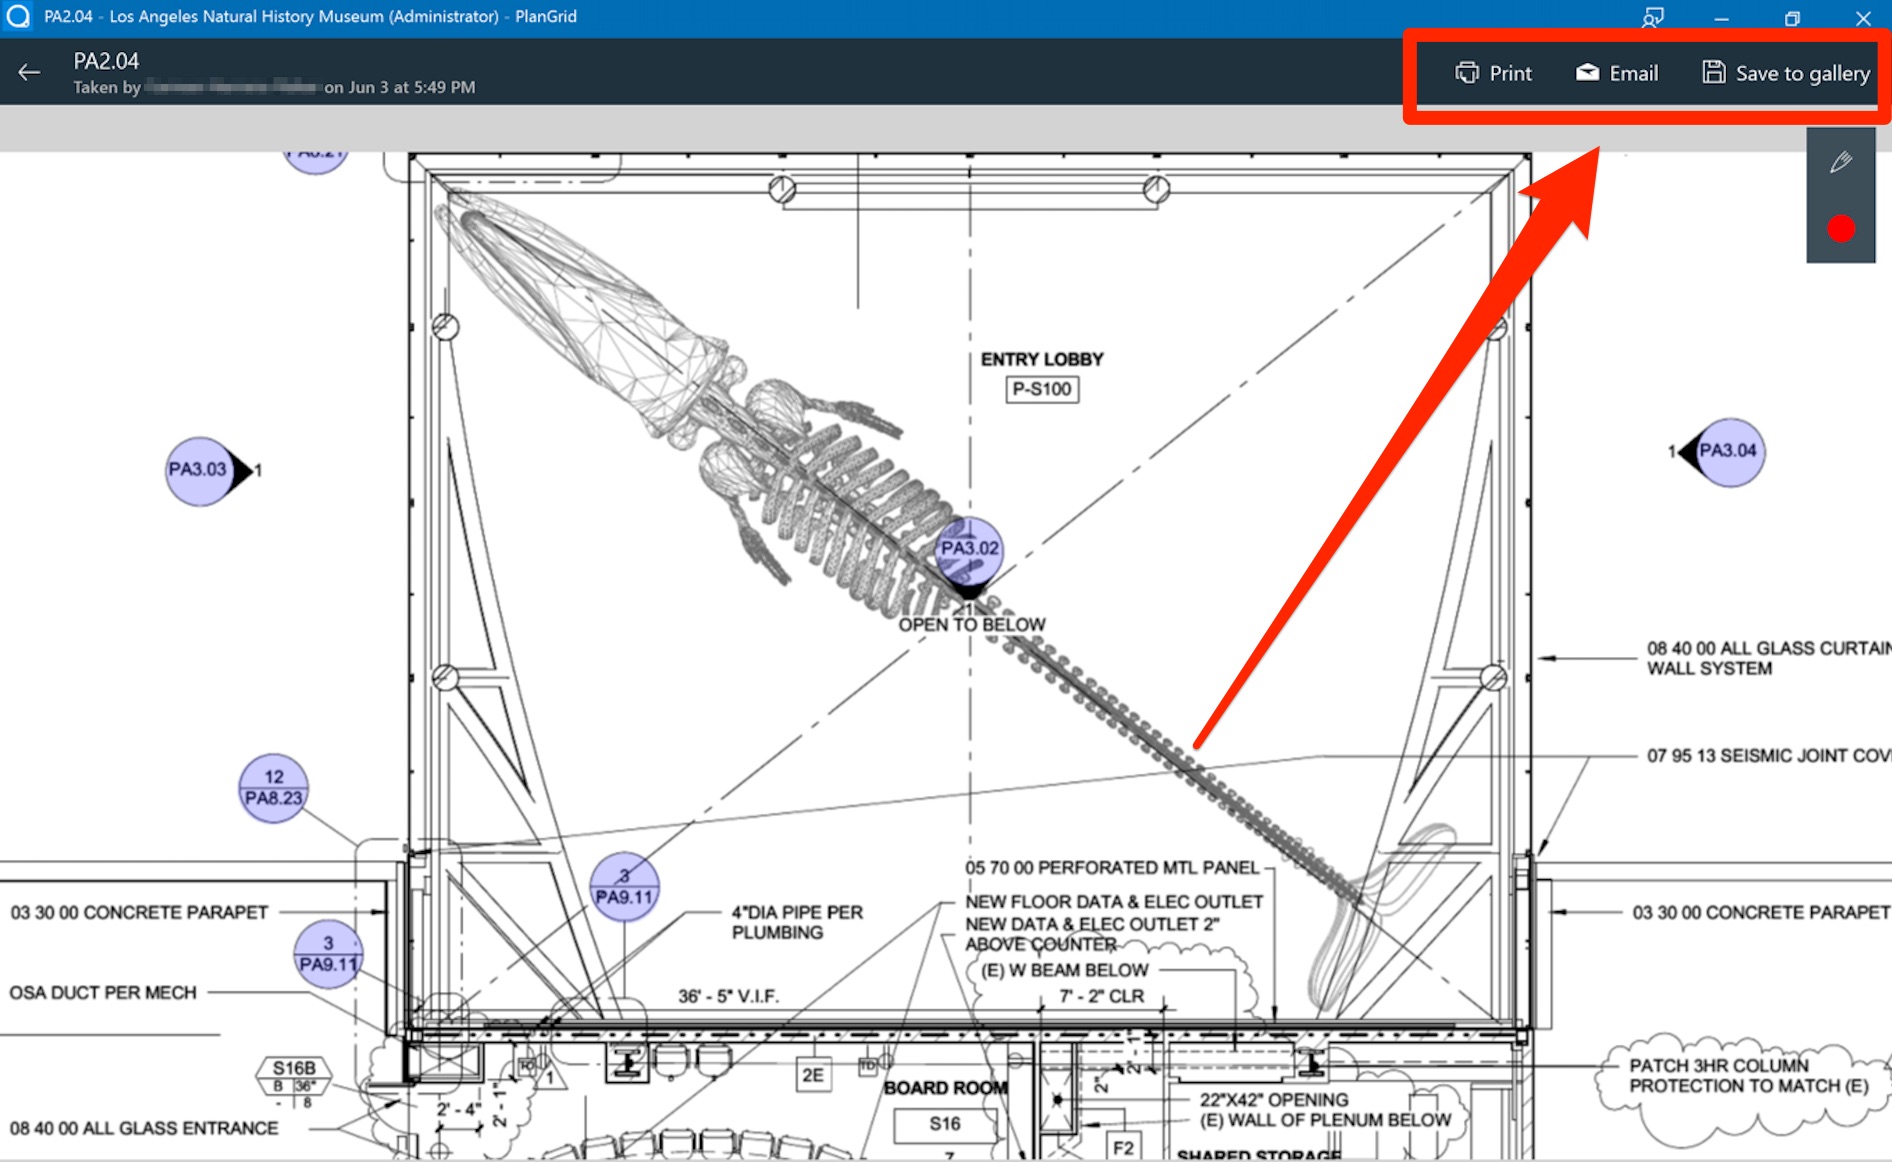
1. Open your sheet, zoom in depending on what you want visible on your snapshot, and click on "Export"

2. A side panel will open. Click on "Snapshot"

3. You will have the option to print, email or save your snapshot to your gallery (available in the progress photos page of your project).
Emailed sheets and Task Reports will only send when connected to wi-fi or cellular. If you don't have a connection when you hit "send", the email will send automatically when you are back on wi-fi.
Snapshots can also be saved to the project's snapshot gallery by tapping "Snapshot" and then "Save to Snapshots”.
Related Articles: