Featured
Send submittal packages for review
Return a package to the Submitter
Submitting and reviewing on behalf of others
Add Items
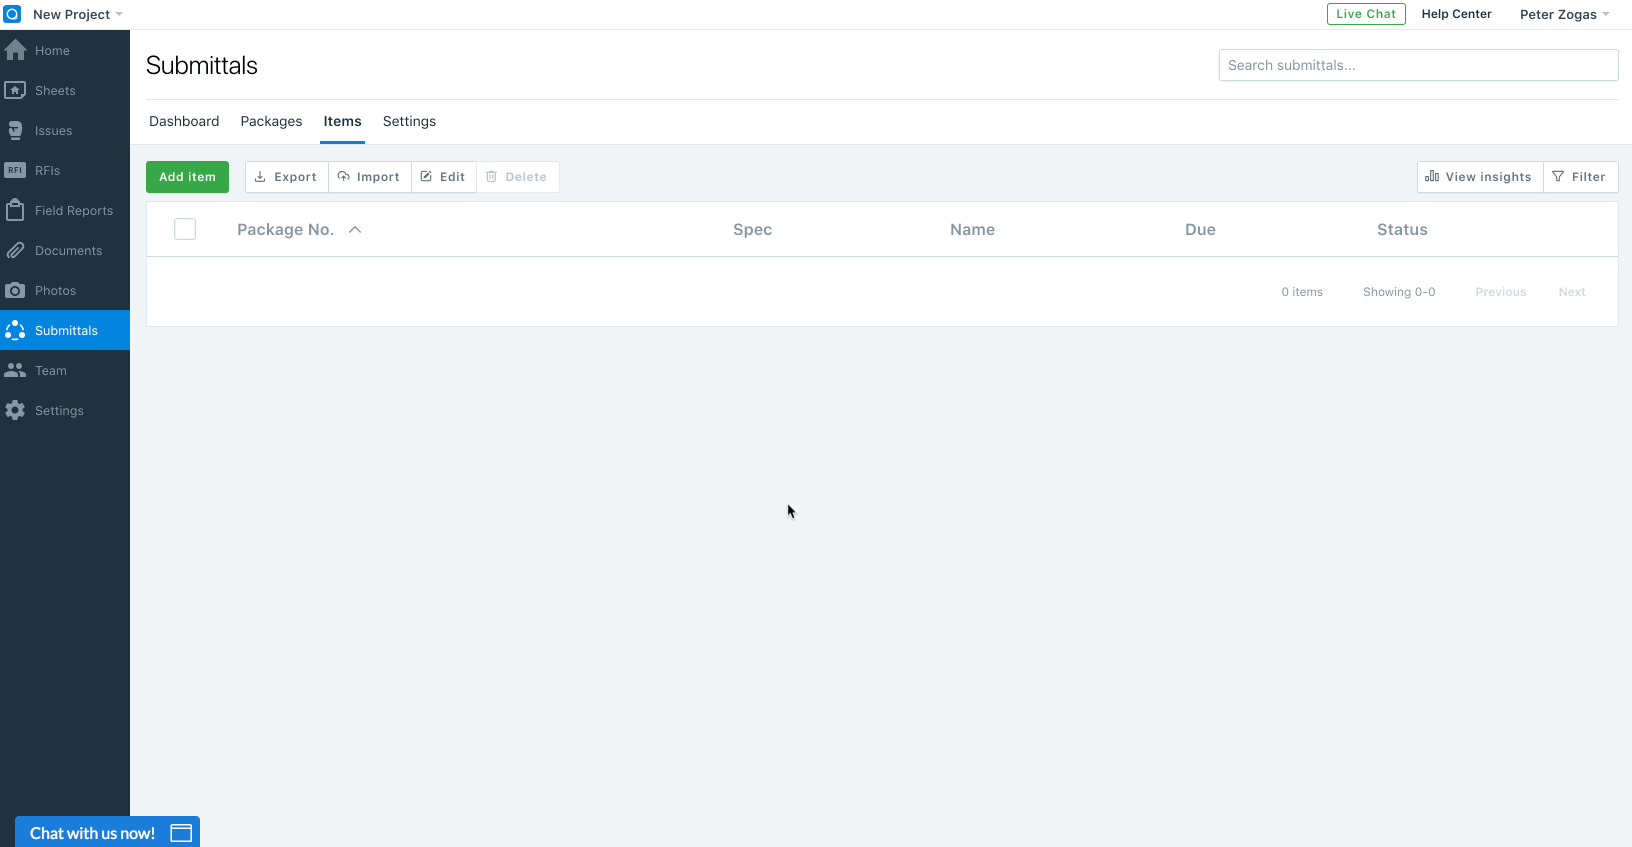
To begin the submittals process, you need to create items for submittal. You can do this in Submittals either in bulk, using a spreadsheet, or individually.
Add items in bulk
You can add submittal items in bulk using a CSV, XLS, or XLSX file. Make sure your spreadsheet matches our bulk upload template, and be sure that the “Section number” and “Submittal title” fields are filled in.
-
From the “Items” tab of your Submittals dashboard, click “Import”
-
Drag your spreadsheet into the import box or click “From your computer” and attach your spreadsheet
-
Click "Next" to upload your items
- Click "Finish" to finalize the upload
Now your new submittal items will appear in your list of items.
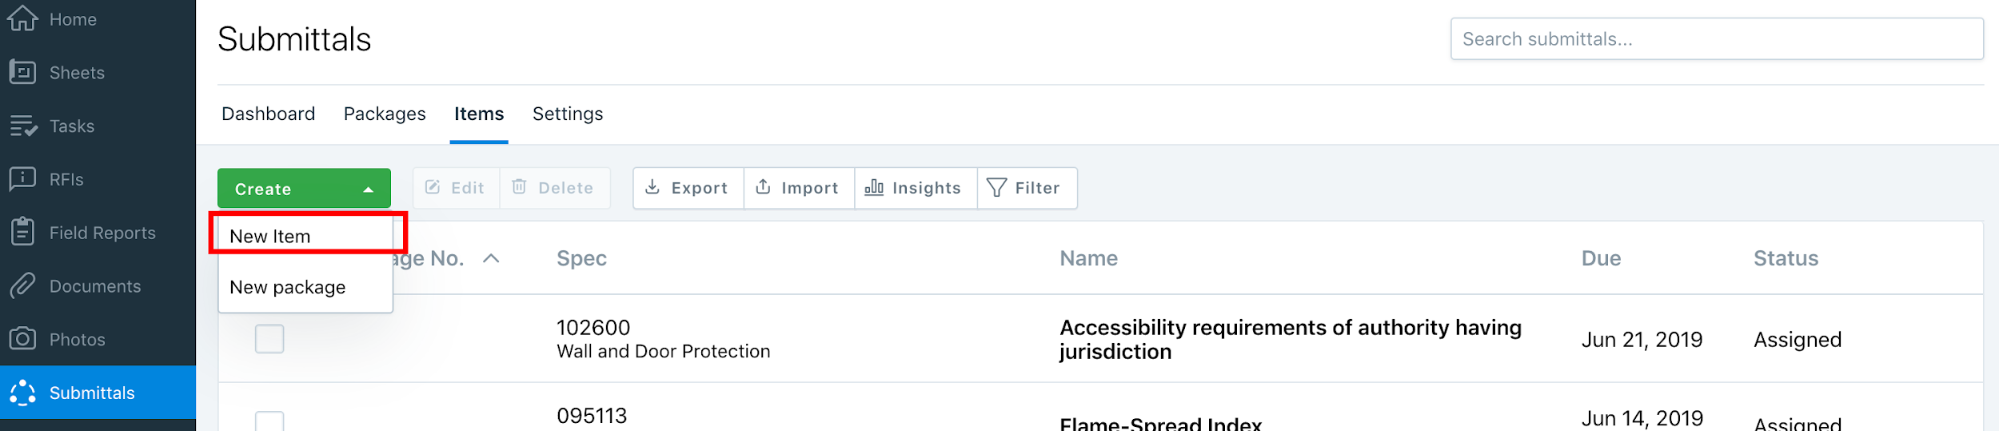
Add items individually
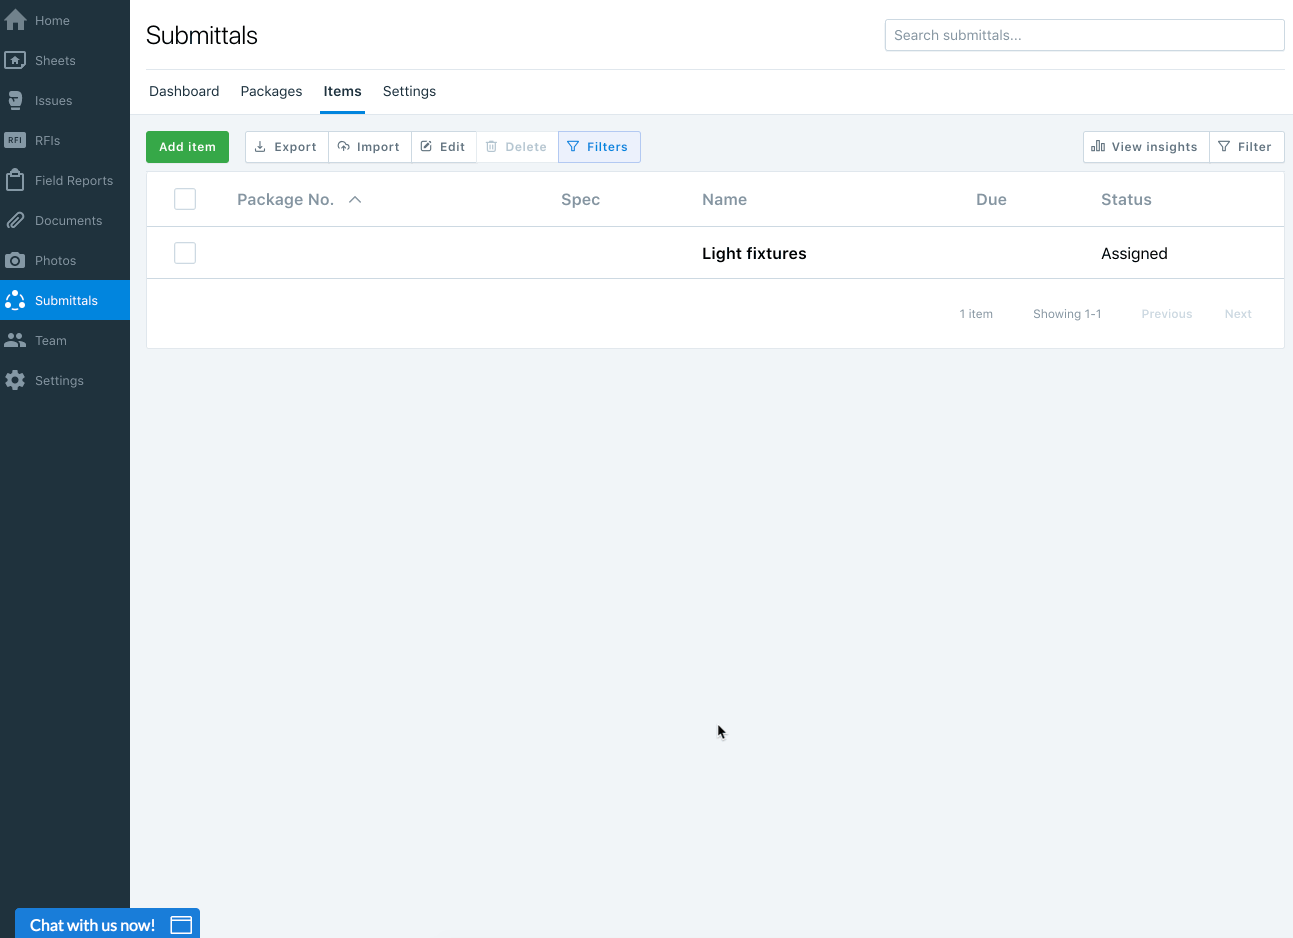
To add submittal items individually, select “Create” and then “New Item” from the “Items” tab of your Submittals dashboard.
Fill out the necessary fields and click “Save” to save the submittal item. It will now appear in your list of items, and if you’ve assigned a Submitter, that person will be notified by email. From here you can add more details by selecting the item and clicking “Additional info.”
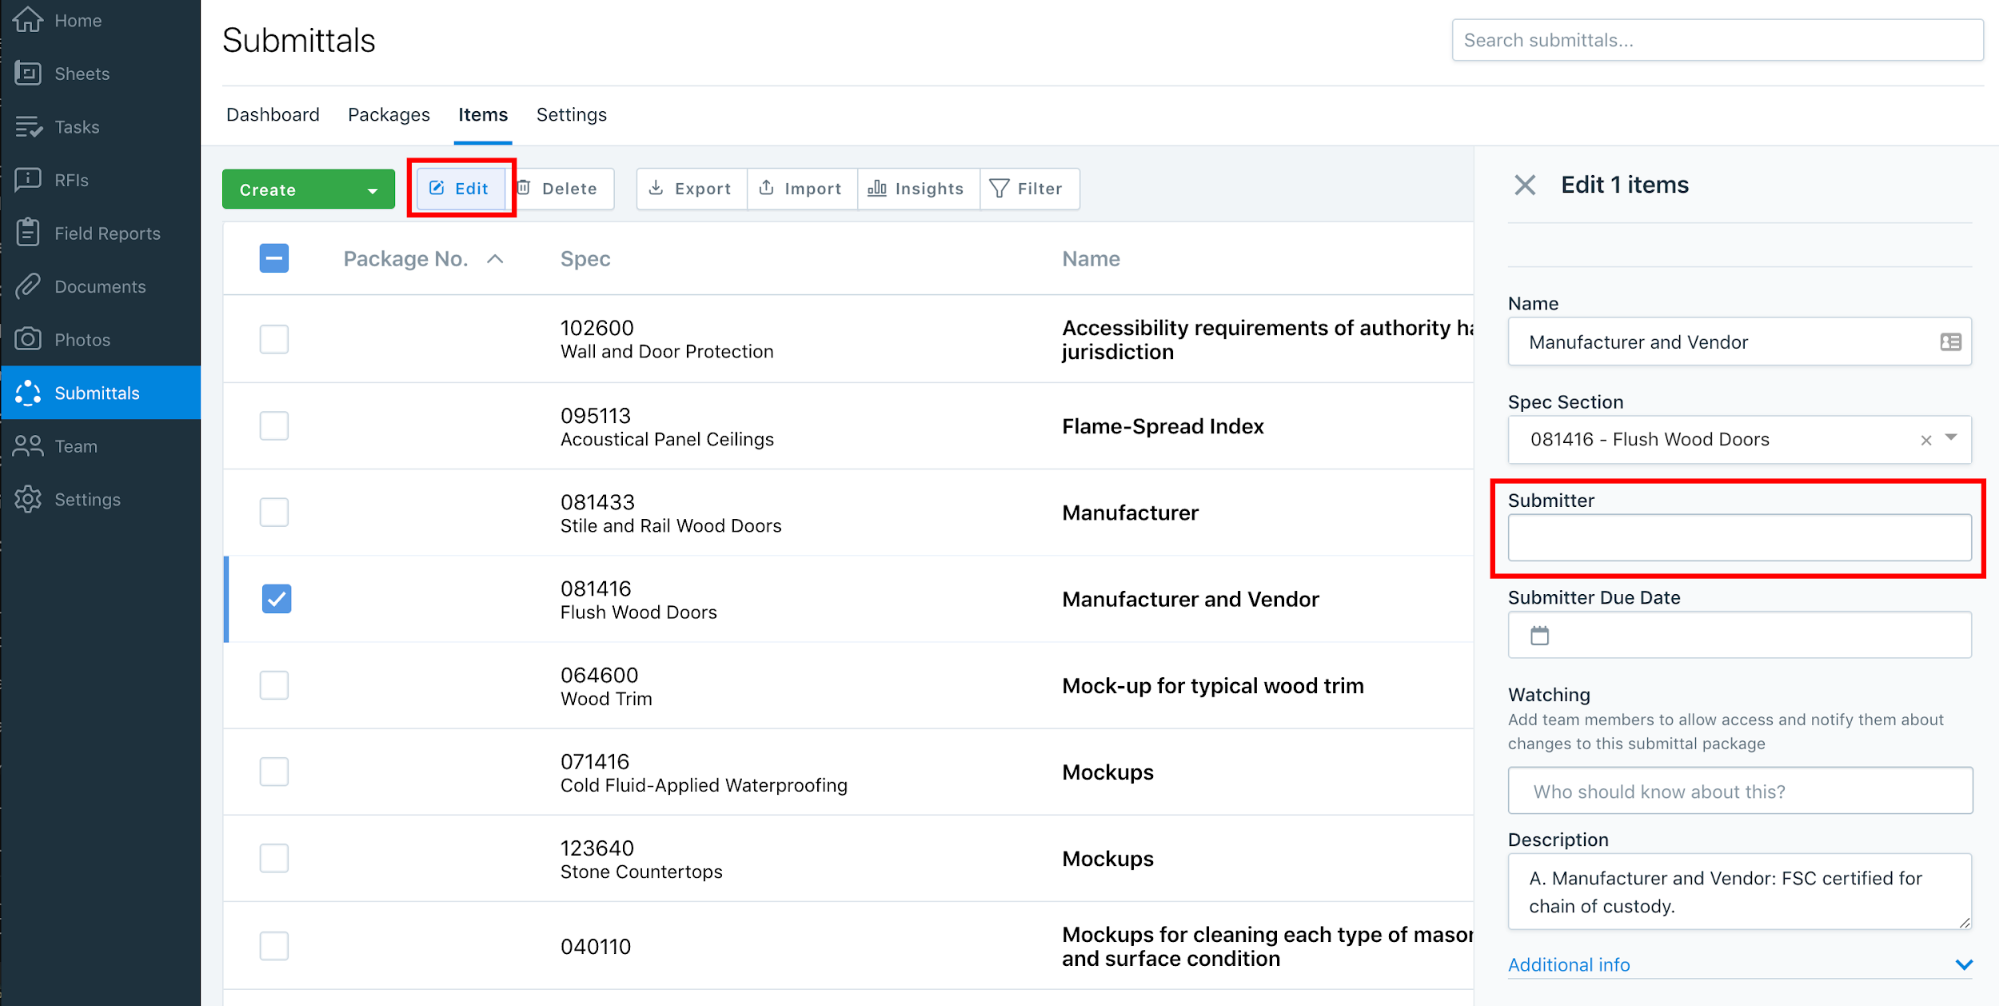
Assign items to Submitters
You must assign items to Submitters in order to have them create packages and complete a submittal. If you didn’t assign a Submitter when you created an item, you can complete the assignment from the “Items” tab.
Select the item(s) you want to assign. Then select “Edit.” In the “Submitter assigned” field, select the person or group that should be assigned to the submittal or enter the Submitter’s email address.
Here you can also add your reviewer to your team by selecting “Invite new team member” or select “Assign without inviting to project.” If you choose this option, your Submittal will be able to see the submittal request and upload a package by email without a PlanGrid account.
Click “Save” to save the item with the assigned reviewers. An email will be sent to the reviewer requesting the item, and they will be notified when the item is overdue.
Send submittal packages for review
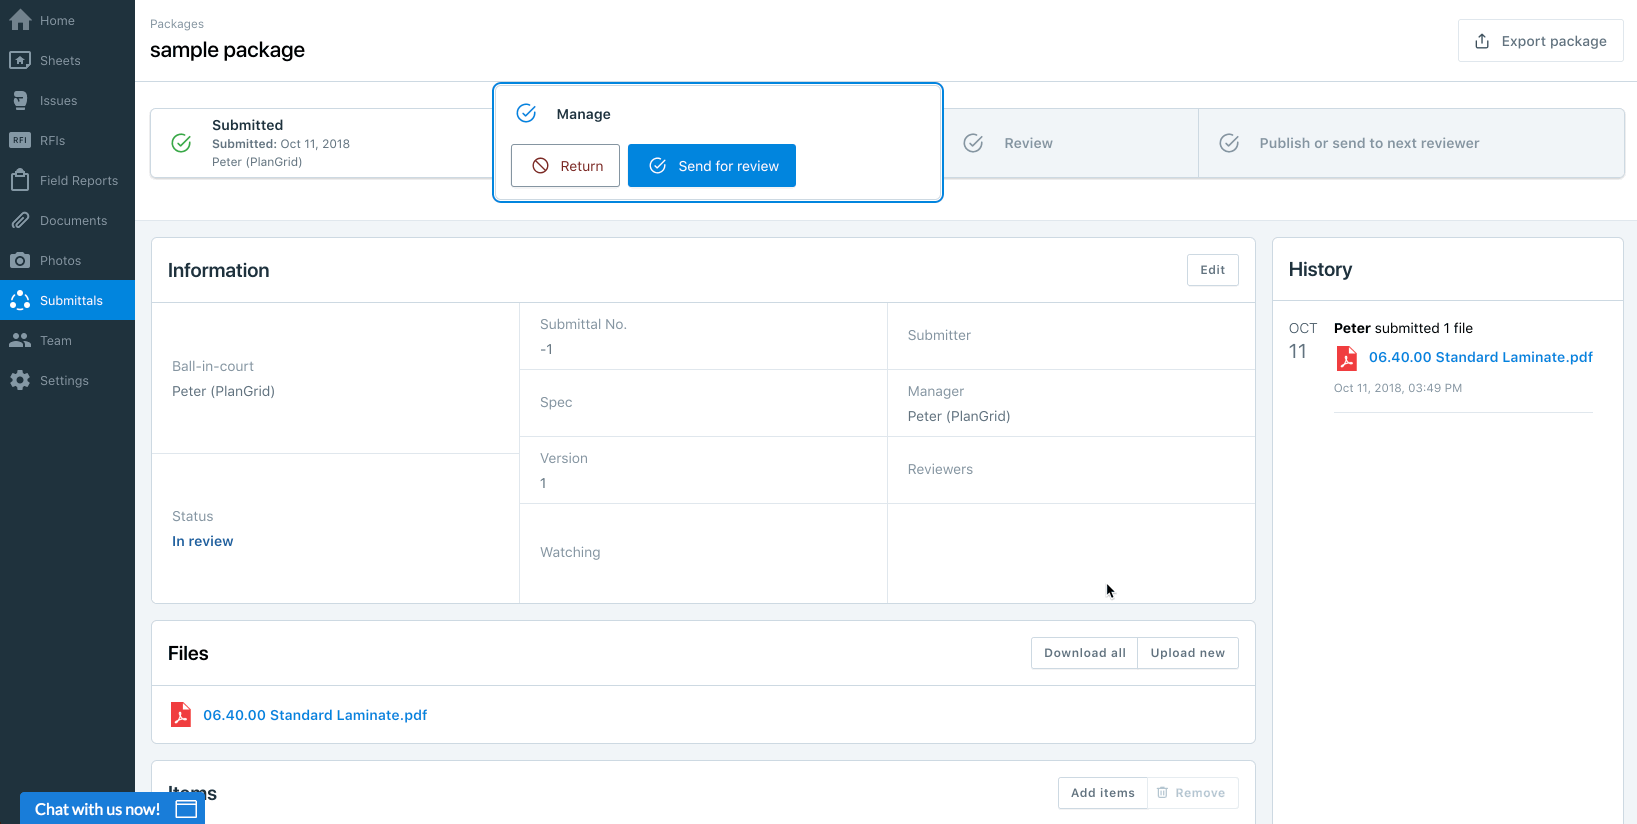
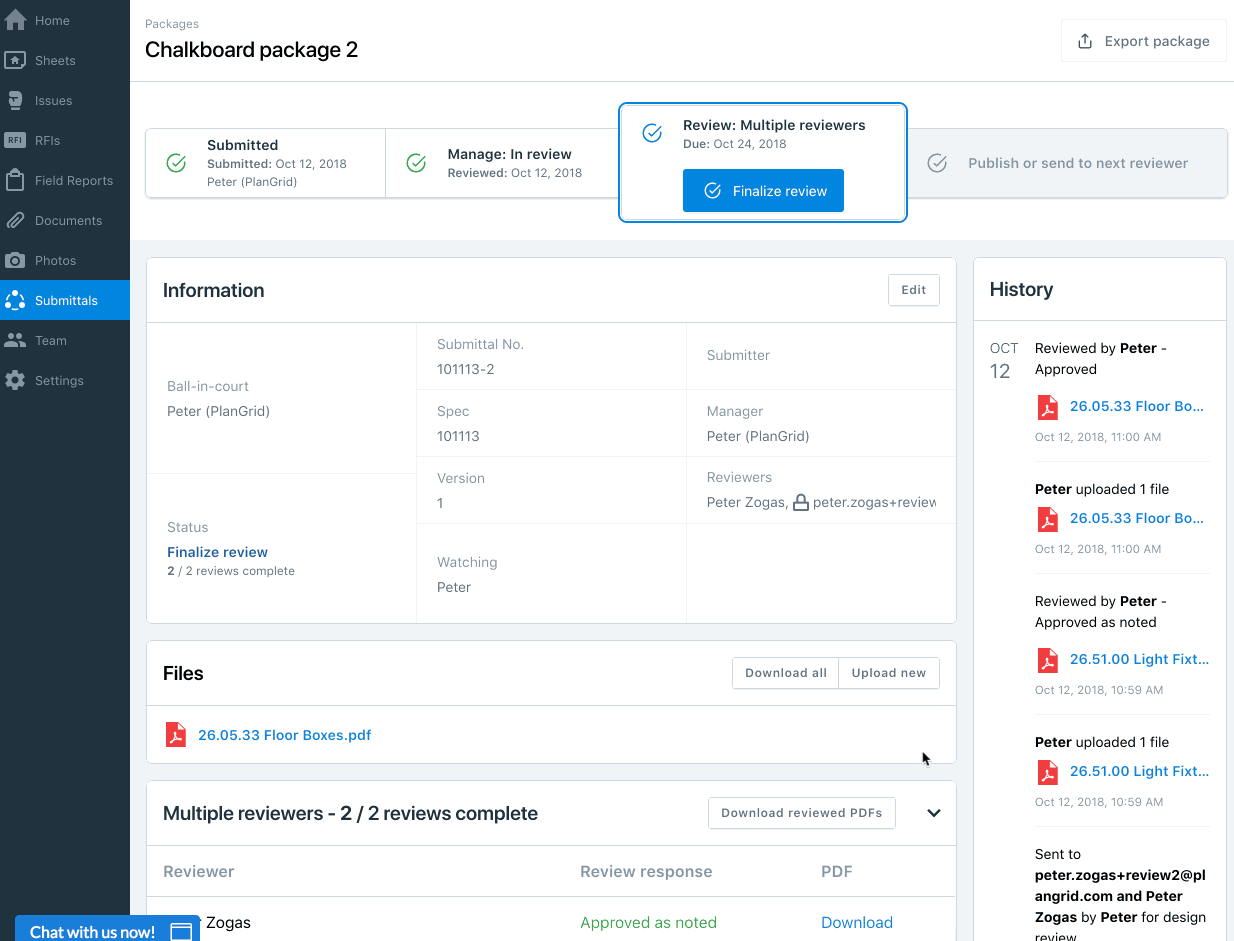
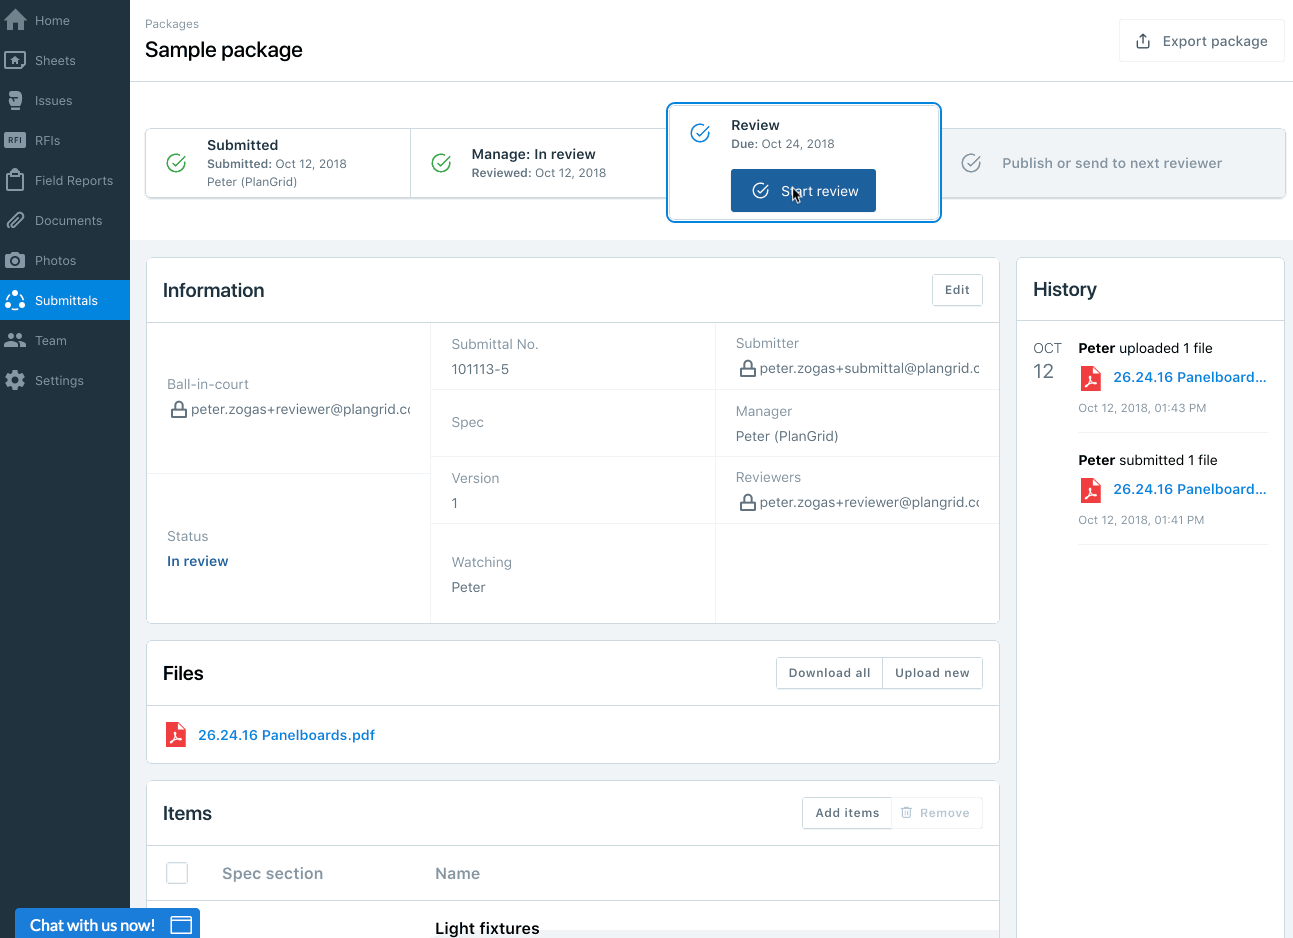
After your Submitter has completed a submittal package in response to the item(s) you assigned, you’ll receive an email notification. The package will also appear in your Submittals dashboard under the “Packages” tab.
Click on the submittal from your dashboard to see all of its information and to download any files attached by the Submitter. You can also see a complete history of actions taken on the submittal on the right hand side of the screen.
To send the submittal to design reviewers, click “Send for review.” Next, you can assign a design reviewer, multiple reviewers, or a group. For more information about parallel reviews and groups, see "Parallel Reviews in Submittals" and "Assigning Groups in Submittals."
When inviting a reviewer, you can either invite that person to your team or proceed without inviting them. Before sending the submittal for review you can include the due date, attach files, add notes, or assign watchers. When you’re ready to send to send the submittal to your reviewer, click “send.”
A Reviewer can approve the submittal, reject it, or ask for revisions. If a Reviewer rejects the submittal or asks for revisions, you’ll be able to use the Submittals dashboard to send the submittal back to the Submitter and then move it along to the Reviewer again once it’s ready.
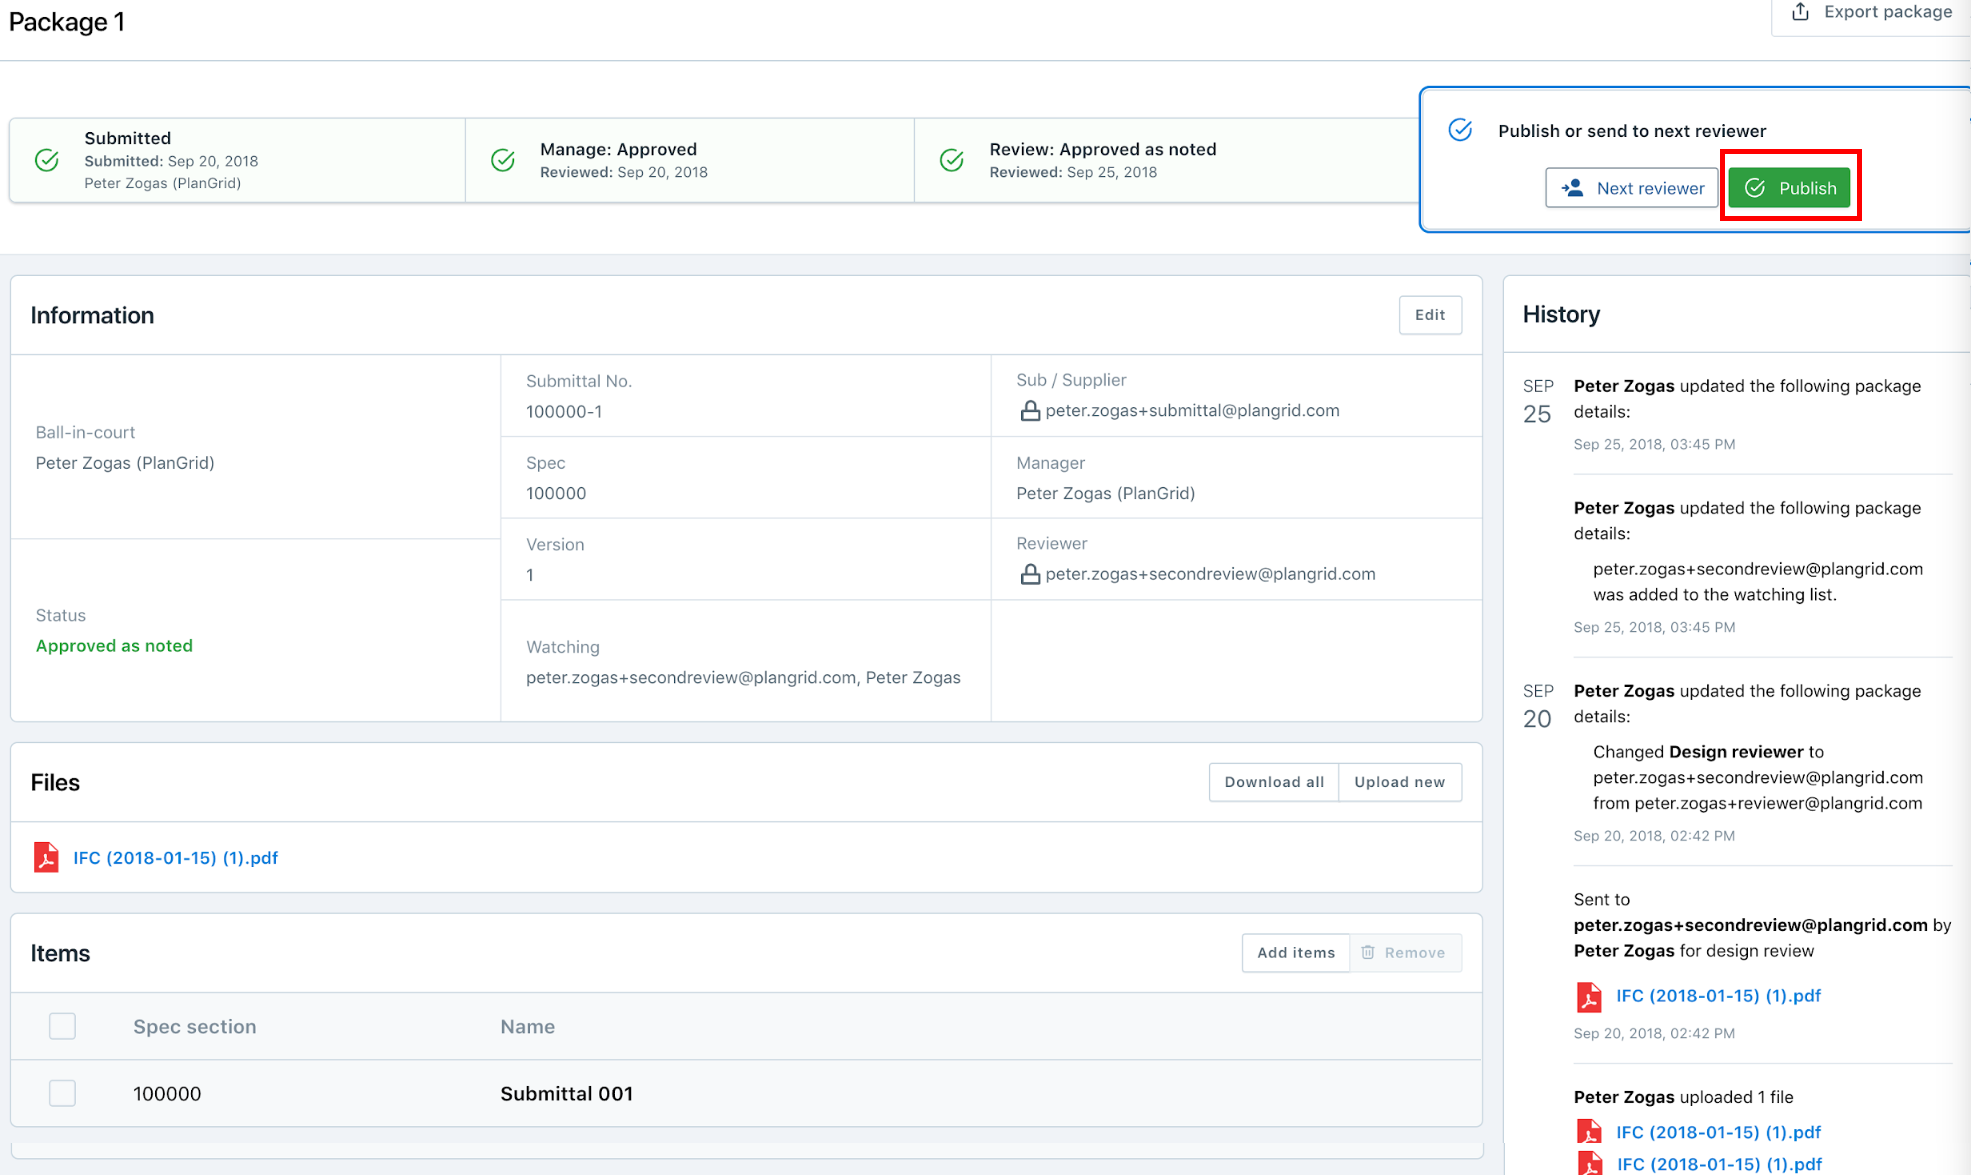
After a Reviewer approves the submittal, you’ll receive an email notification. From here, you can either send the submittal package along to additional reviewers or accept the package and publish it.
If you’ve assigned multiple reviewers to a submittal, you’ll need to finalize the review. Choose “Finalize review” from your dashboard, and then assign the final status for the submittal package. Here you can add or delete files and include any additional notes. When you’re finished, click “Send.”
Return a package to the Submitter
If the Submittal needs to be returned to the Submitter for revision before the review can be processed, click the “Return” button to reject the submittal.

In the popup, specify a reason for return and new due date.
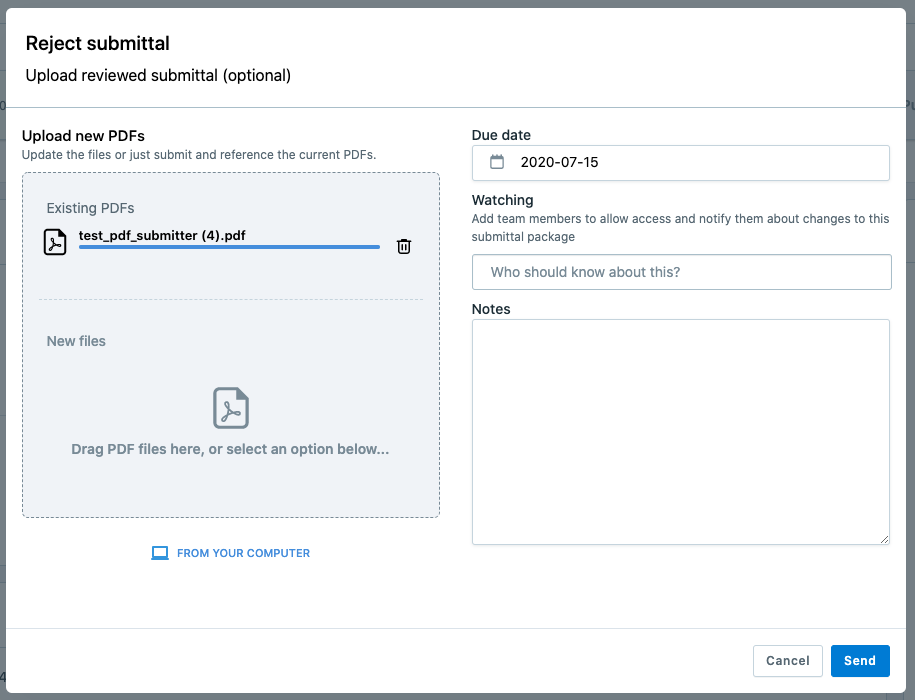
The submittal will be stamped “Revise and Resubmit” and move back to the Submitters ball-in-court.

Publish Packages
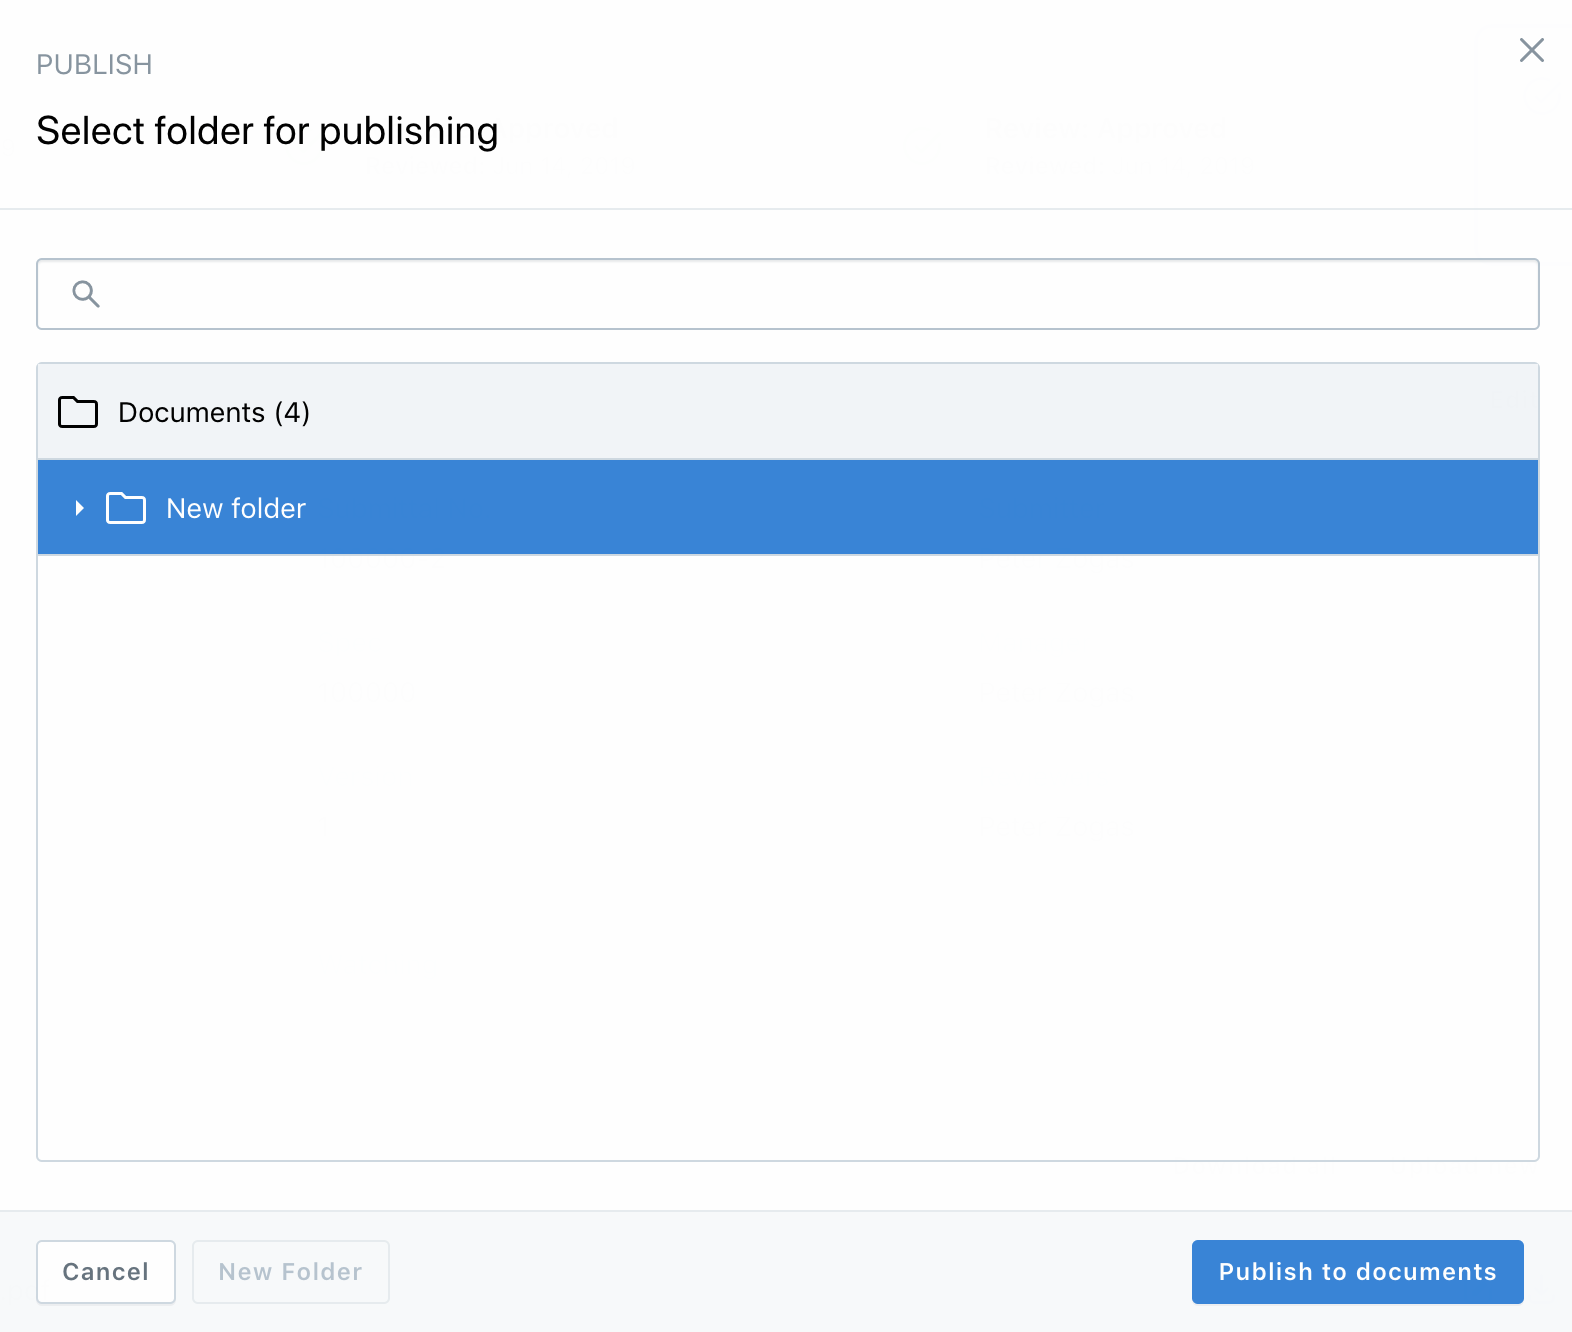
When your reviewers have submitted their final packages, you’re able to share the final submittal with your team by publishing it. Simply select the package from your Submittals dashboard and then click “Publish.”
When you publish a submittal, you can choose its folder or create a new one. Approved packages will no longer be visible on your dashboard, but you can view them on the packages list page.
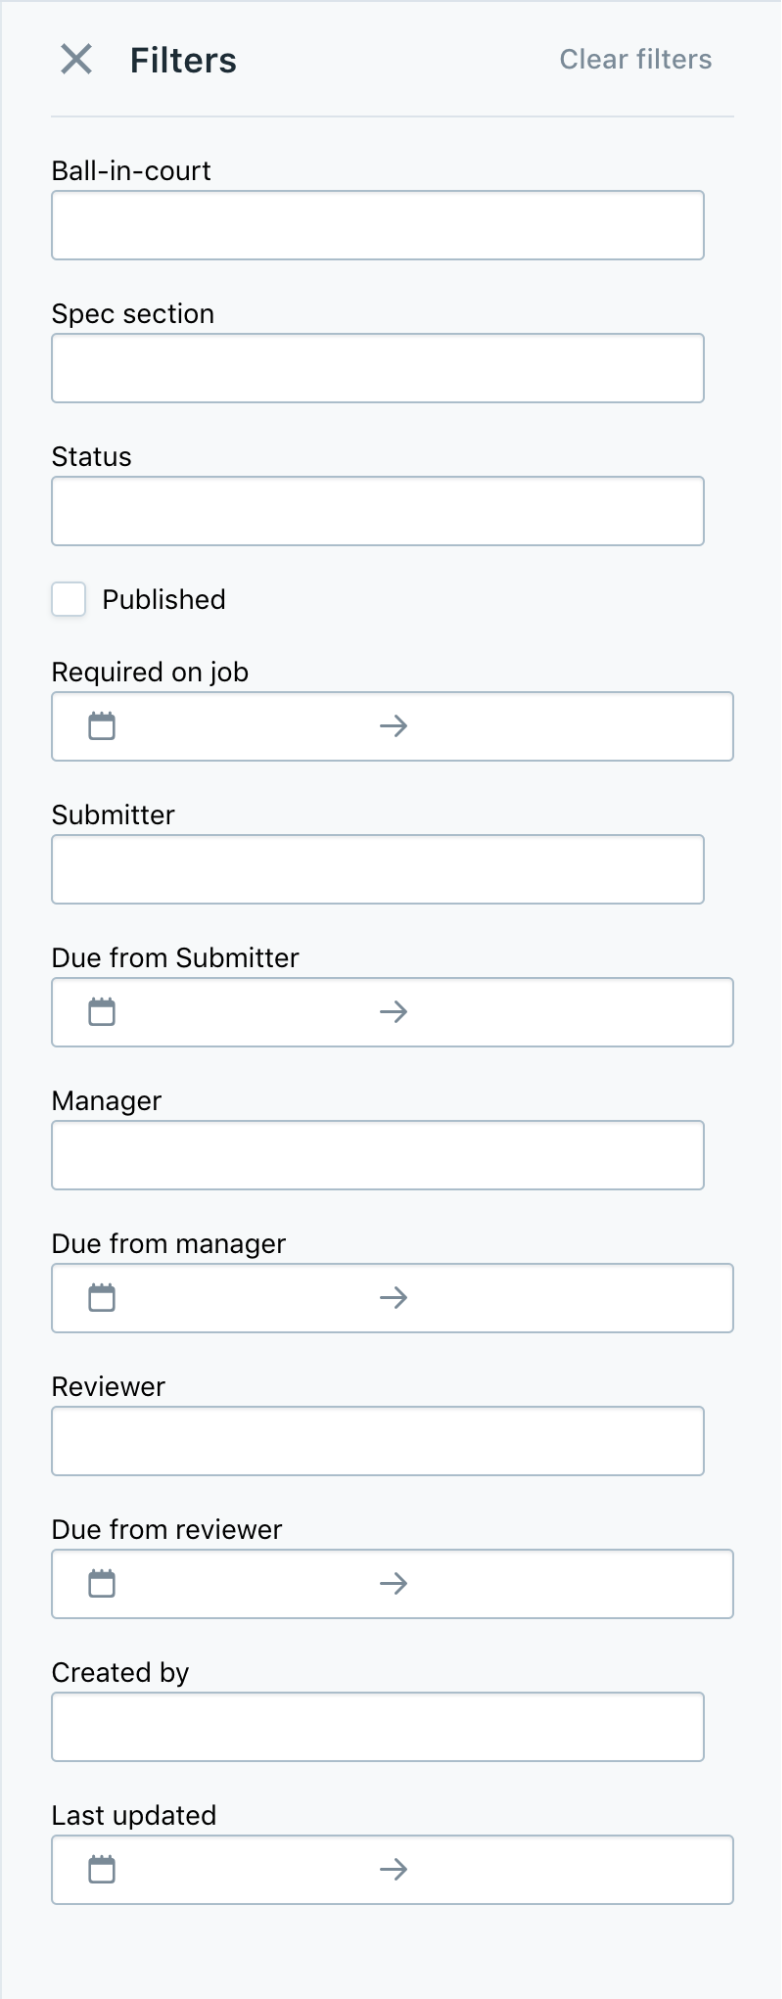
Filtering
As Submittal Manager, you can easily find items and packages with specific criteria using filters. From the “Items” or “Packages” tab, click “Filter” to open filtering options.
![]()
From here, you can filter items or packages by assignee, spec section, or status, as well as by Submitter, Reviewer, and dates. Select the items you’d like and your list of submittal items will filter based on your choices. Click “Clear filters” to deselect all filters and start again.
Submitting and reviewing on behalf of others
You’re able to create submittal packages and review them on behalf of others through your Dashboard.
To create a package, select the items you’d like to include from the “Items” tab and click “Create package.” Fill out the name and any other relevant fields, then click “Create.”
To provide a review, click “Start review” from your dashboard. Next, upload the relevant PDFs and submit the review response before clicking “Send.”
Reopen a published Submittal
Published submittals can be reopened and sent back to the review stage. To reopen the Submittal, click “Reopen Package” in the Package Dashboard:
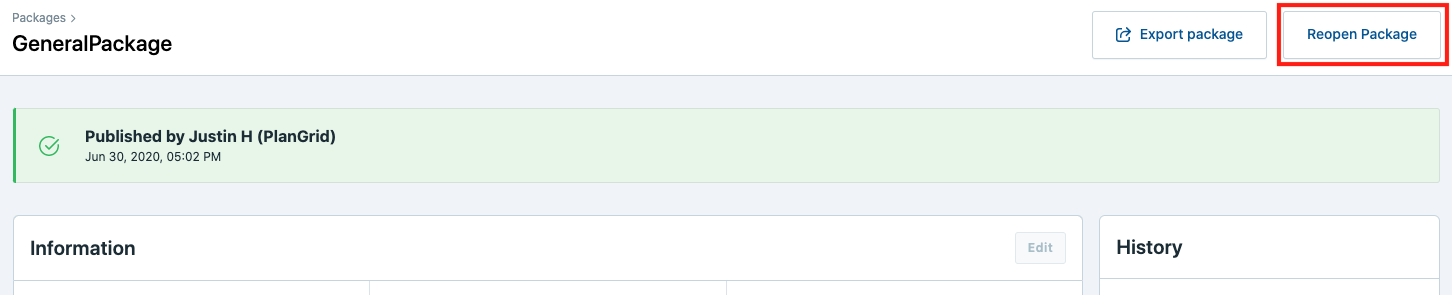
In the popup, click Reopen to confirm that you are wanting to reopen the submittal by clicking “Reopen”
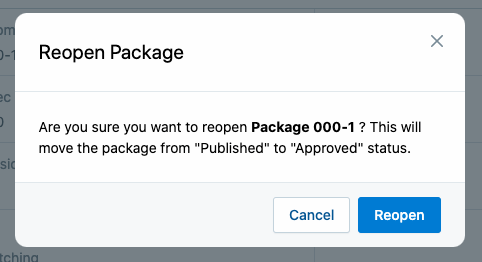
Once Reopened, the Submittal package will be set to “Approved.” It can then be sent for a new review.